

Take a look at this leaked Gartner report:
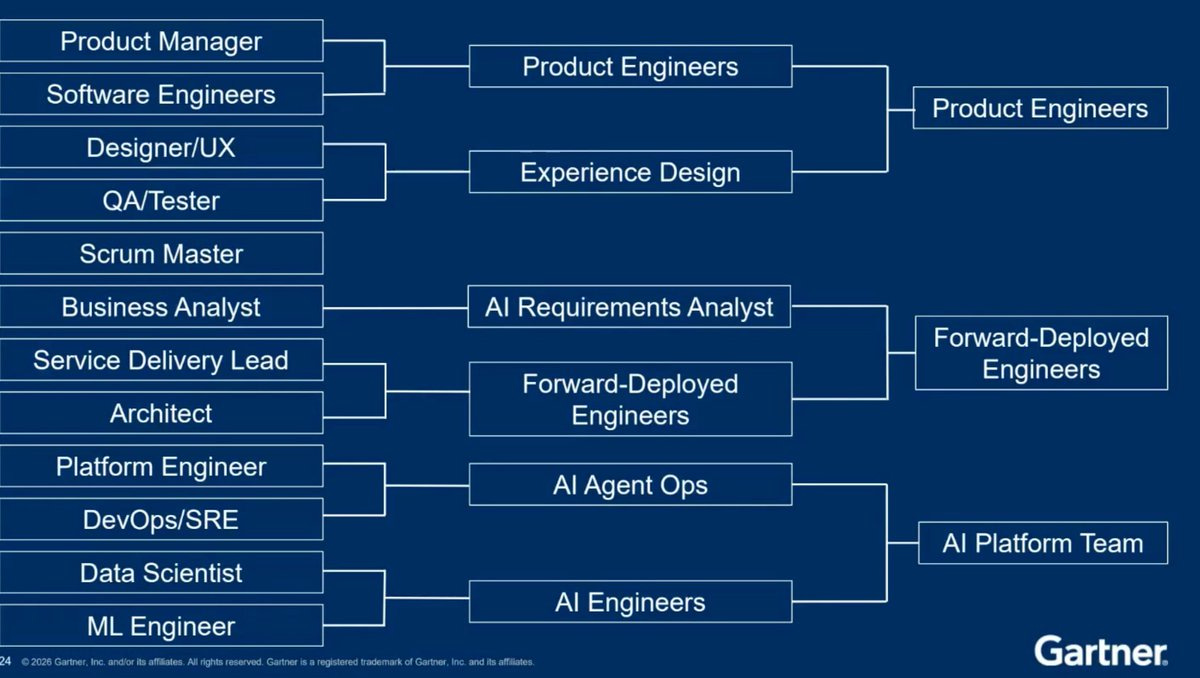
The roles are merging whether or not you can already feel that in your organization. While product discovery remains the core of our job, as a PM you should develop a basic understanding of engineering with AI.
Good news: you don’t have to code.
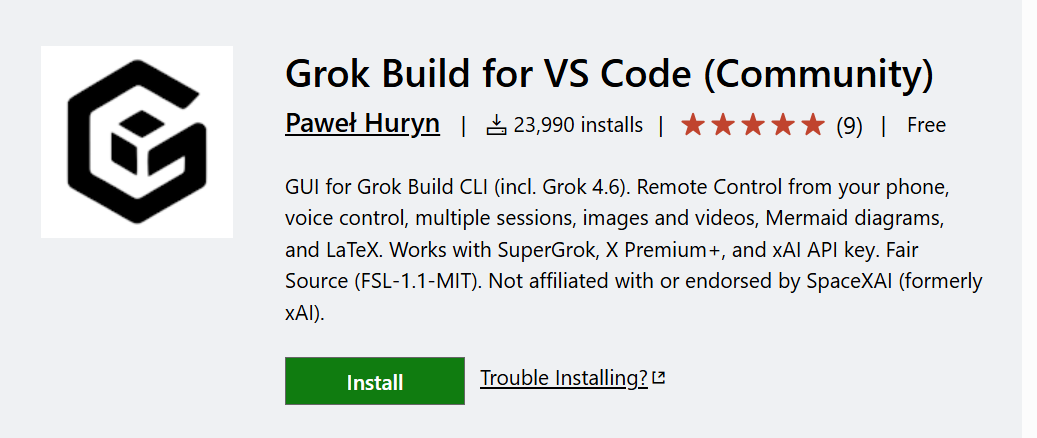
My recent project, Grok Build for VS Code and afkpilot.com/desktop, has been installed by 105K+ people. 37K MAU. 5,094 unit tests. ~177K lines of code - I’ve reviewed none.
Many ask me how I can trust the agents.
If you think about the 5,094 tests, this number is crazy. Many of them impersonate users and drive the browser sessions end-to-end. Only AI could do that in 3 months. This transforms the quality of what we can ship as non-developers.
A critical part is also documenting the intent, so that agents have something to design tests and inspect the codebase against.
In my new series, rather than presenting infographics, I demonstrate the how step-by-step, with templates, prompts, and all the hacks I’ve learned. By the end you will know how to discover, design, build & secure, launch & monetize, analyze, and monitor a commercial product. A real side hustle or for your portfolio.
Without ever looking at the code.
Side note: As some have asked, hooked users are already paying to use the remote client ($1,920 ARR). The first step was proving the value and the word-of-mouth. I will focus on monetization after launching managed hosting — tomorrow.
In this issue:
Case Study Context: AskOne, Slido Alternative
Claude Solution Template for Non-Coders
Step 1: Design your App
Step 2: Build a Static Website
Step 3: Setup Clerk & Supabase
Step 4: Sign Up with Google, See Your Data
Step 5: Configure Billing and Plans, See a Purchase
Step 6: Add Test Accounts and Browser Automation
Step 7: Publish it, Simplified
🔒 The Template to Download
Conclusion
🔒 Live Session Recording
You can choose any web product. The steps are universal. This part will take you 3-4 hours. Most of that is waiting for AI, so you can drive it remotely from your phone.
1. Case Study Context: AskOne, Slido Alternative
AskOne is live Q&A for talks, webinars and cohort sessions:
A host opens a room and gets a join code.
The audience opens
askone.org/r/<code>on their phones, no account, asks questions and upvotes.The host and moderators approve, hide, pin and mark answered; the room updates live; a projector view shows the top questions. When the room closes, the host gets the Q&A by email.
An API and an MCP server let the host's agent turn the questions into a FAQ.
B2B2C SaaS.
A $5/month alternative to Slido:
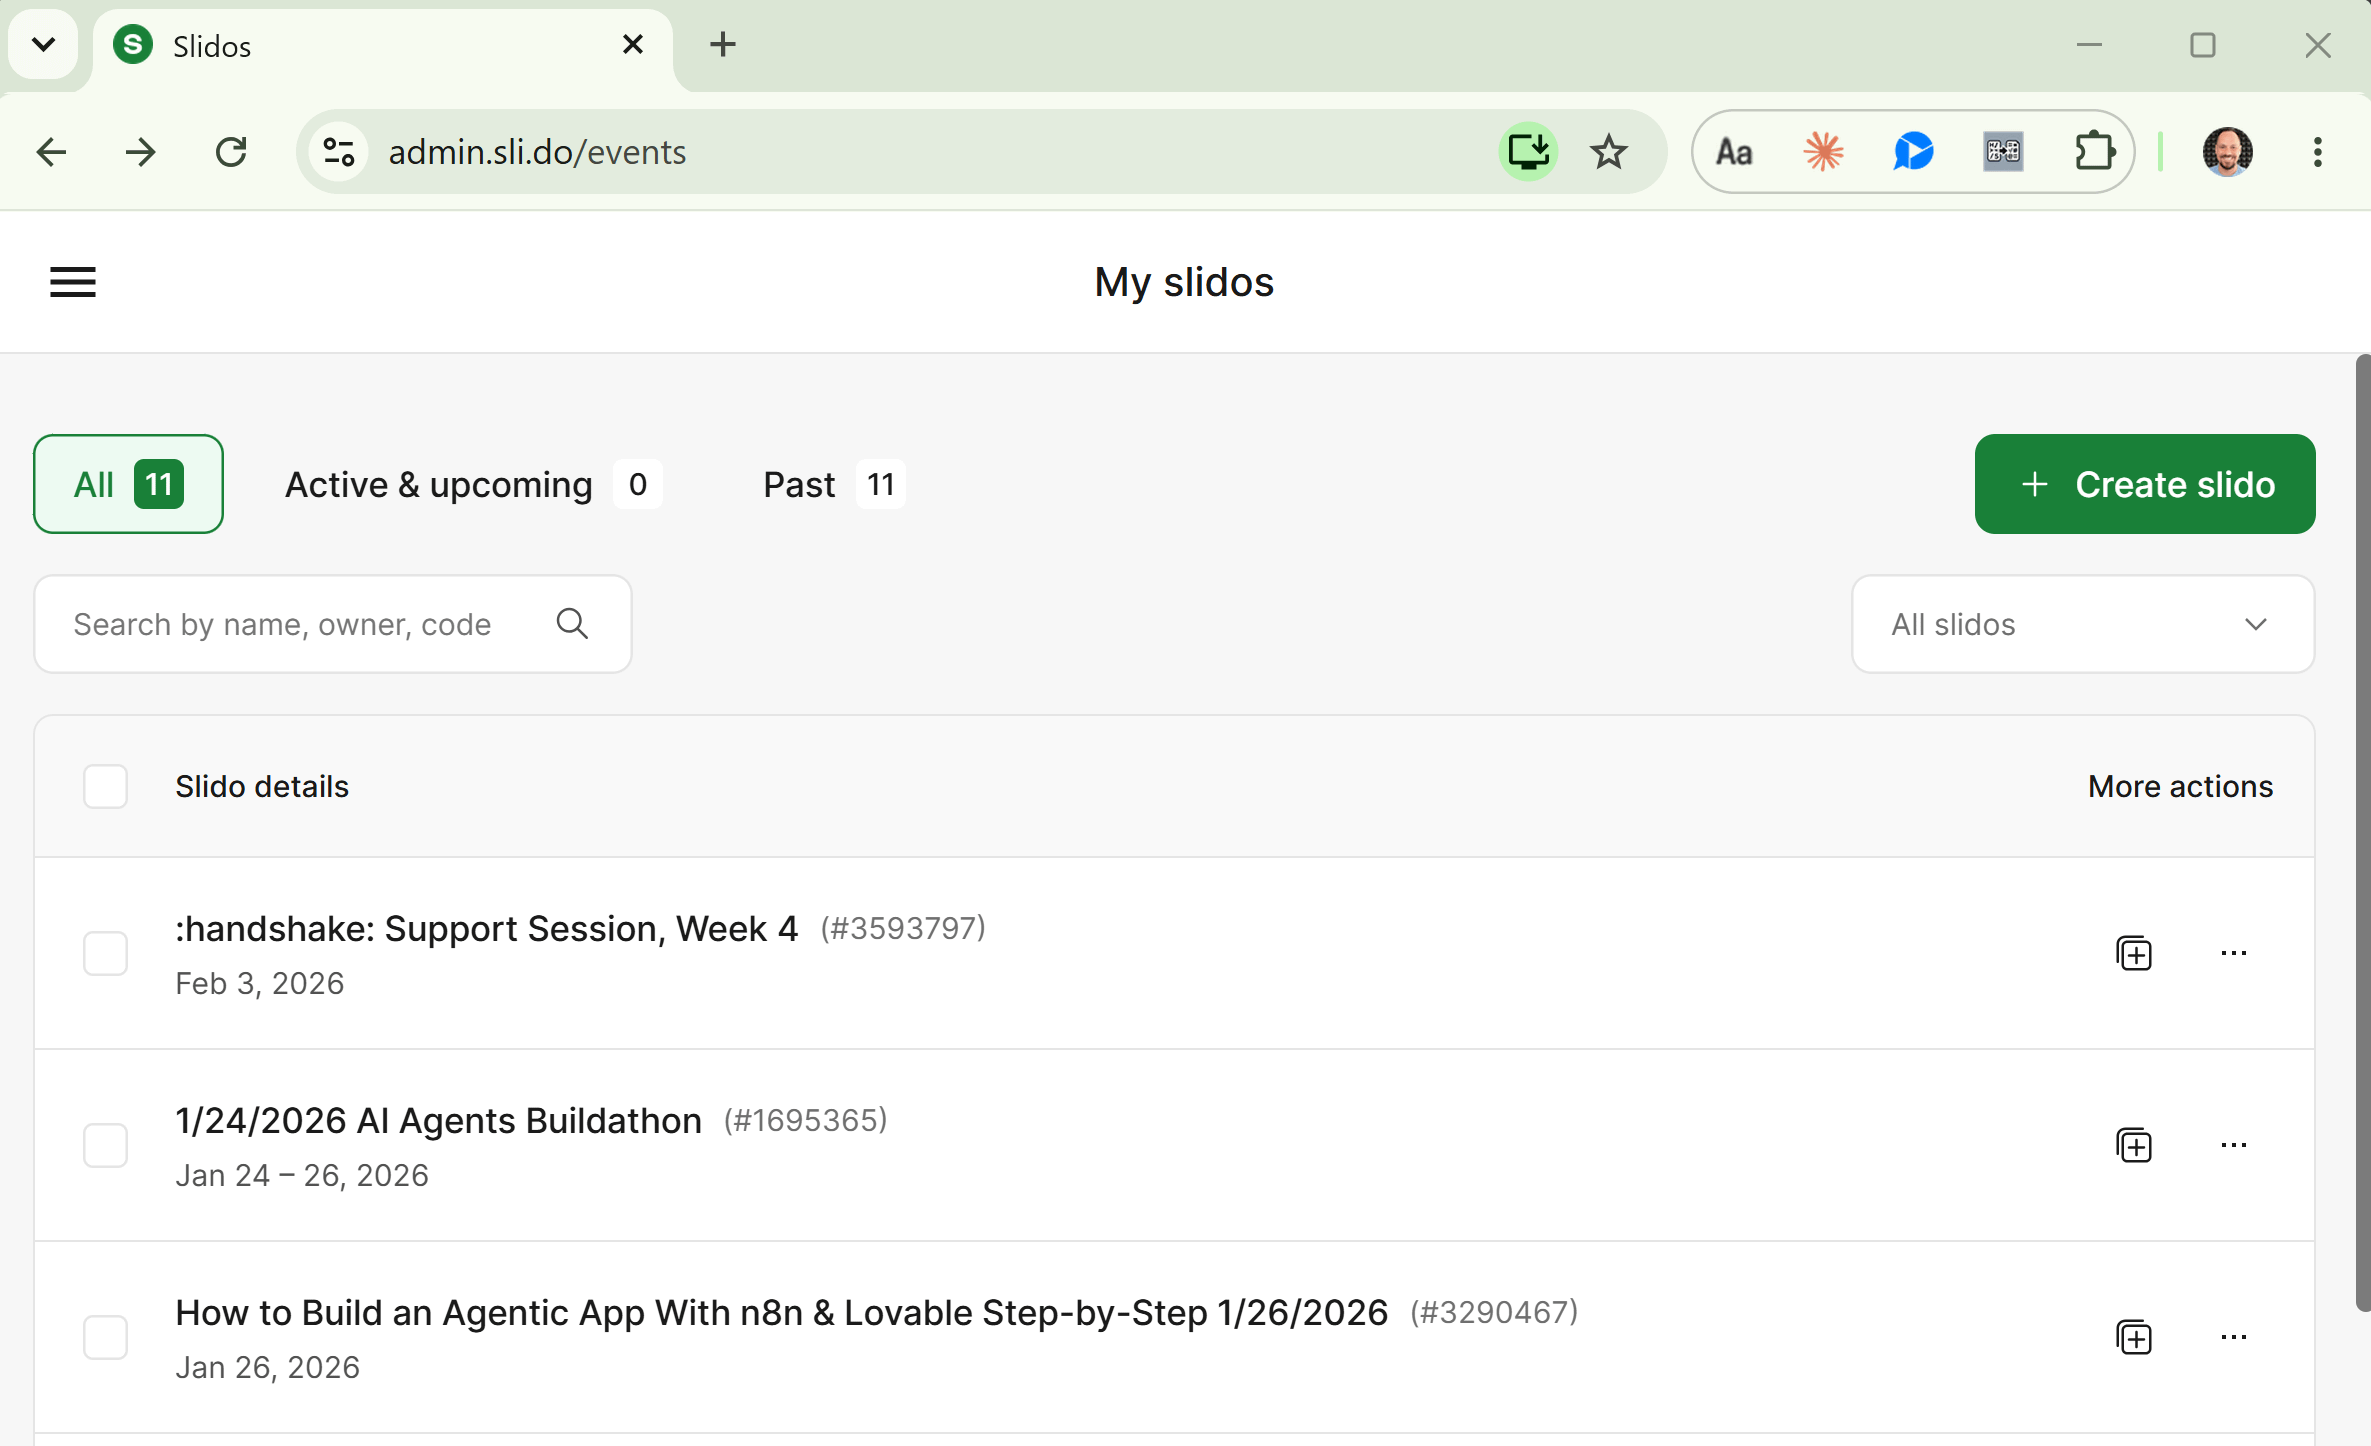
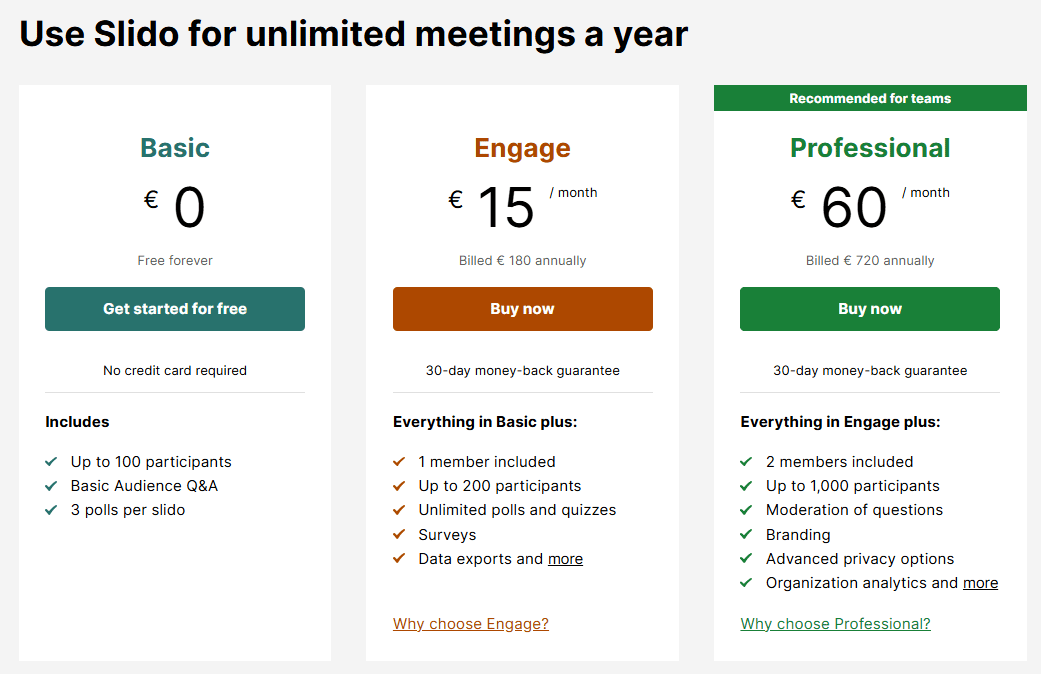
Banal on purpose. It will demonstrate all critical elements, including a multi-tenant setup, Google authentication, paid subscriptions, roles and permissions, CI/CD, and securing the app.
You will never open a file with the code.
2. Claude Solution Template for Non-Coders
You don’t have to start from scratch. A Claude SaaS solution template we will start with defines:
The recommended, common tech stack (Next.js, Clerk, Supabase)
Preinstalled skills for Supabase and Clerk integrations
Instructions for the agent (quality, documentation, opinionated choices that worked best for me)
AGENTS.md has a strategic context placeholder that should stem from your product discovery. Explain what you want to build, market segments, value propositions, jobs to be done, use cases, who can do what, not in scope, and constraints:
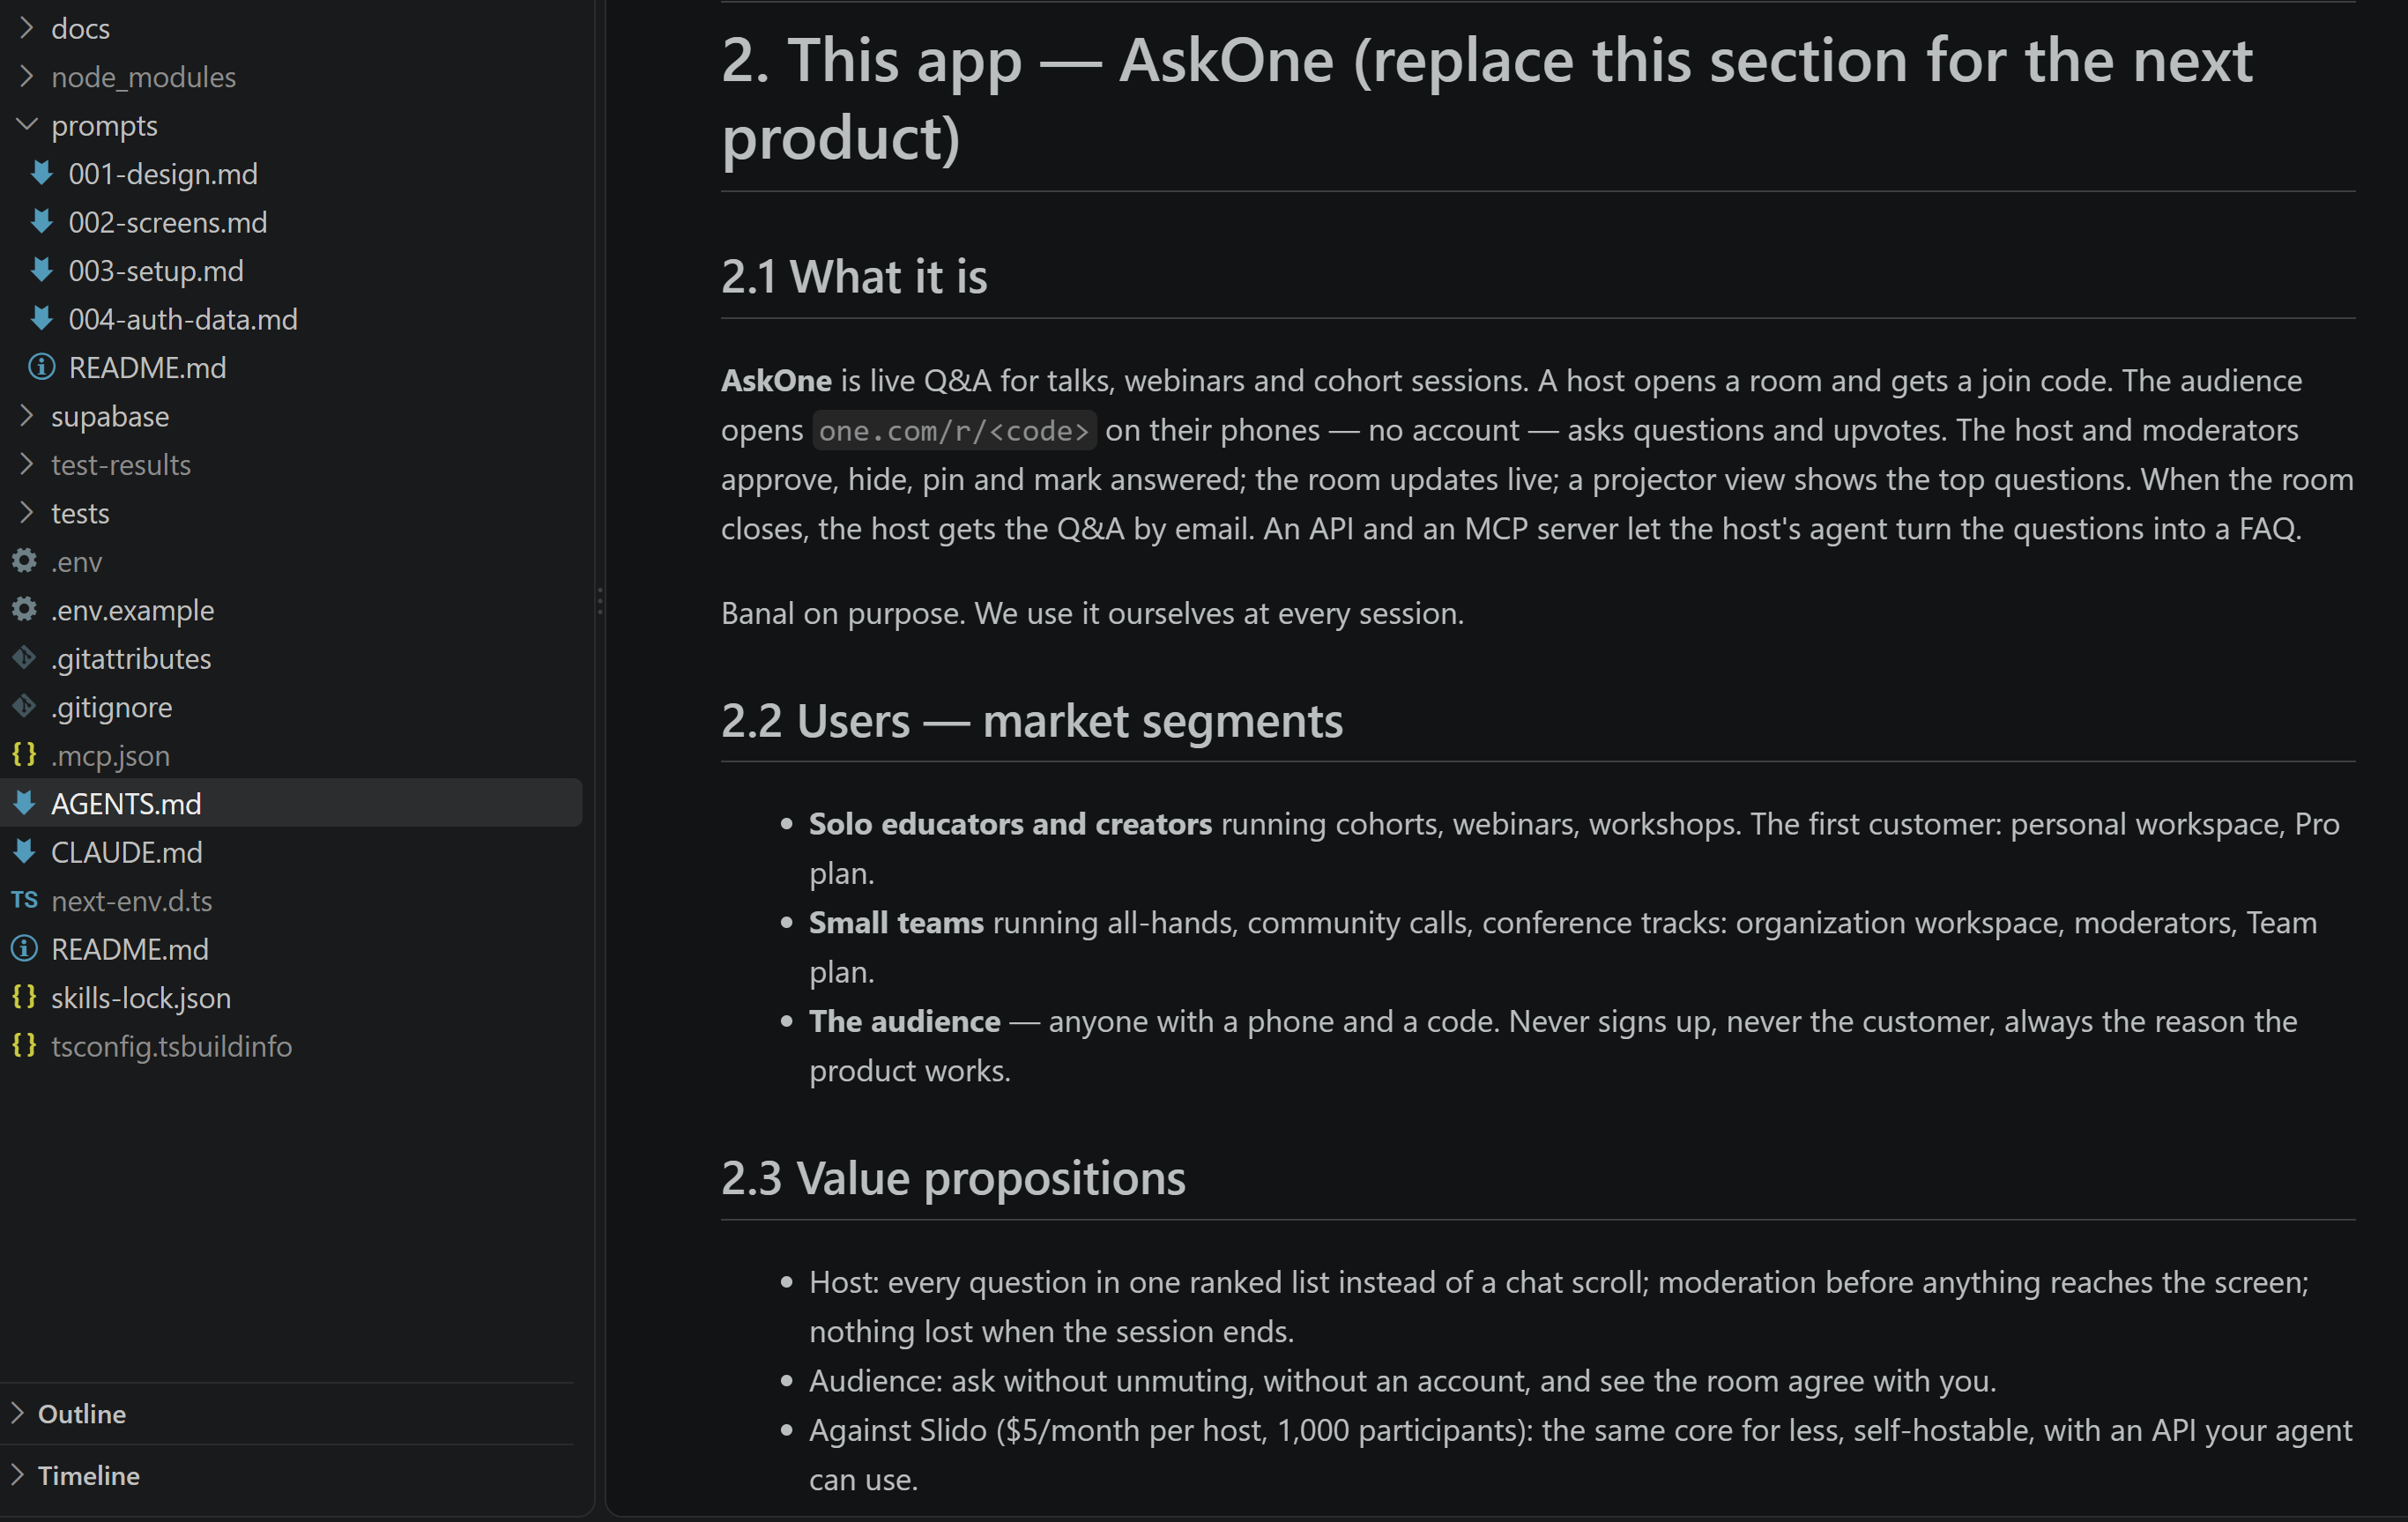
This is just a high-level strategic context, not a full specification upfront — we can’t know it without interacting with the app and getting feedback from the users.
You can use my case study, or replace it with what you know about your product.
3. Step 1: Design your App
We start with design. Let’s keep it simple. No accounts, no keys, no database. Just you and the Claude Code chat.
Ask (all my prompts are part of the template, you can copy and adjust them):
Read AGENTS.md. Design only — no code, no database, no .env.

/design the two Phase 1 screens with their empty states: the host's rooms list (desktop) and the participant's room page (phone). Use the `frontend-design` skill. I want to open and interact with the results.

Give me two genuinely different directions, one line each on what it optimizes for and the trade-off. Stop; I pick.

After I pick: build the kit in design/, rebuild the two screens from it, keep the artboards in the repo, commit, and stop again.

Layout, copy, type, color, what the kit contains — yours. Real copy, lucide icons, phone-first.
It gave me an interactive link with 2 designs: https://claude.ai/code/artifact/6abe1030-5b21-418e-9326-999b3edfa816.
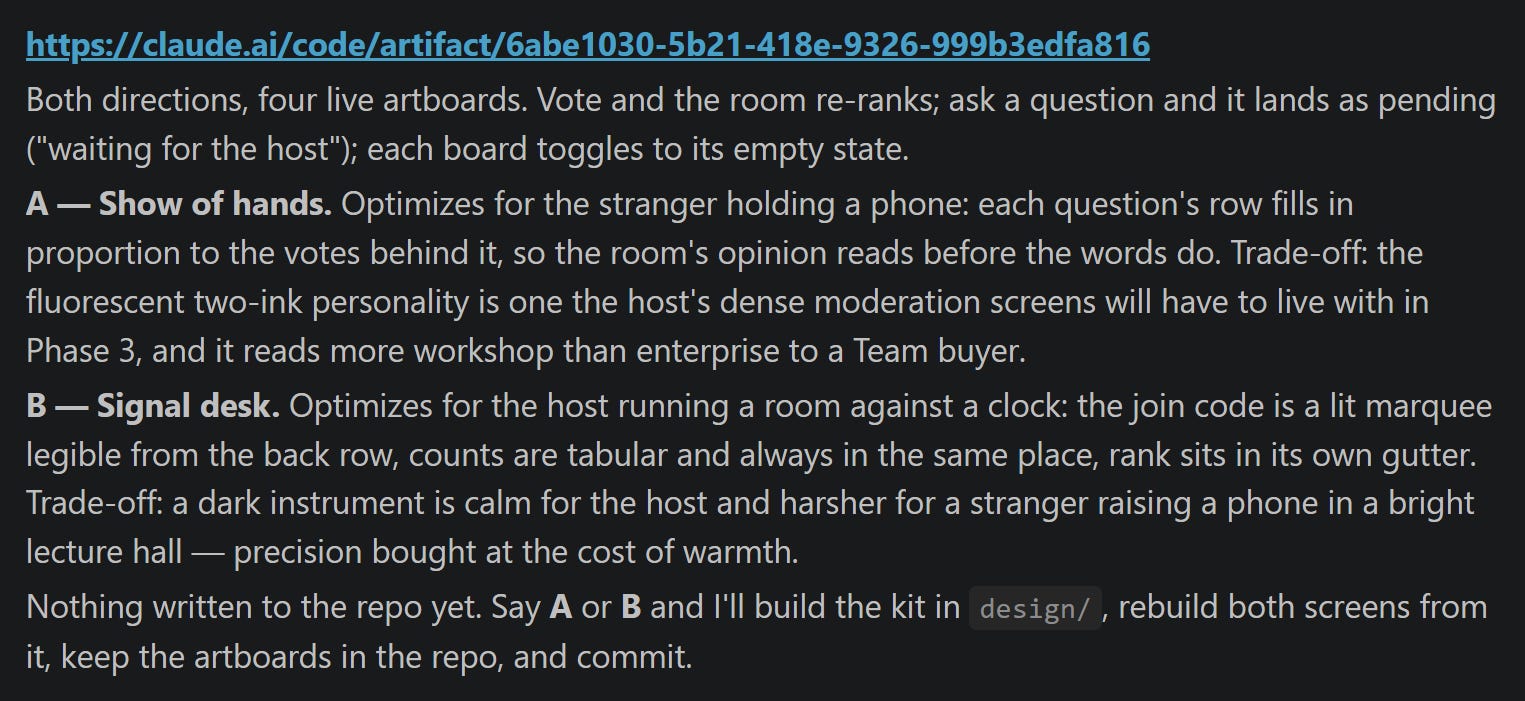
I rejected “A - Show of hands”:
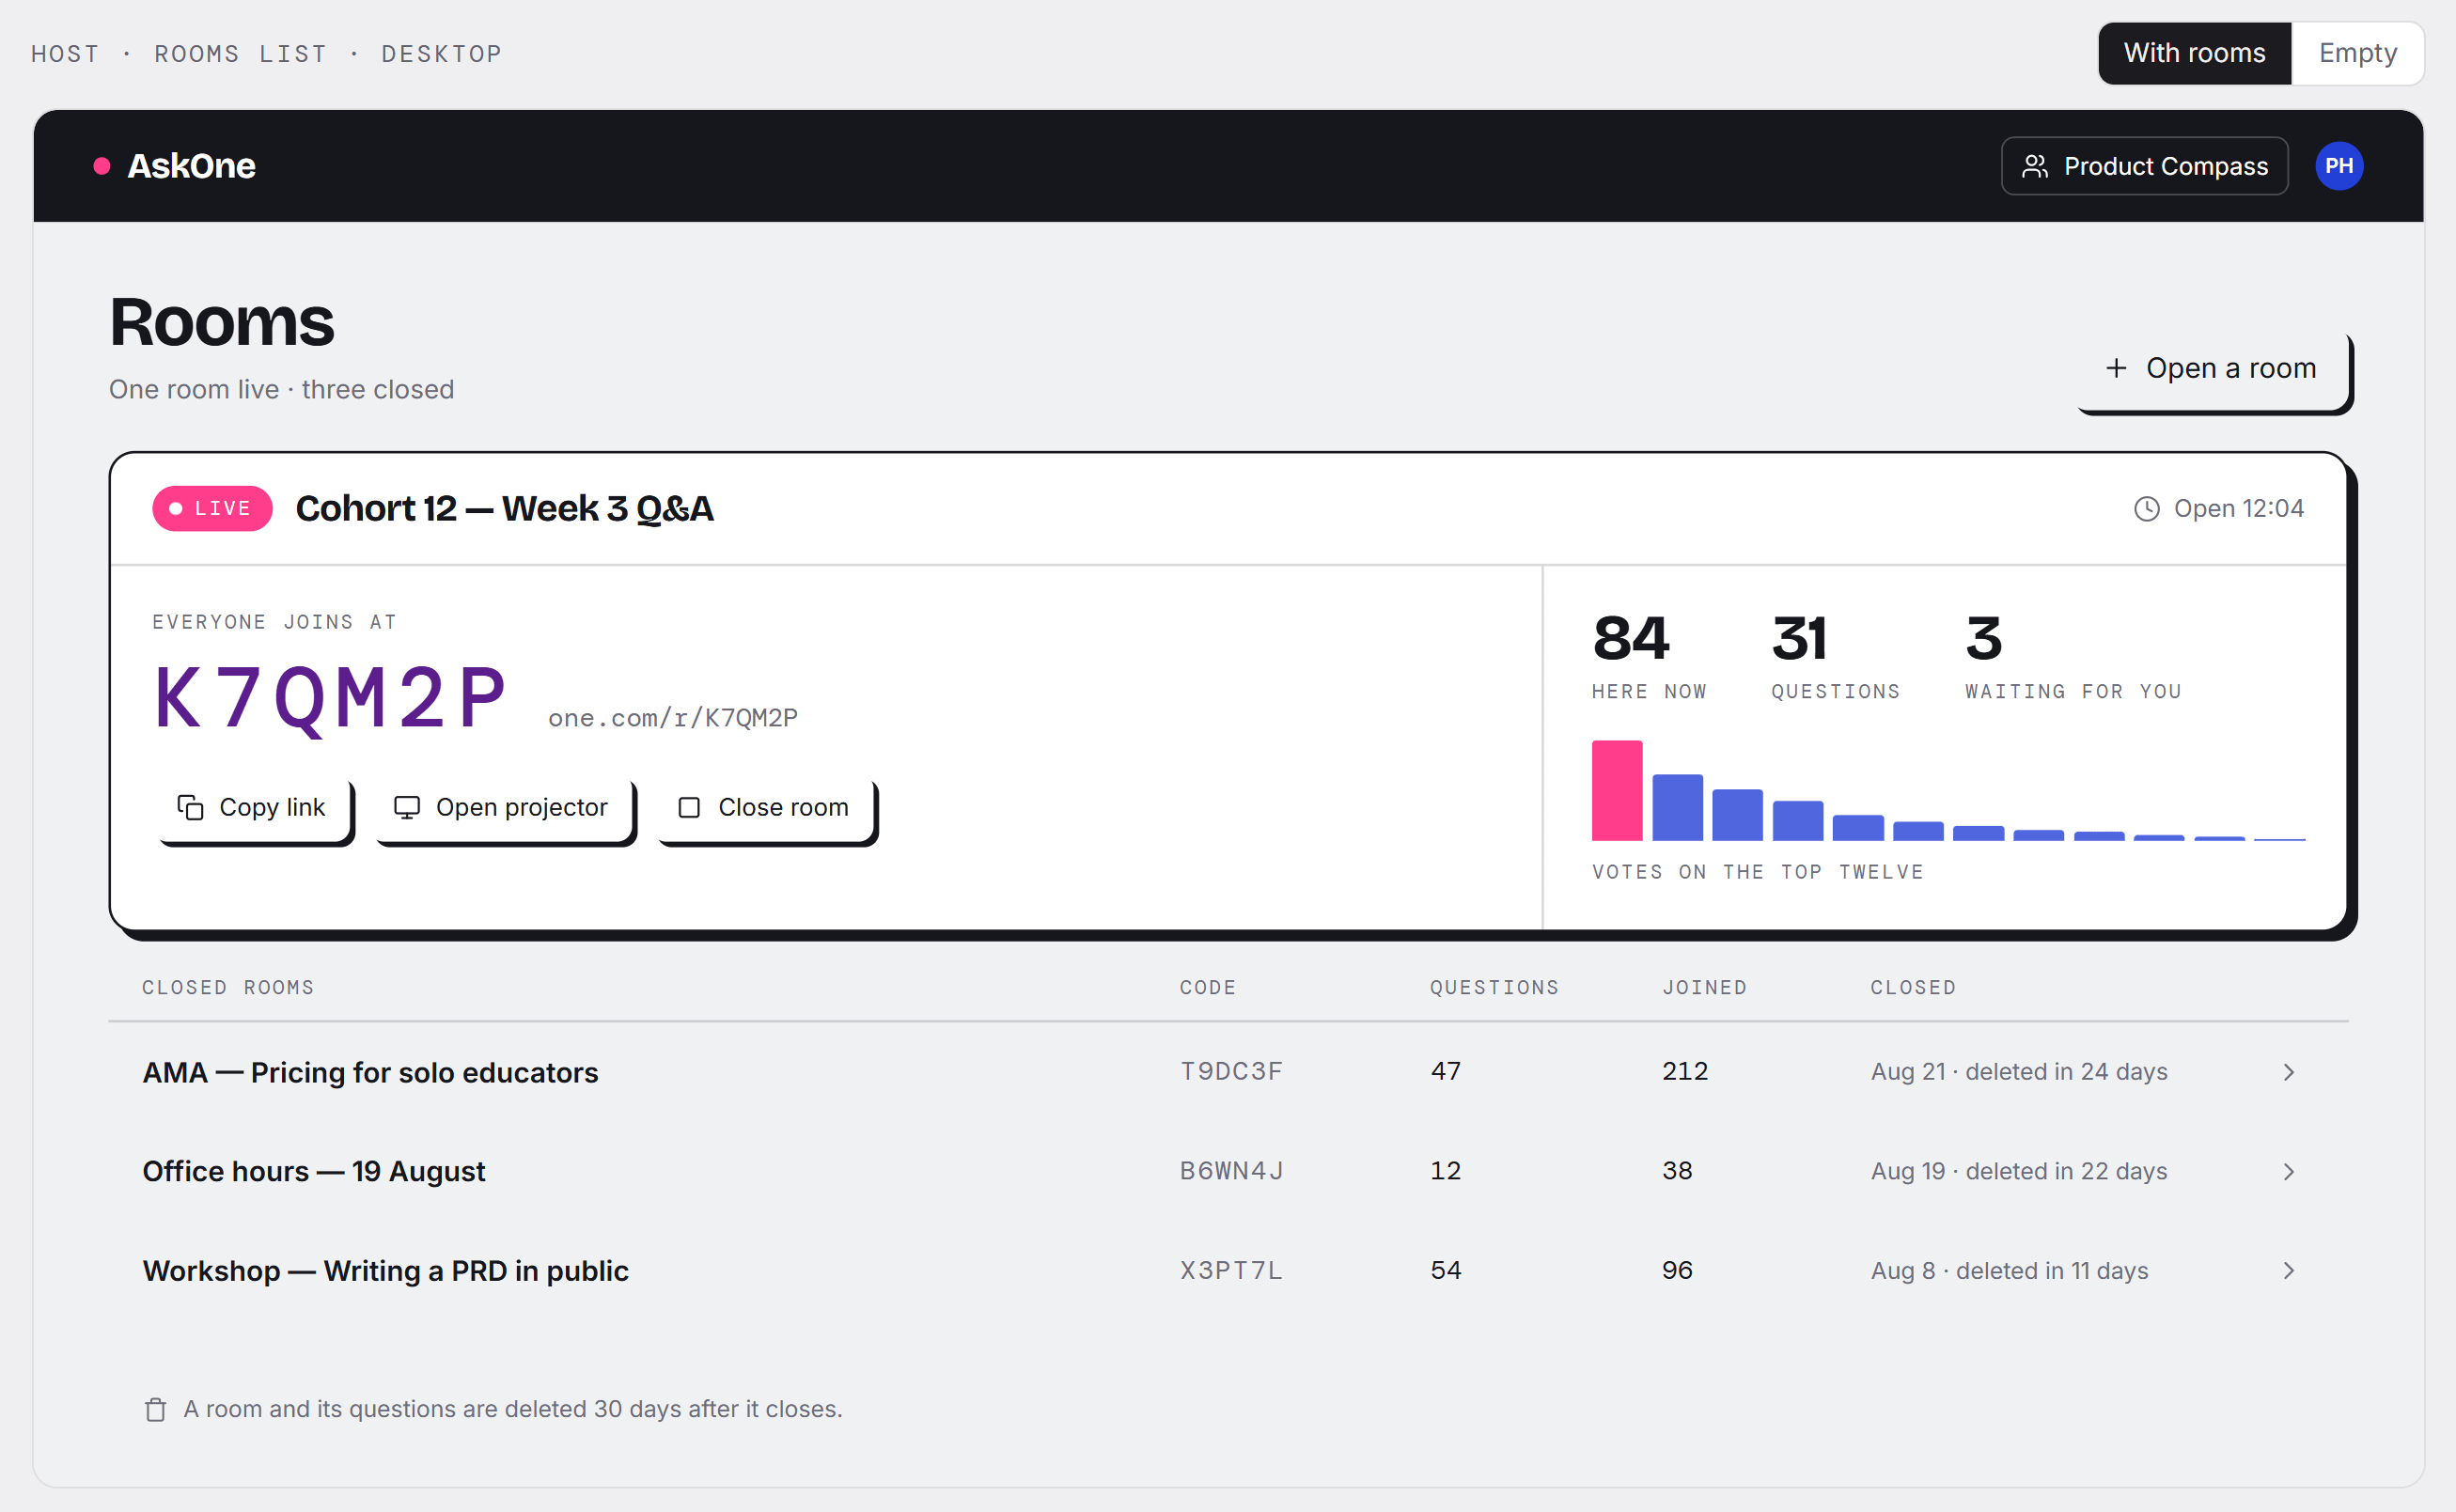
And selected B — Signal desk, to prioritize enterprise buyers:

Then, Claude built a design system with tokens (colors, styles) we will use later when developing our product. You can preview it here: https://claude.ai/code/artifact/32fd141c-452d-45a7-8111-d6cb7792085a
4. Step 2: Build a Static Website
This step turns the design into an app we can click through. Still without accounts or database.
Ask the agent:
Read AGENTS.md and design/README.md. Build the approved design as a running app: the host's rooms list and the participant's room page, with realistic content and their empty states.

No accounts and no database in this session. 003 connects Clerk and Supabase; 004 puts the real data model (§ 1.1 — workspaces, the three functions) behind these same screens. Build so that swap is small, and invent no storage in the meantime.

Plan briefly, build, commit, run it and give me the URL. Then stop and tell me what I can click.
It gave me a URL I can click (localhost, works only on my machine):
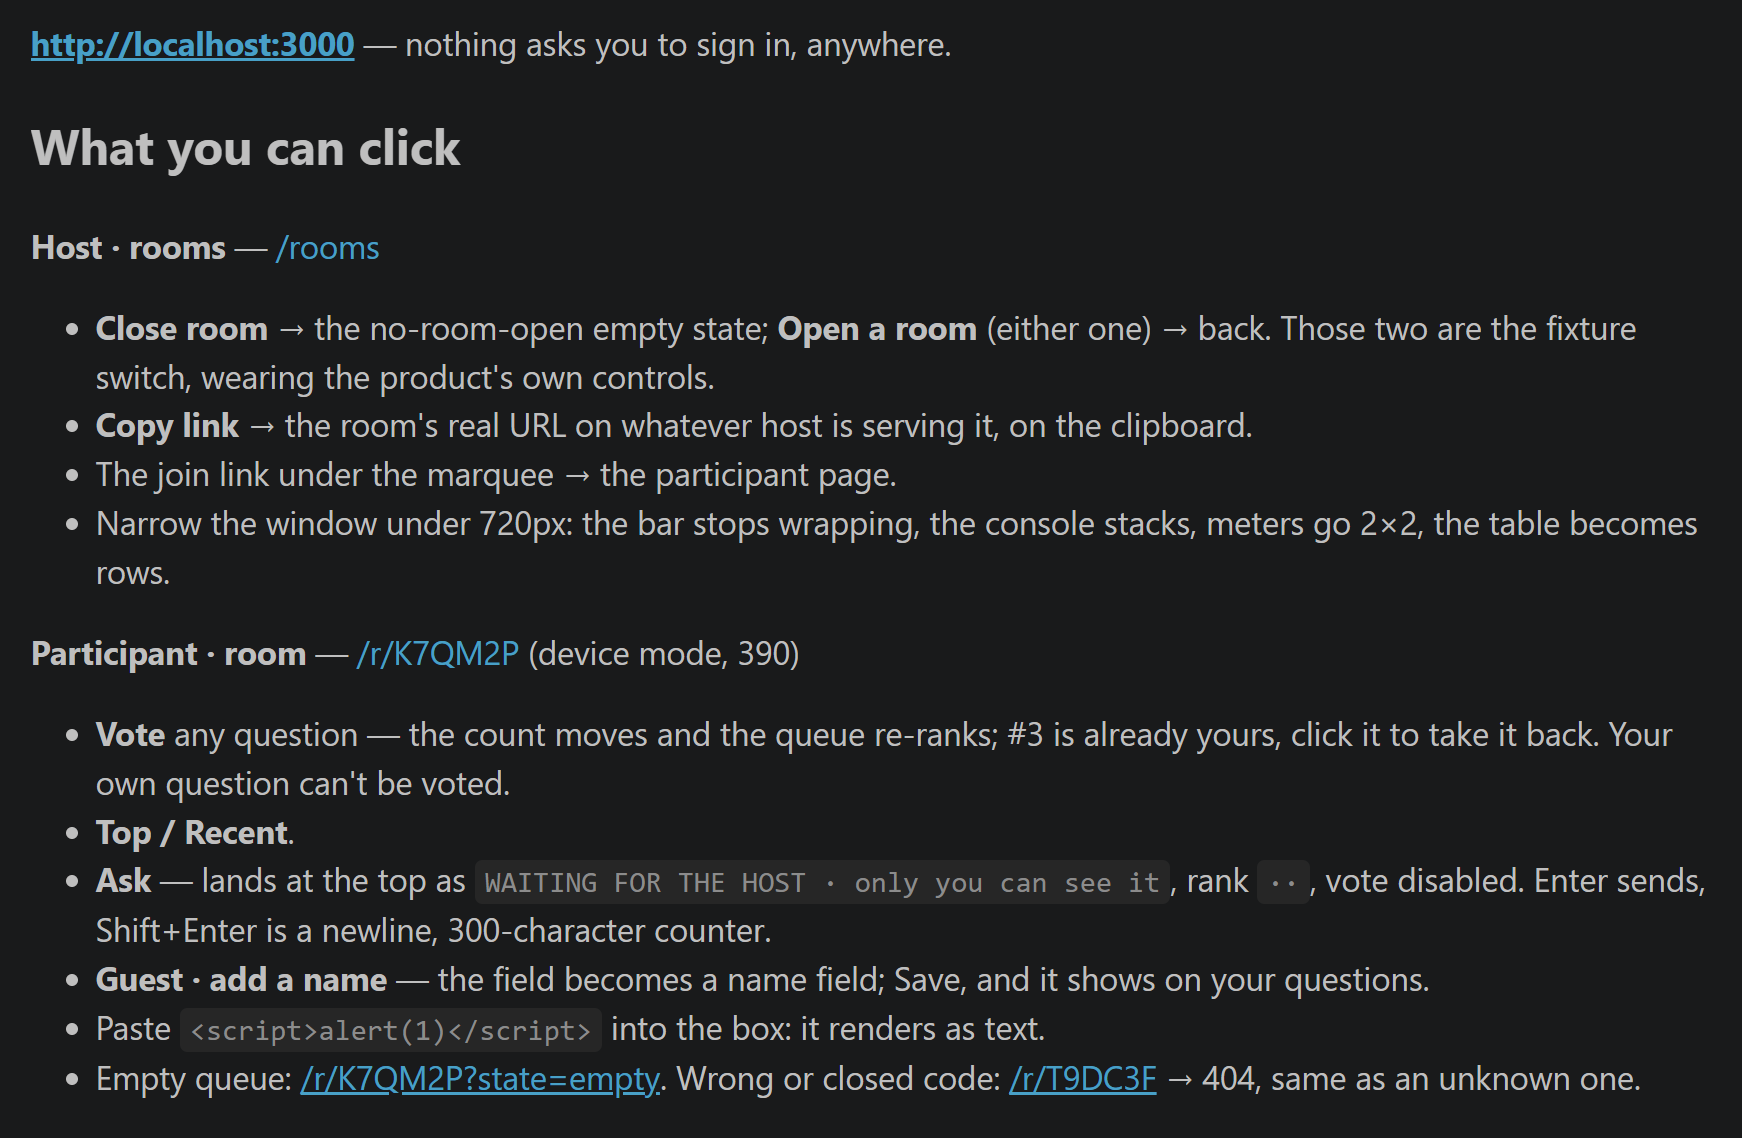
📌 Note that in one of the bullets it mentioned pasting the <script> element - this eliminates the “XSS injection” attack surface. Our template instructions (AGENTS.md) teach the agent to consider common threats, even before review.
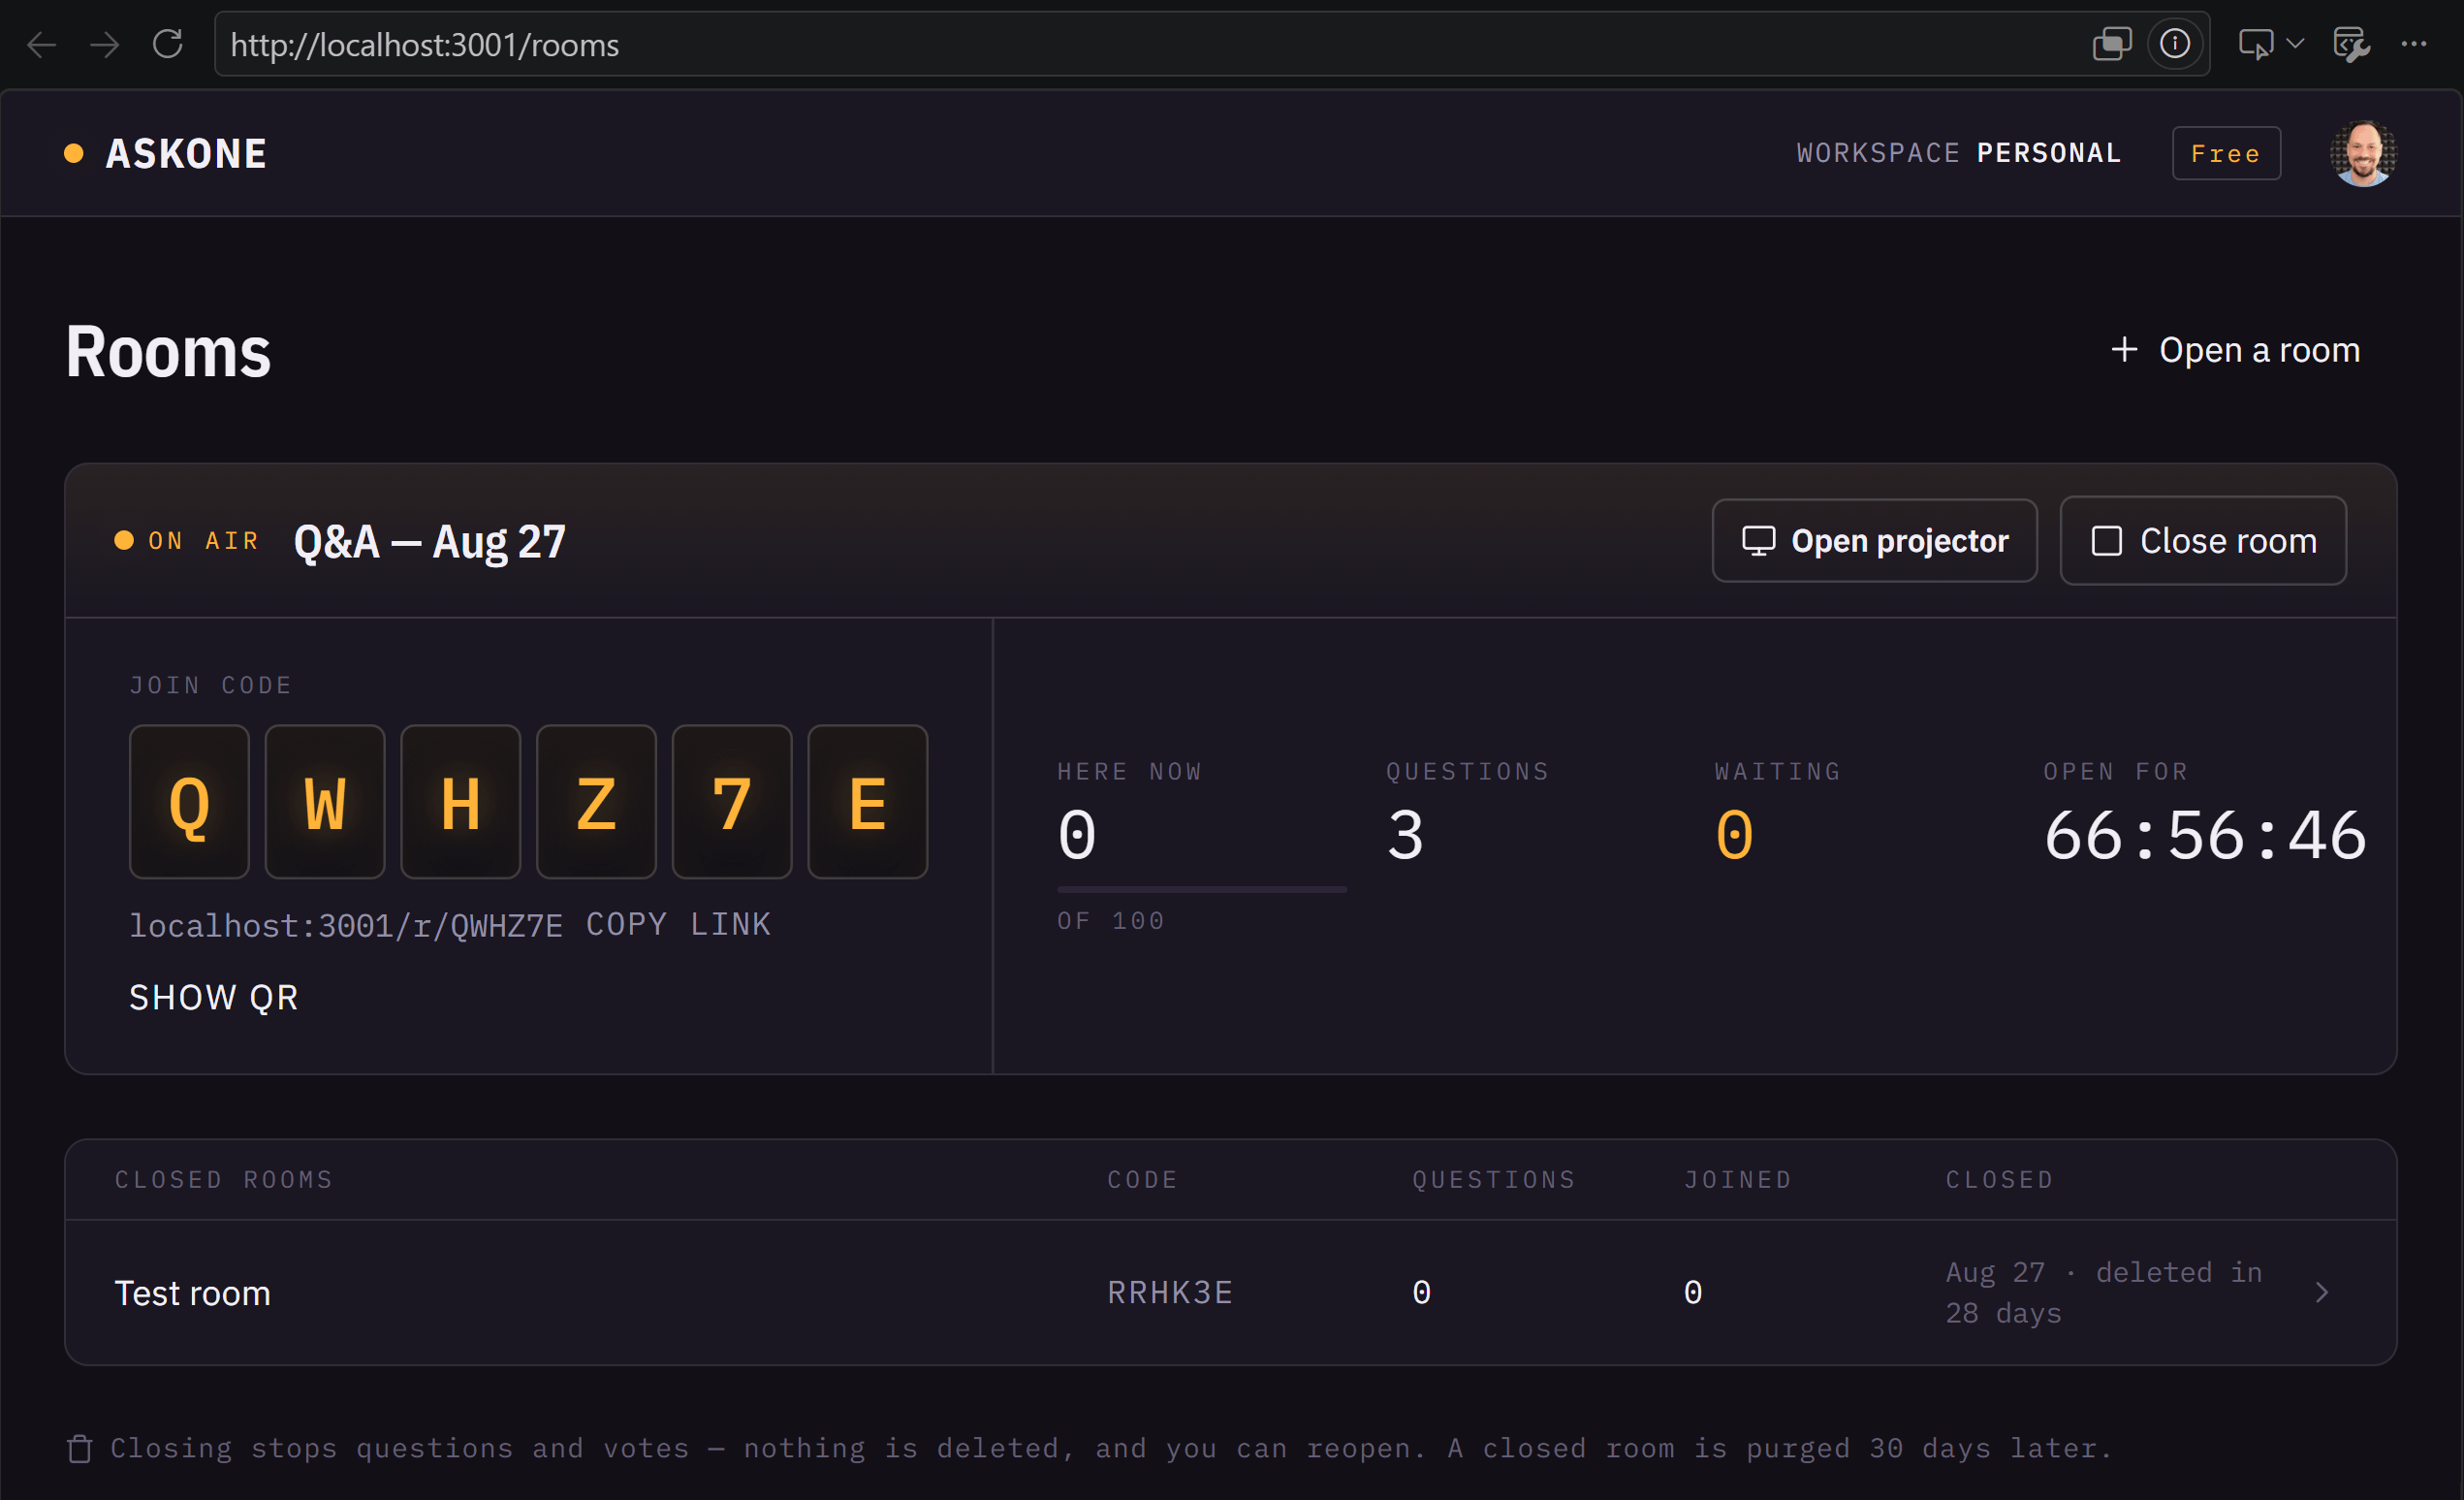
The live website looked just like the design:
5. Step 3: Setup Clerk & Supabase
Our app exists and can be displayed in the browser, but with fake content. The next step is connecting the two services that make it real:
Clerk decides who you are
Supabase is where the data lives
Step 3.1: Create two new projects
Configure Clerk
Create a new, free application at https://dashboard.clerk.com/apps/new. Make sure Google auth is enabled. Don’t enable multi-tenancy yet. We will do it later:
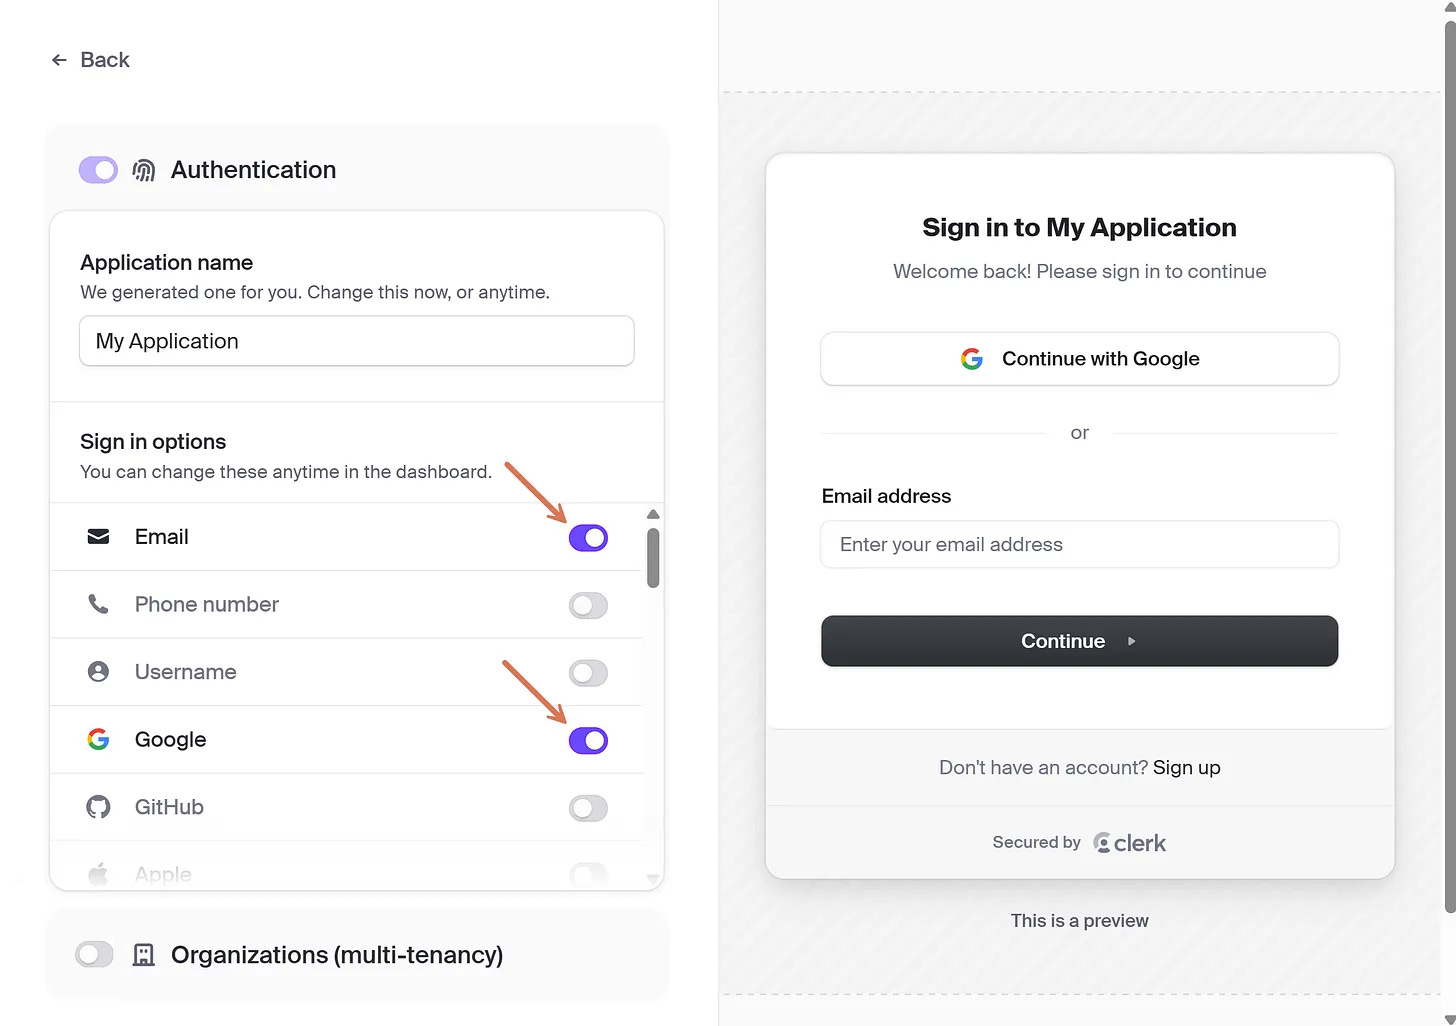
You will land on the development instance. The dashboard offers a long “Add authentication” prompt: ignore it. The page you want is Configure → API keys.
Note:
NEXT_PUBLIC_CLERK_PUBLISHABLE_KEYCLERK_SECRET_KEY
Configure Supabase
Create an empty, free project at https://supabase.com/dashboard.
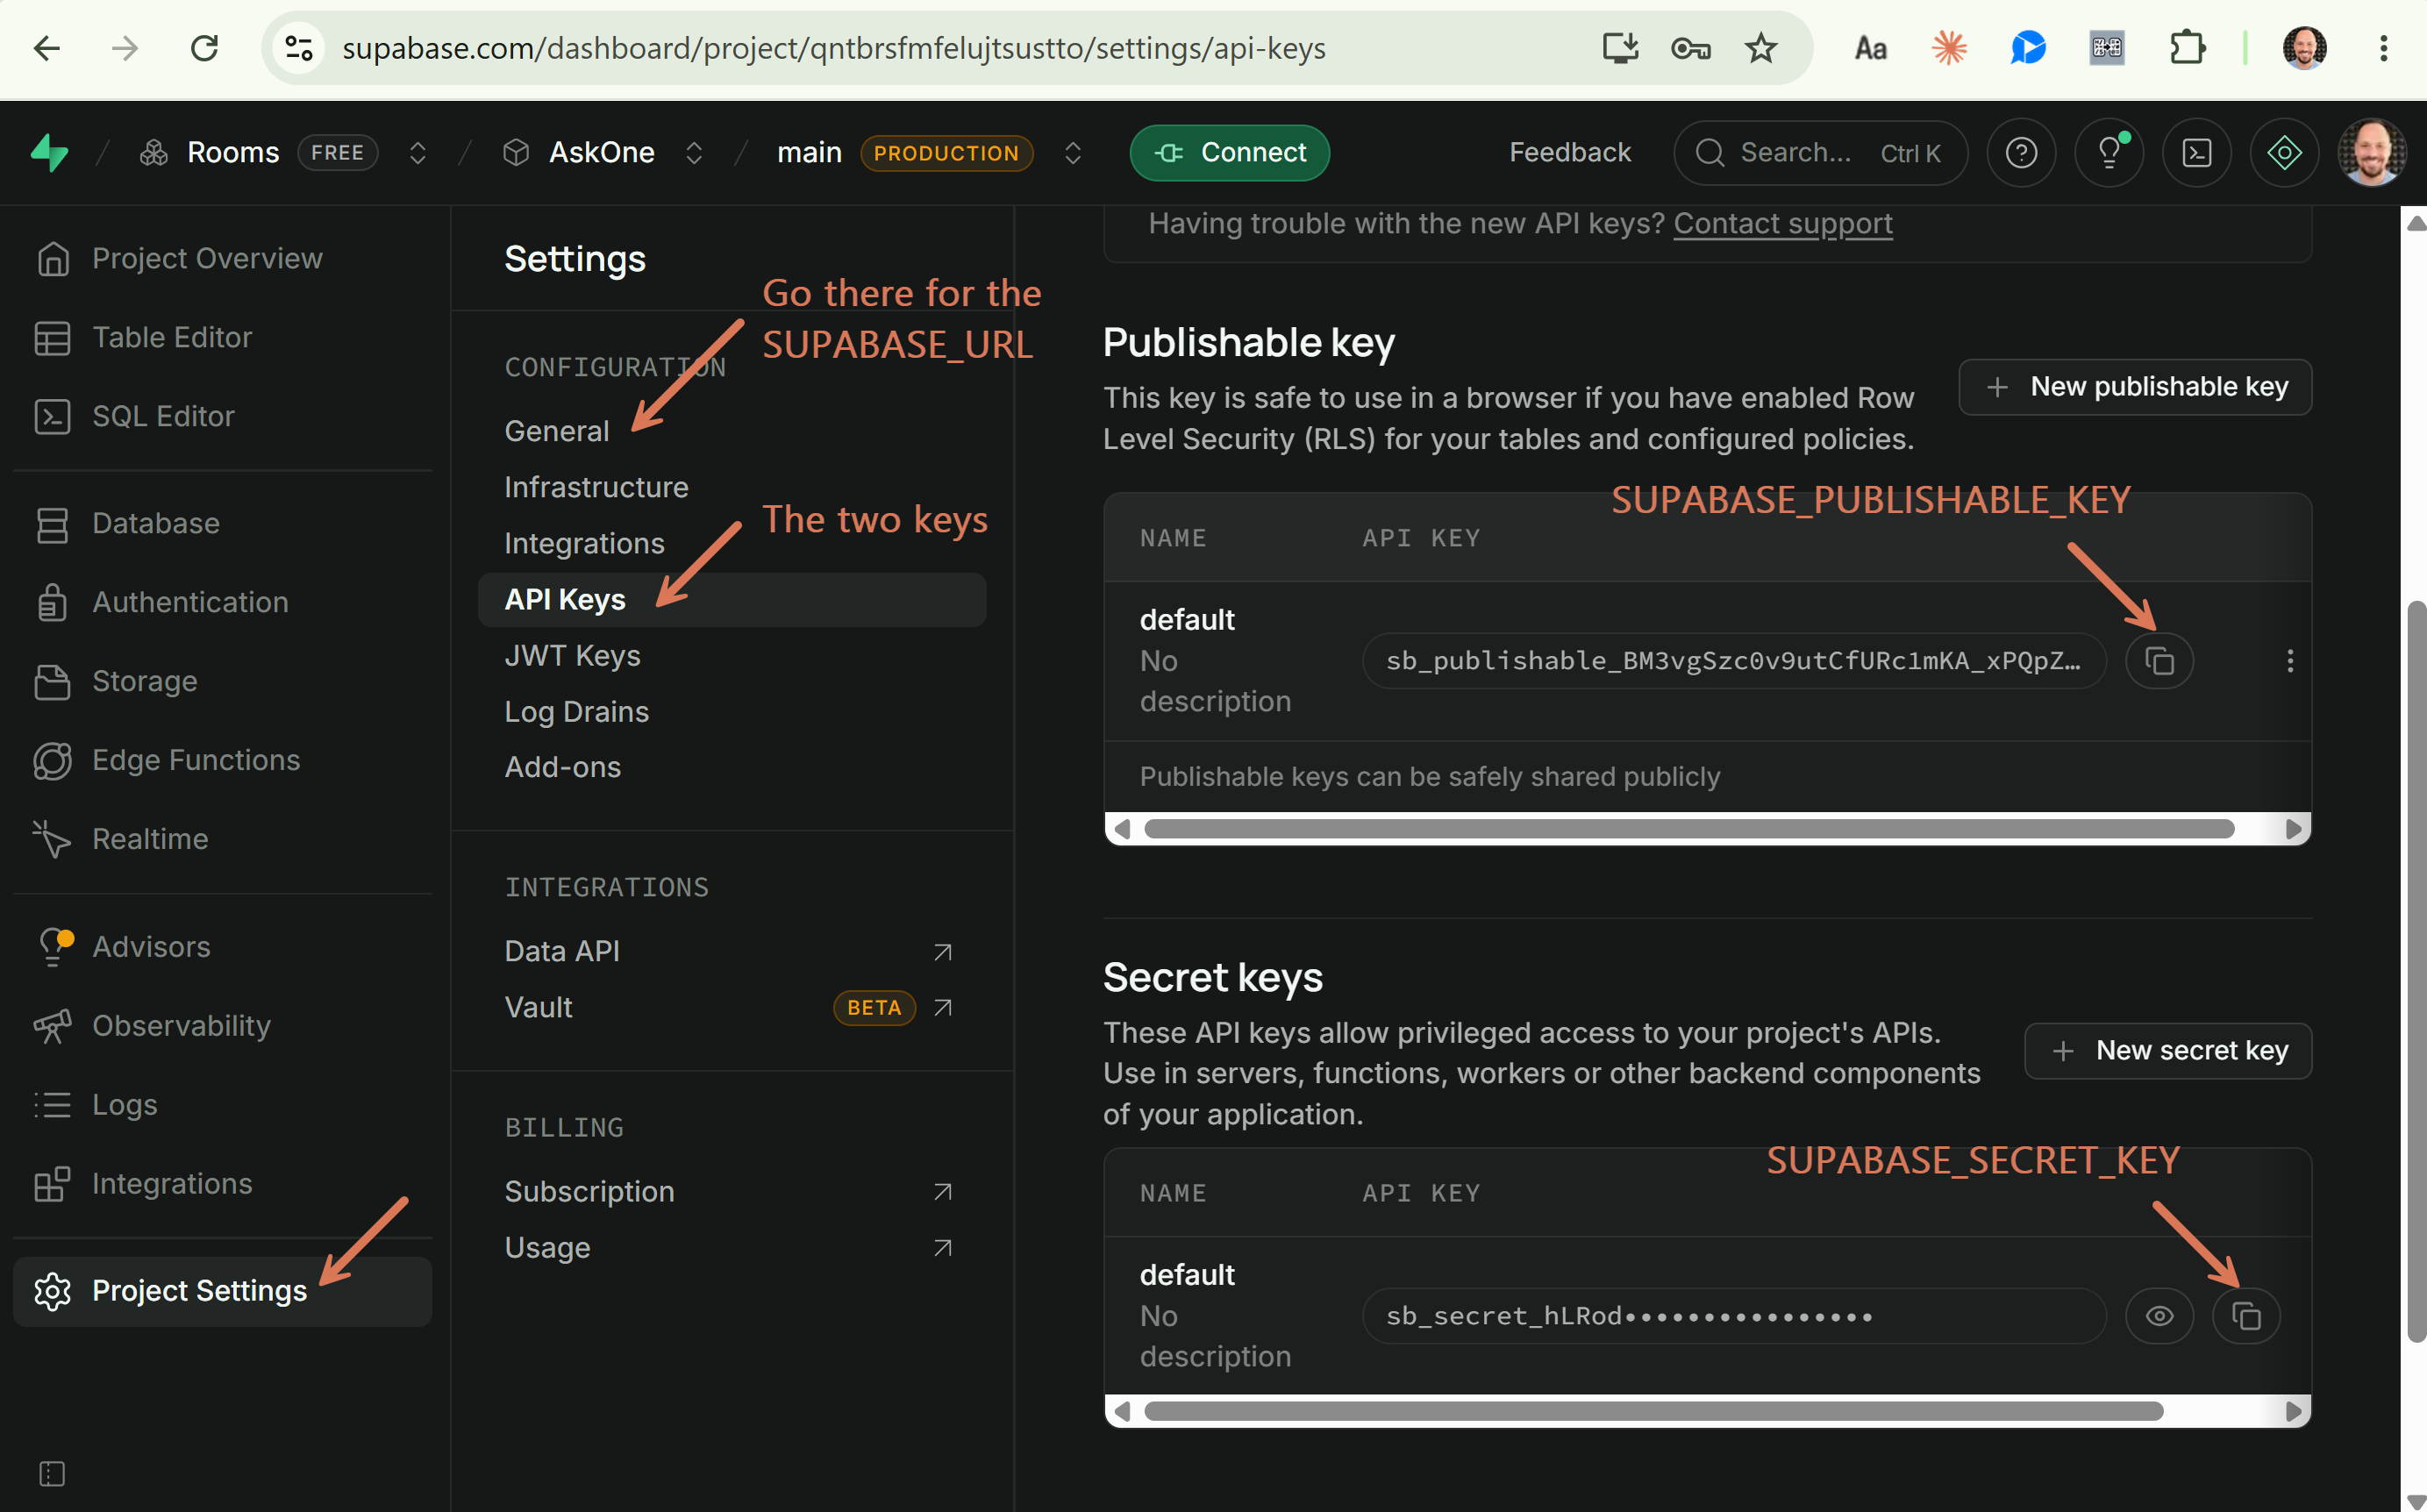
Go to Project Settings → API for the project URL and the secret key. The publishable key is optional, only for your unit tests.
Note:
SUPABASE_URLSUPABASE_SECRET_KEYSUPABASE_PUBLISHABLE_KEY
Step 3.2: Establish a Supabase MCP connection
Supabase generates this for your project under Connect → MCP → Claude Code. Select all feature groups, copy the prompt, and paste it into your Claude Code:
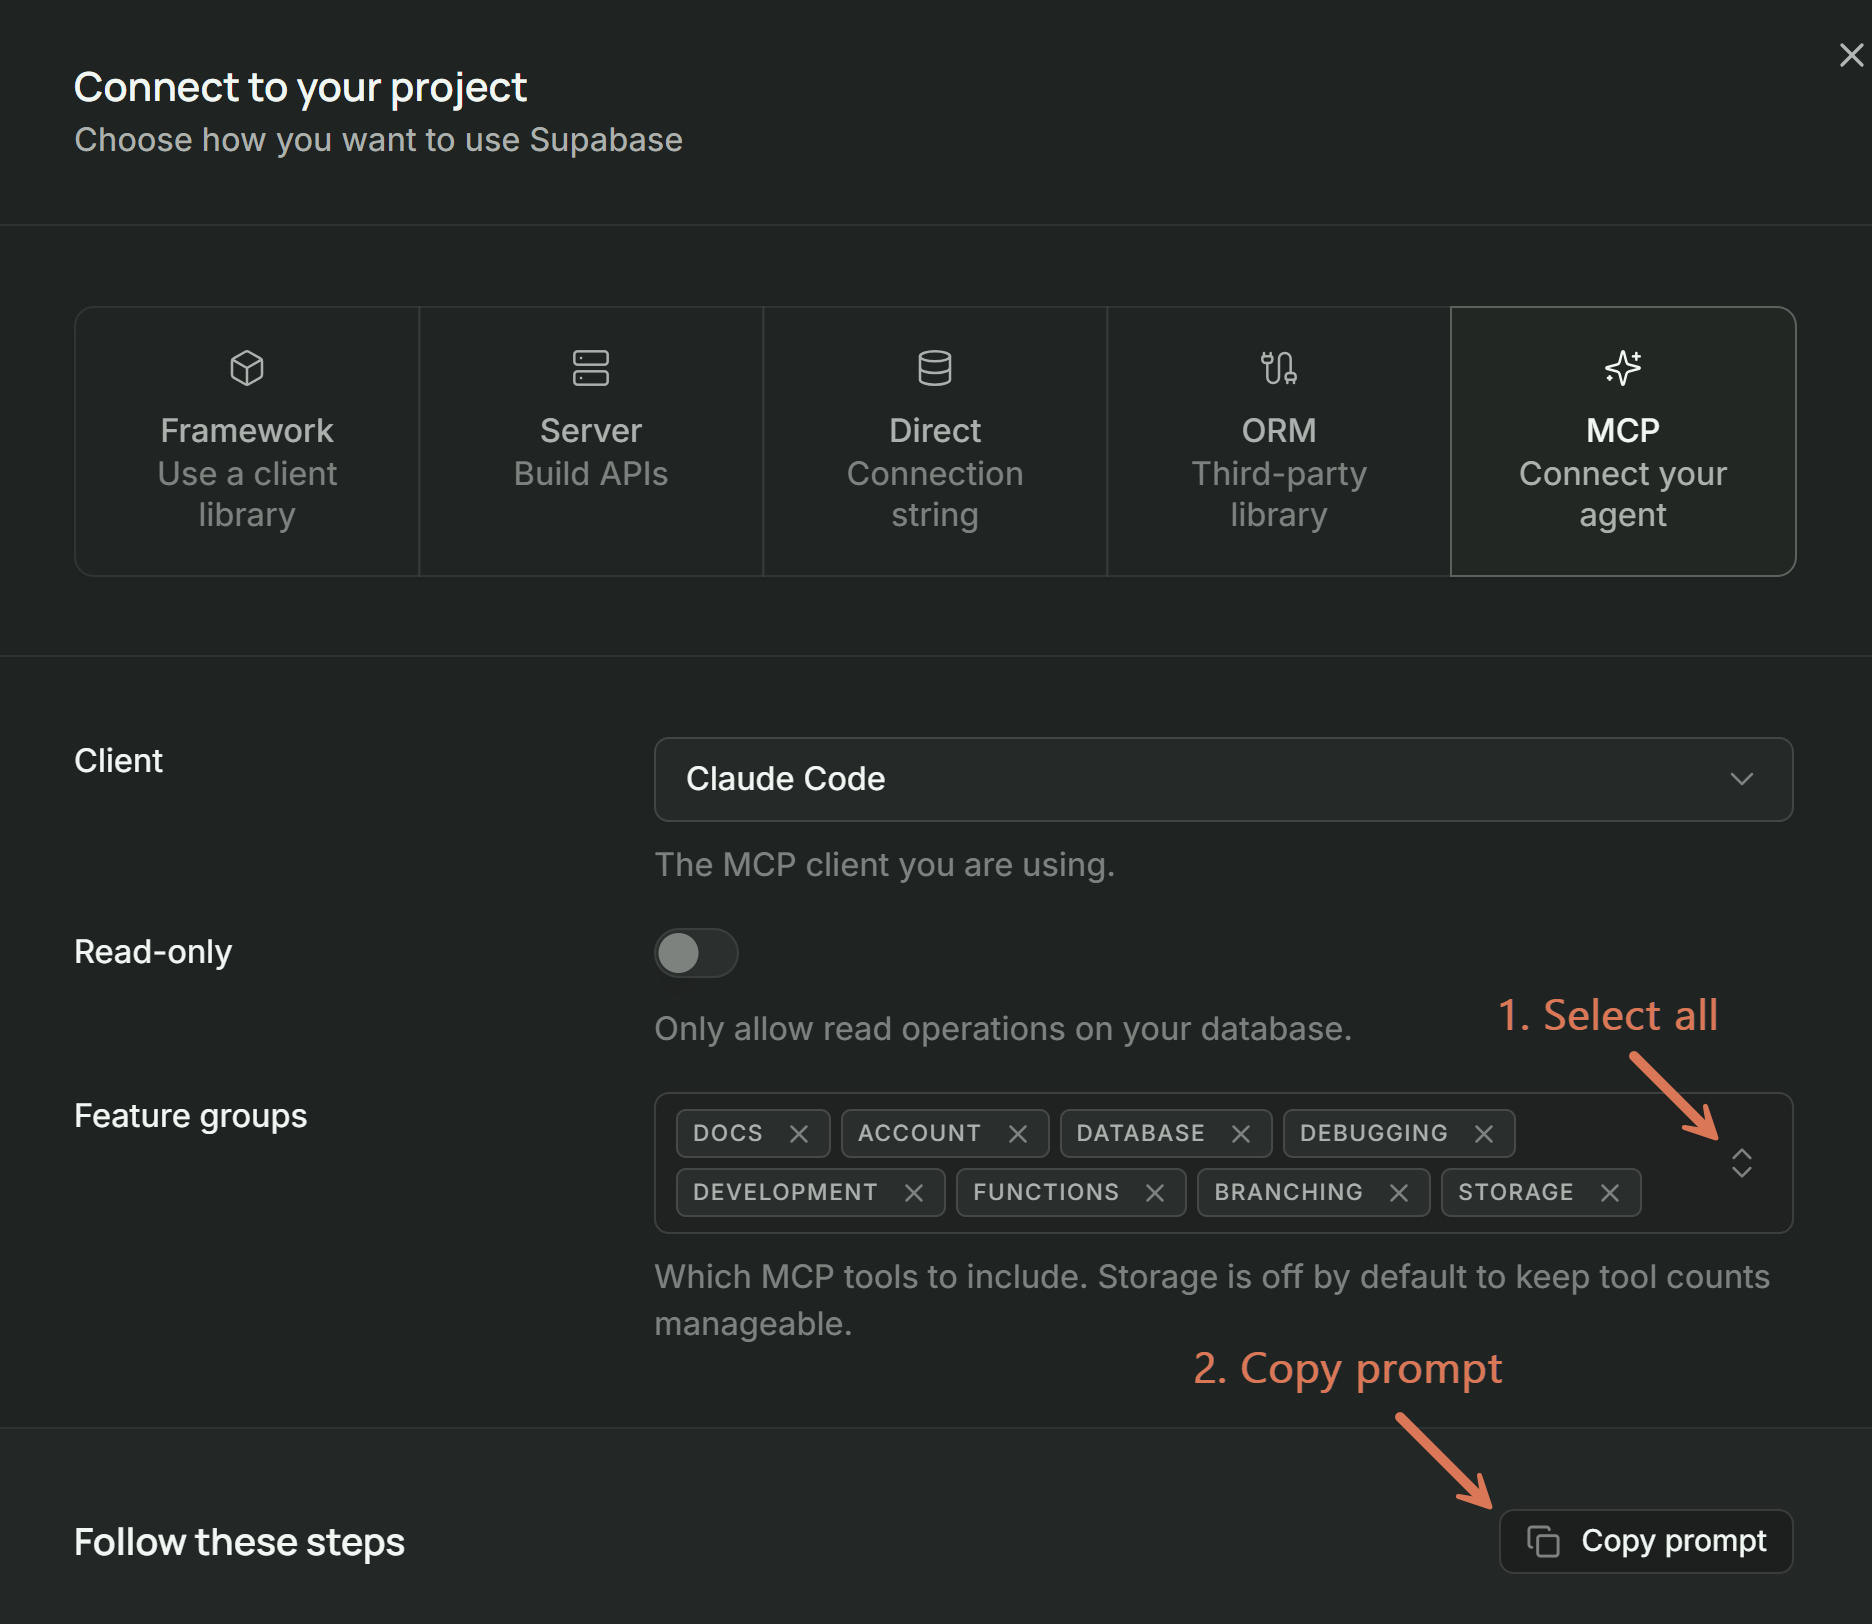
It carries your project ref, so the version below is only the shape:
1. Add MCP server

claude mcp add --scope project --transport http supabase "https://mcp.supabase.com/mcp?project_ref=************"

2. Authenticate

Run this in a regular terminal, not an IDE extension. Select the supabase server, then Authenticate.

claude /mcp

3. Install Agent Skills (optional)

npx skills add supabase/agent-skills“Install Agent Skills” is already done (included in our template). Step 2 is yours: open Claude Code in the terminal, type /mcp, pick supabase, select Authenticate (hit Enter):
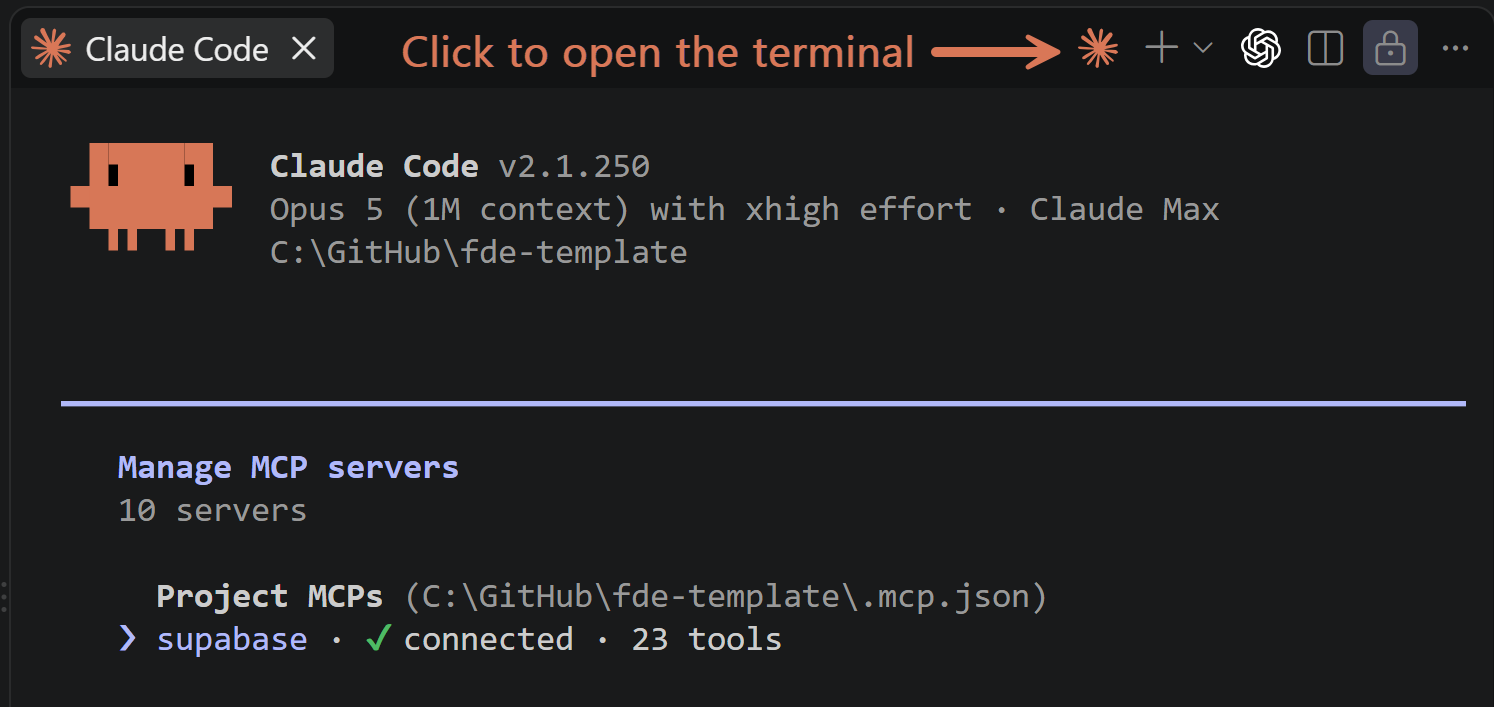
Restart Claude Code by pressing “Ctrl + Shift + P,” then “Developer: Reload Window”:

Or you can restart the entire VS Code.
Step 3.3: Configure your access keys
Copy .env.example to .env and fill in the five values from Step 3.1:
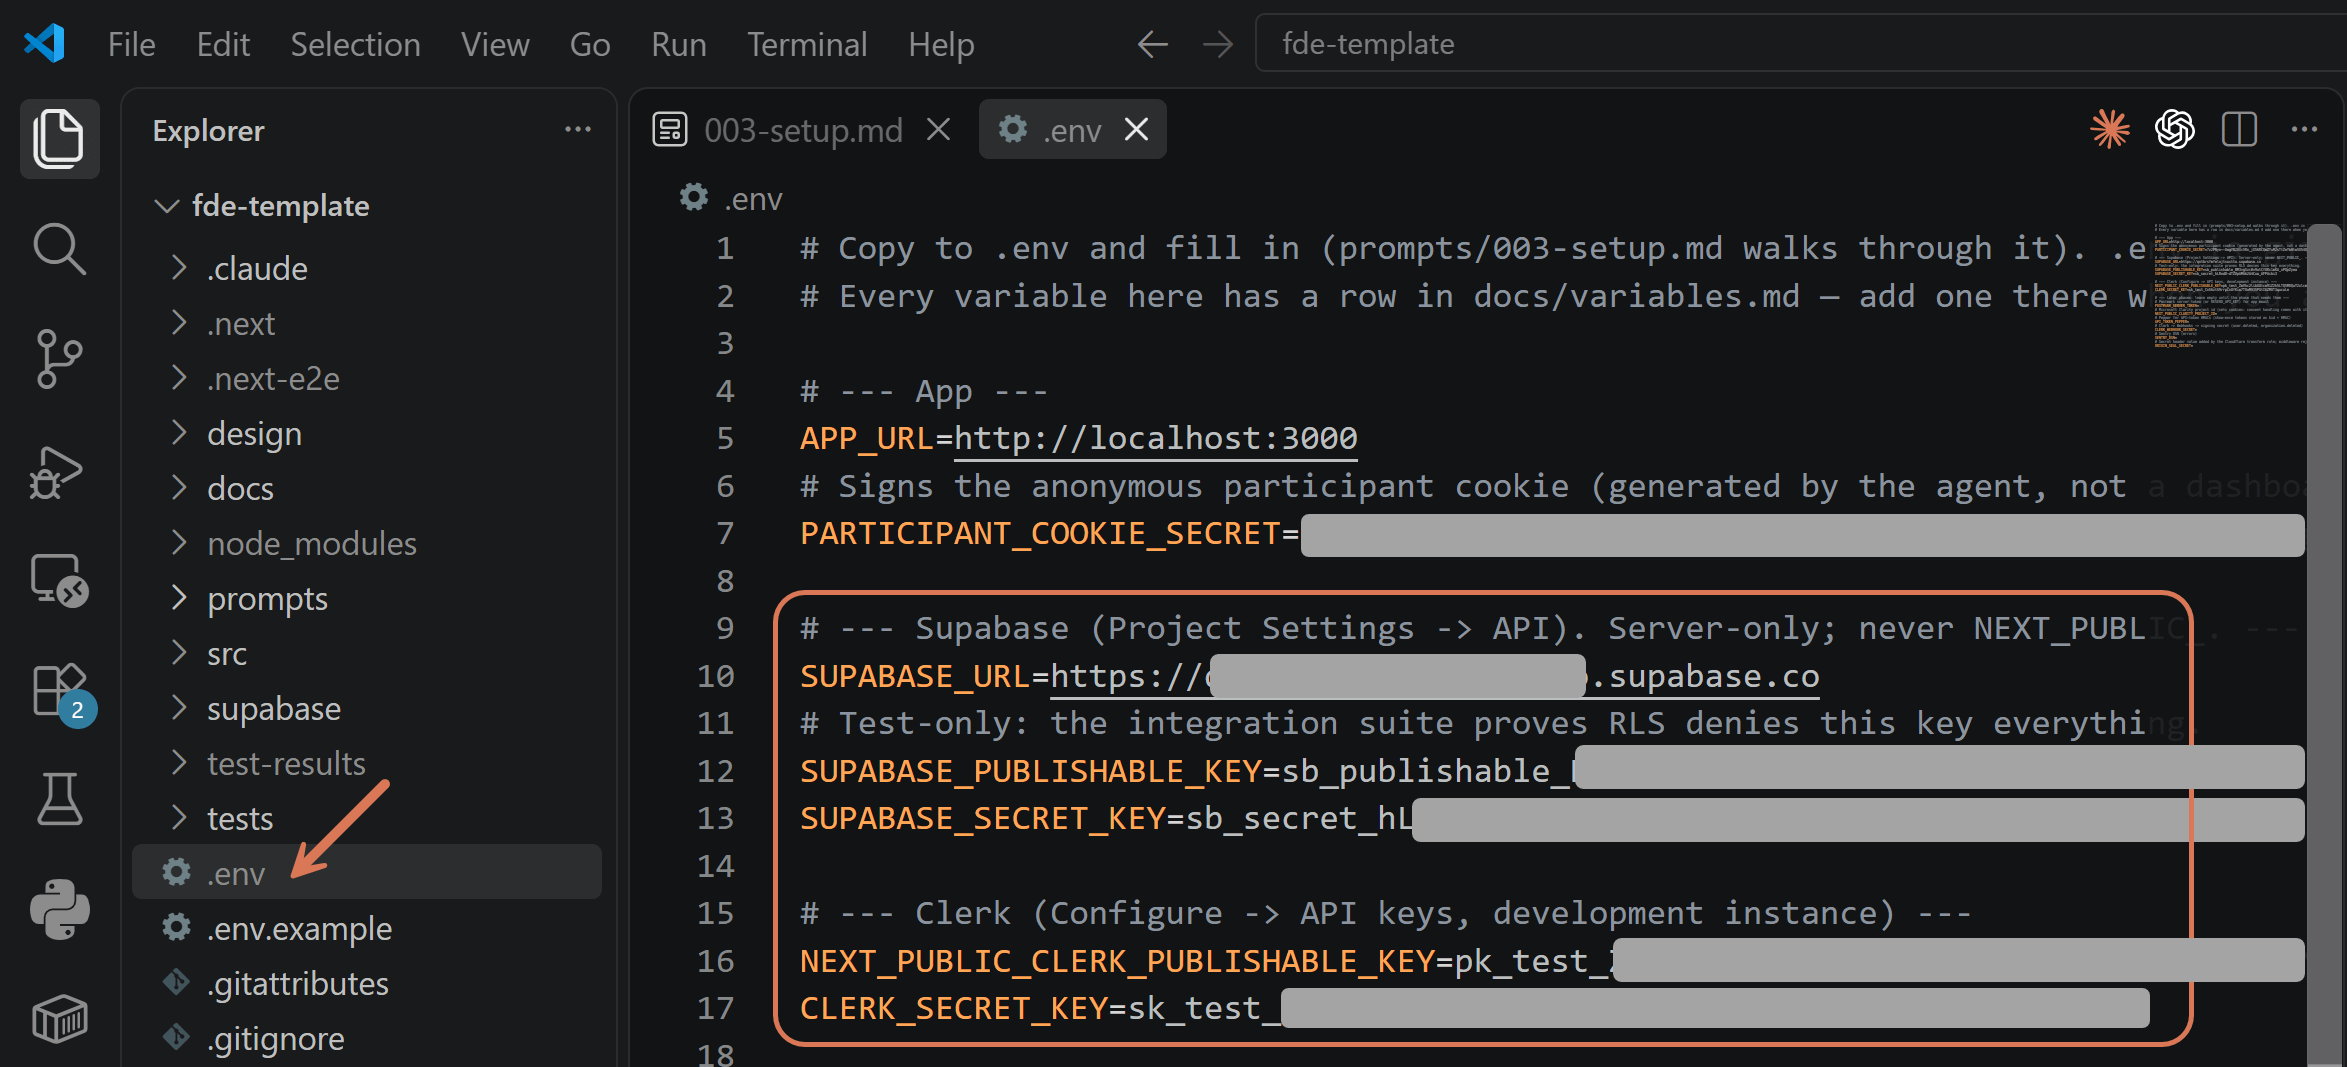
📌 Keys go into .env and nowhere else - never into the chat. A key that touched the chat should be treated as compromised and rotated (regenerated). For production, you will store them elsewhere.
Ask the agent:
I configured the secrets in .env. Please verify connections to Supabase and Clerk. All should be green (not literally). If not, let the agent guide you.
6. Step 4: Sign Up with Google, See Your Data
The screens exist and the two services are connected. This step makes them real: signing in, a database, and who is allowed to do what. It is the long one, though. You can delegate that work and go do something else.
Ask the agent (Opus 5 worked for ~30 min):
Read AGENTS.md and design/README.md. Build Phase 1 for real: sign-in, a host's own rooms, the public room page anyone can use without an account, questions, and upvotes.

Check the ground first — the Supabase MCP answers, the project has no tables, .env is filled — and stop if any of that is false. Then plan in one page and stop.

Build it. The screens from design/ keep their shape; what changes is where their data comes from and how users can authenticate. Use standard Clerk components and integrate them with the existing design.

Then commit, run it, give me the URL, and one summary: what exists, what the tests cover, what you left out, and how I check it by hand.
You will get a working app you can sign up into:
📌 Claude wrote detailed unit and integration tests. I didn’t ask for it. The instructions came from our Claude solution template.
Part of its report:
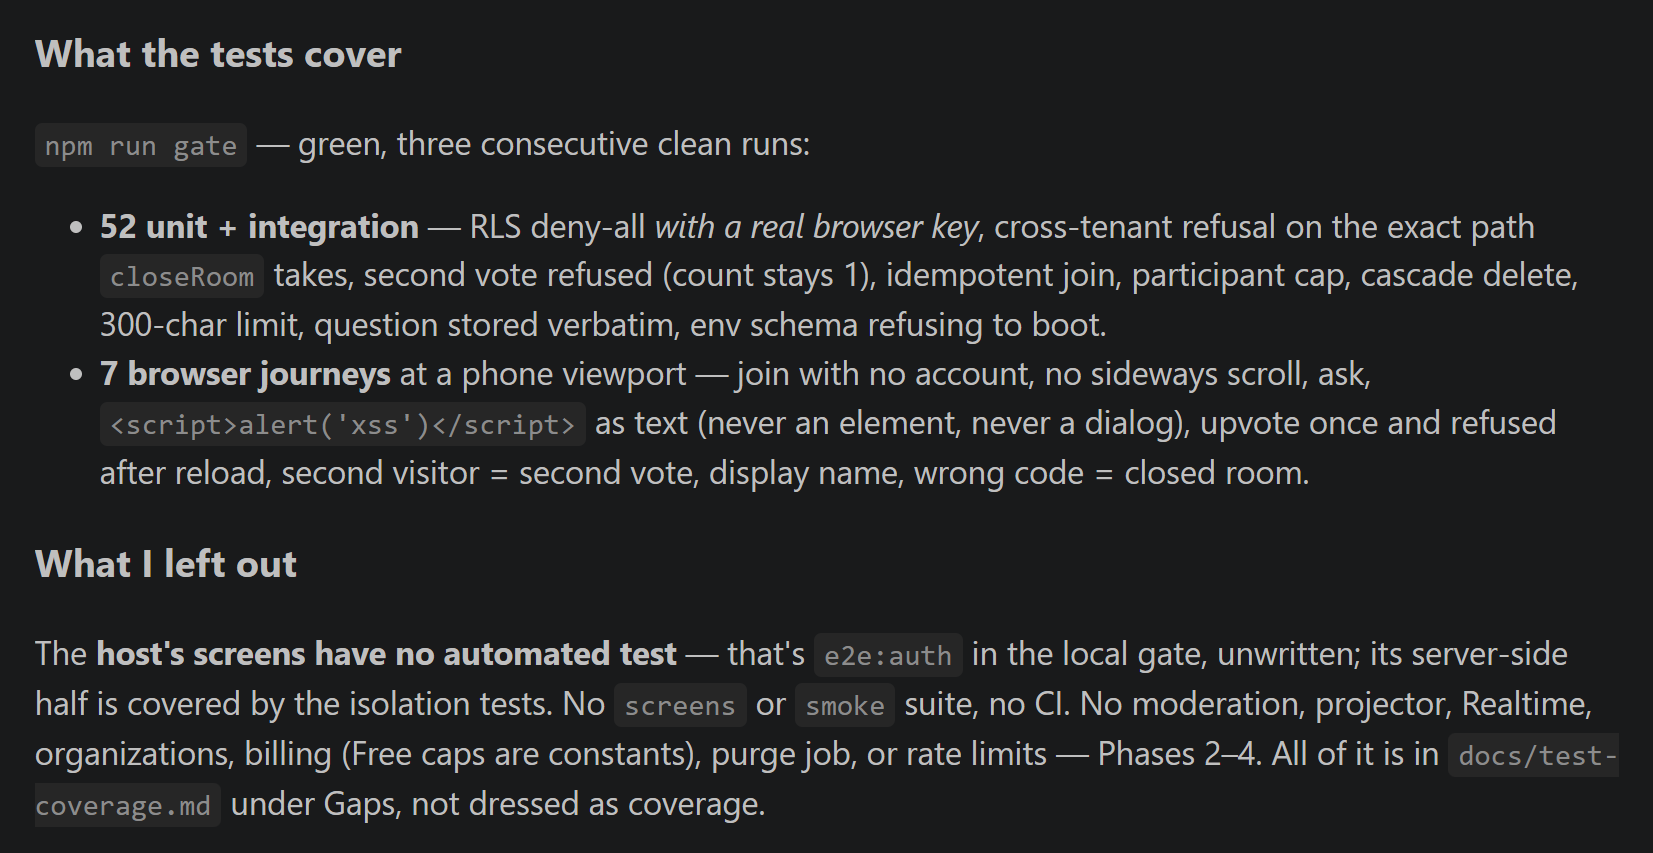
📌 We haven’t provided Claude with test accounts yet, so browser automation couldn’t be tested. That’s expected.
The session didn’t end at the first summary. I tested the app manually and asked for what's missing. The follow-up prompt that was actually run:
Issues:
- Implement the 'Open projector' and 'Close room' buttons - they currently do nothing.
- Add a QR code for the room URL, perhaps displayed on request on `/rooms` and inside the room. Include buttons to copy the URL and download the QR code as a PNG.
- Add confirmation before closing a room. Closing should block anonymous participants only. I should still be able to open the room, view questions, and reopen it for participants.
- Remove the Next.js icon.
Claude fixed all those issues in one iteration. I already included them in the video above.
📌 Note the shape: a flat list of what’s wrong or missing, each item saying what should happen rather than how to build it. You define the intent, without micro-managing the agent.
You can also forget most of what you heard about prompt engineering - agents don’t need it anymore when they have the right context. “IMO this looks bad. Look at the borders” with the attached screenshot is perfectly fine.
7. Step 5: Configure Billing and Plans, See a Purchase
We can’t offer our product for free forever. The next step is configuring subscription plans. Let’s start with B2C.
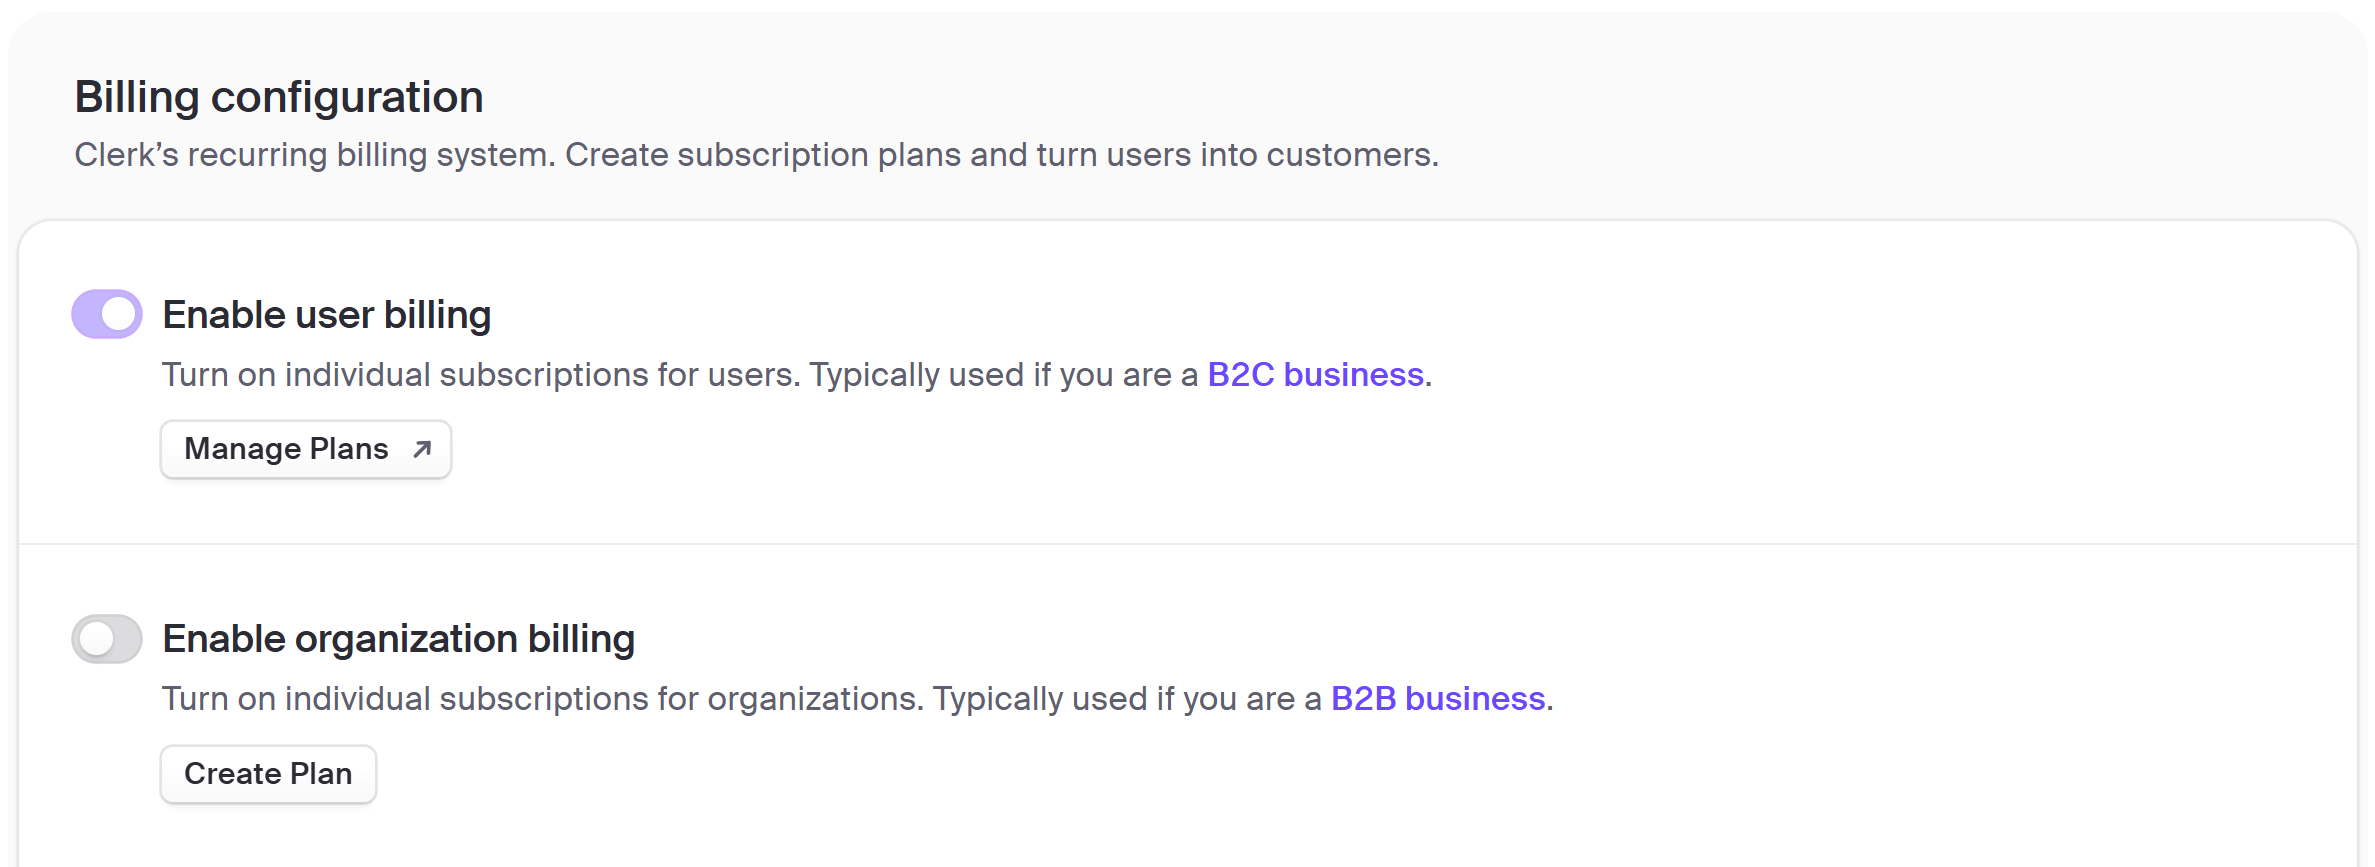
Step 5.1: Enable billing
Go to Clerk Dashboard > Configure > Billing and turn on “Enable user billing:”
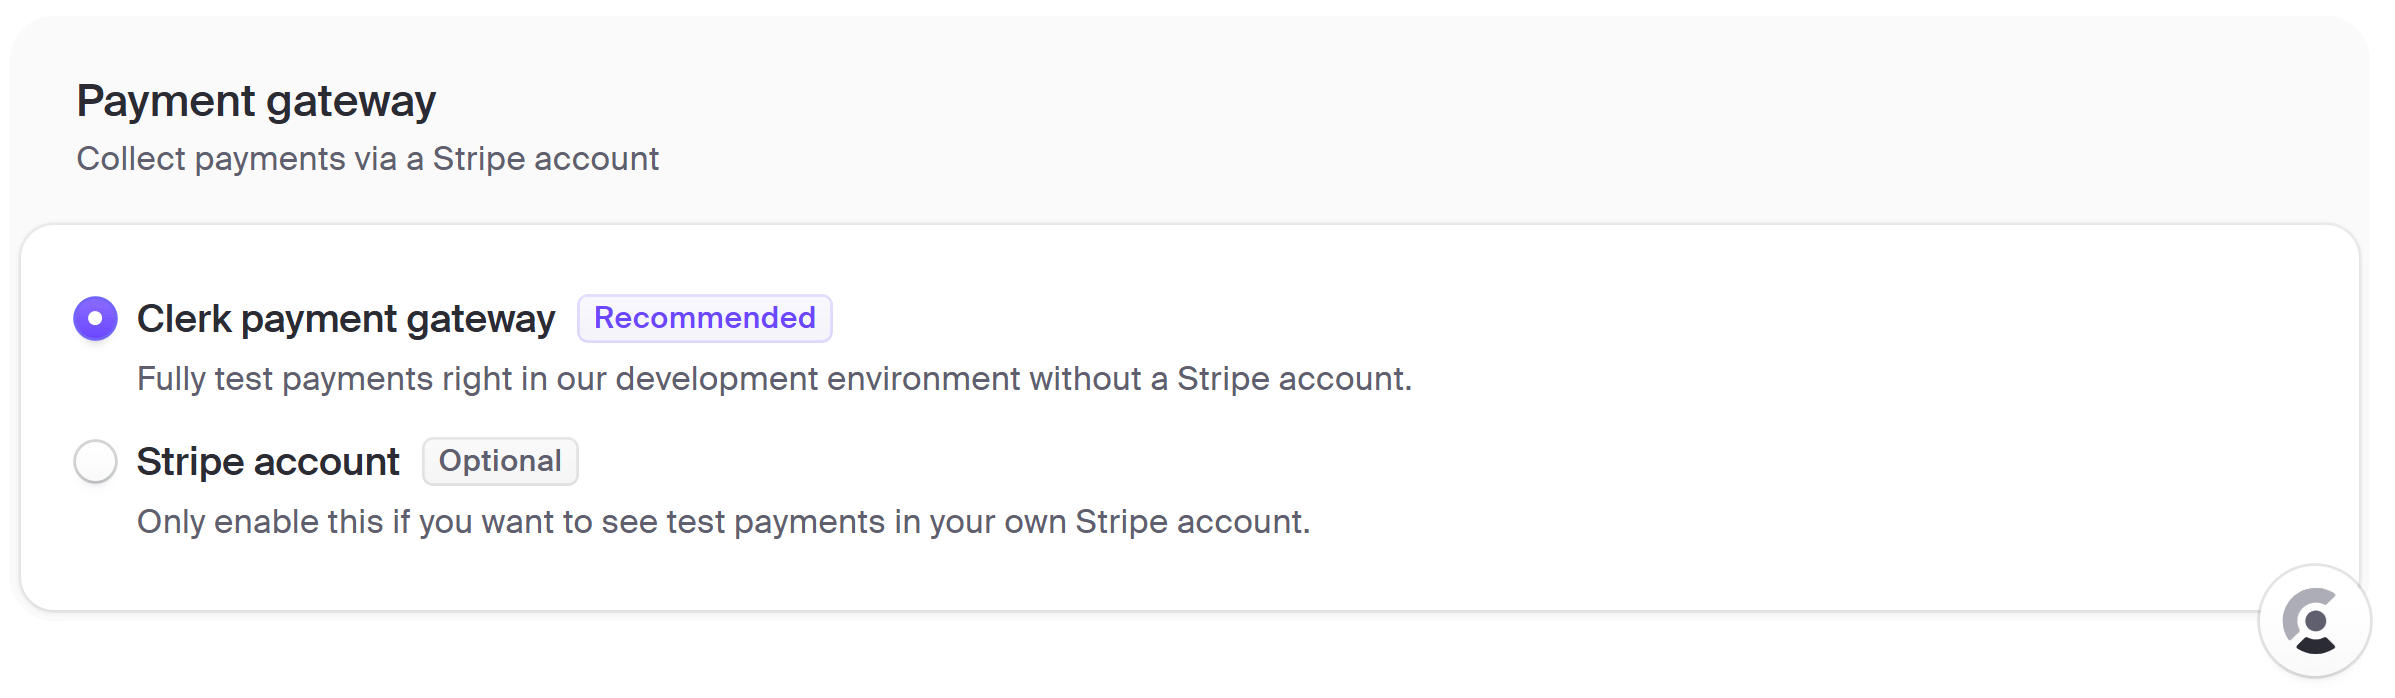
On the same page enable “Clerk payment gateway” - on a dev environment, we don’t want real transactions (later, the integration with real Stripe is banal):
Step 5.2: Define Subscription Plans
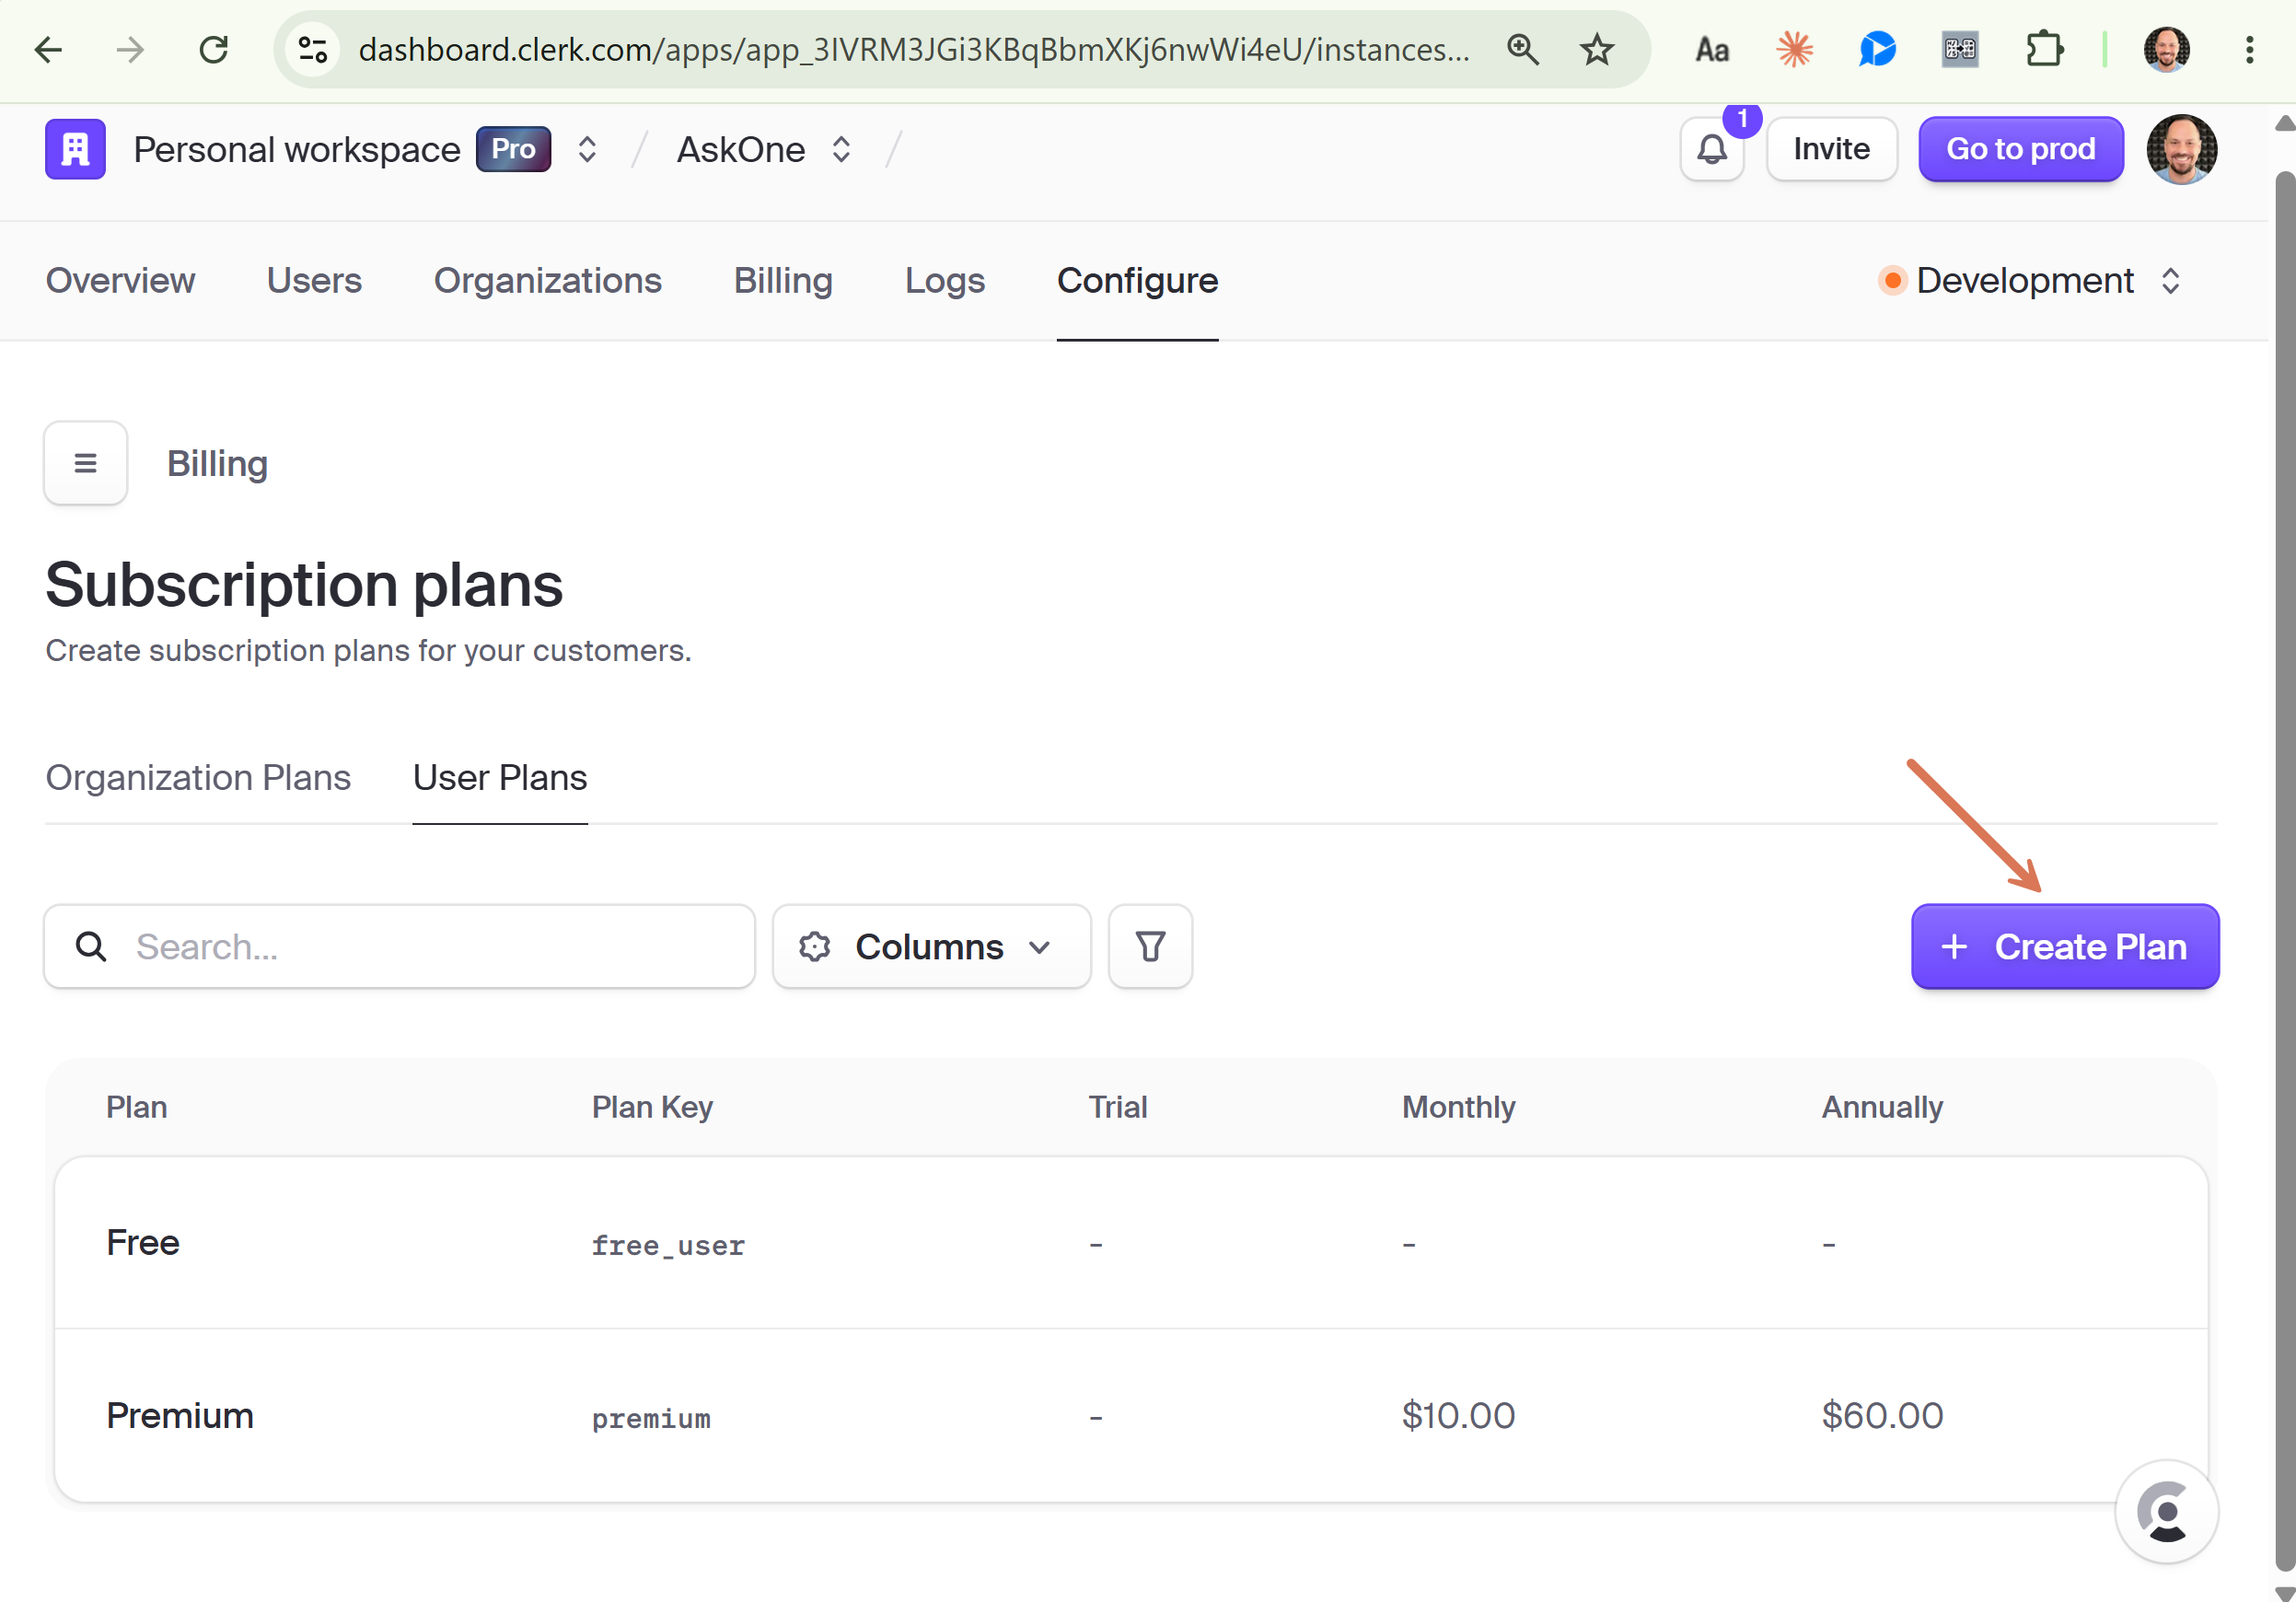
Next, go to Clerk Dashboard > Configure > Billing > User Plans. Define two plans, for example:
Free
Premium
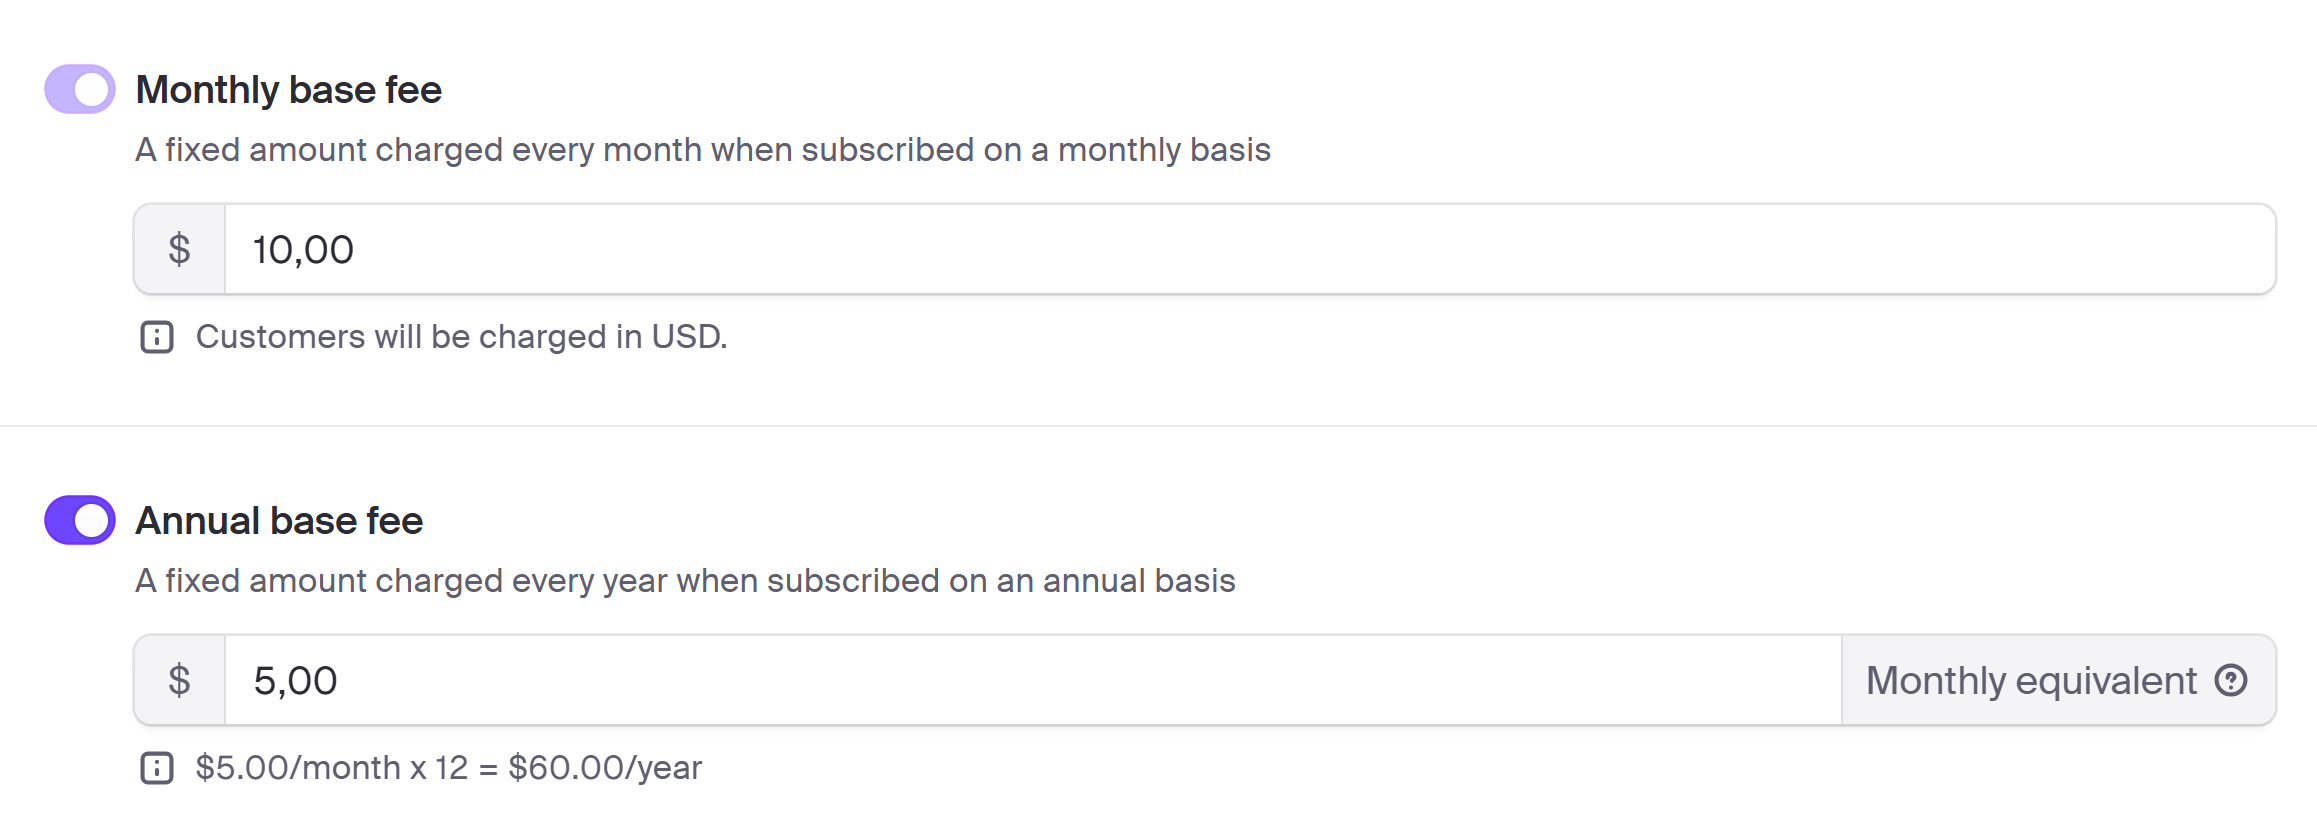
For each plan you can configure a monthly base fee (e.g., $5) and an annual base fee with an optional discount (e.g., $50) and enable/disable free trials. Play with the options:
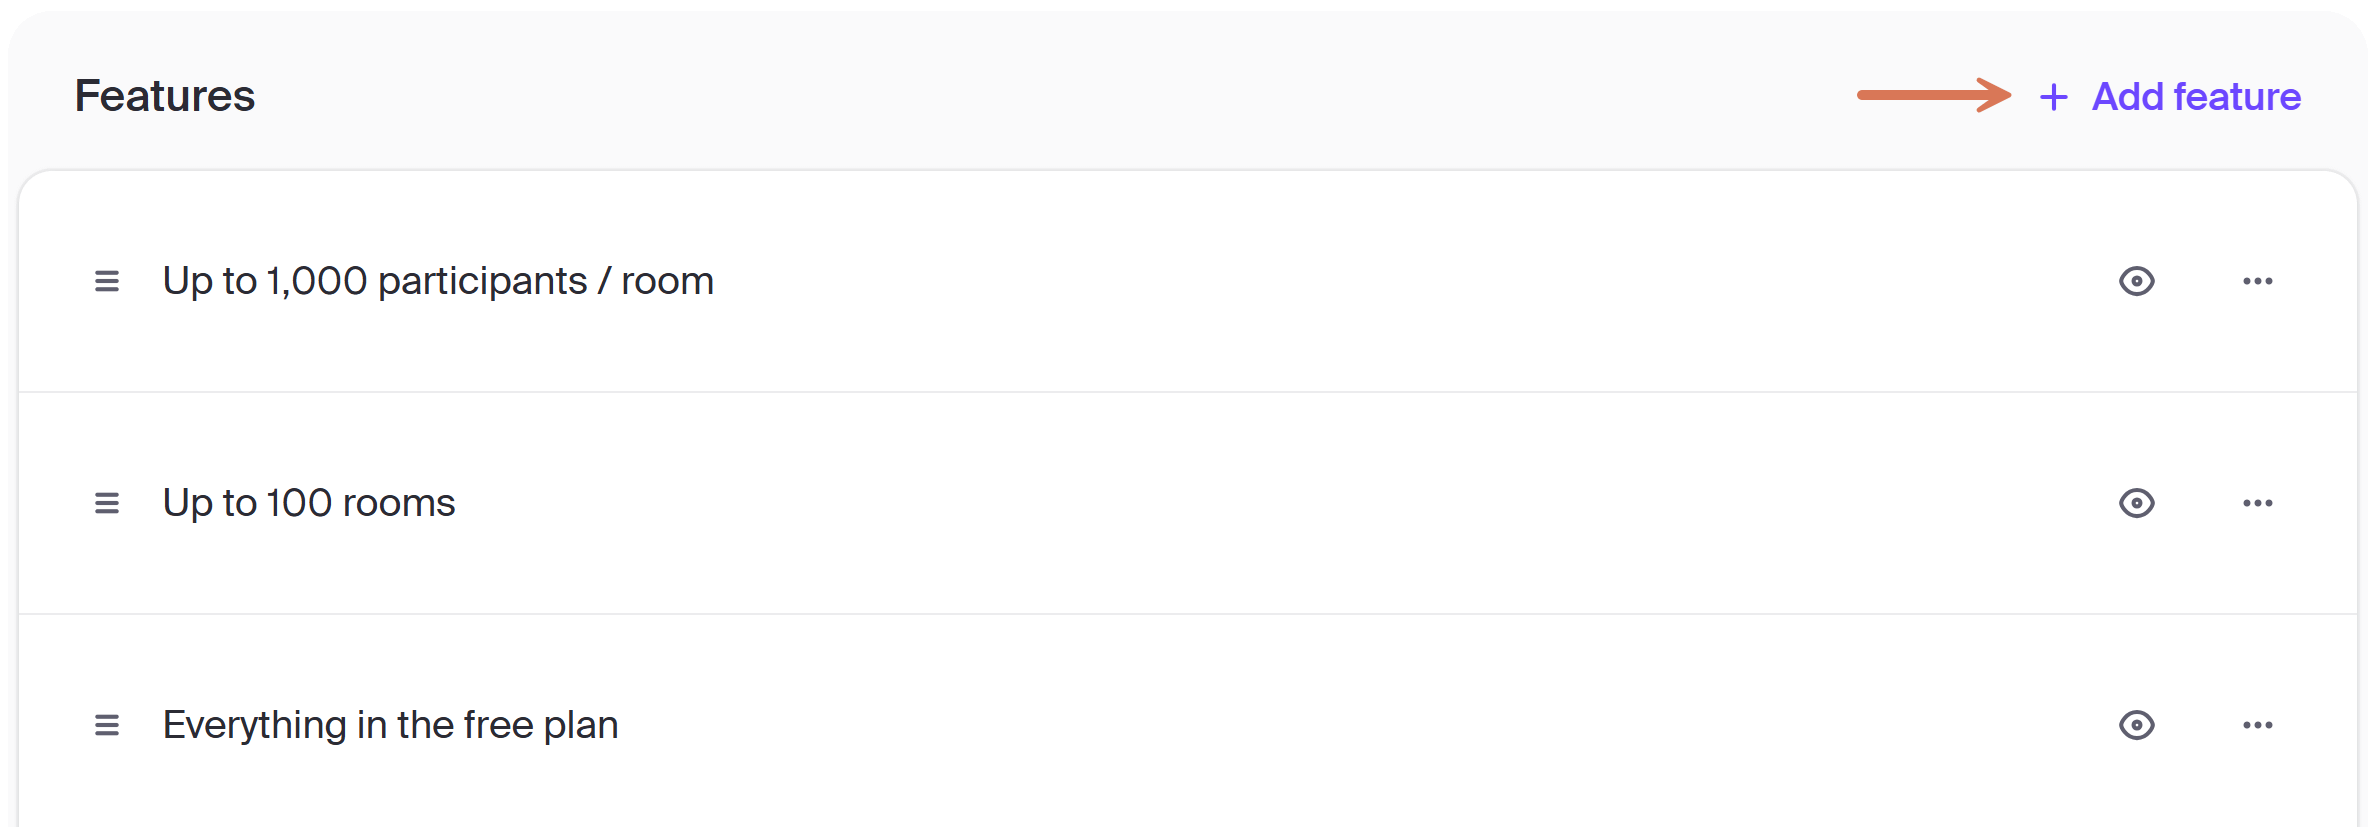
An important configuration element is the Features. These can be used to guide the app behavior (entitlements, we will discuss this later) or displayed in public pricing plans:
Step 5.3: Test it
Wait. What about the prompt?
There is no prompt. We’ve previously implemented Clerk integration and asked Claude to use Clerk components. Subscription plans just work based on the current Clerk configuration:
8. Step 6: Add Test Accounts and Browser Automation
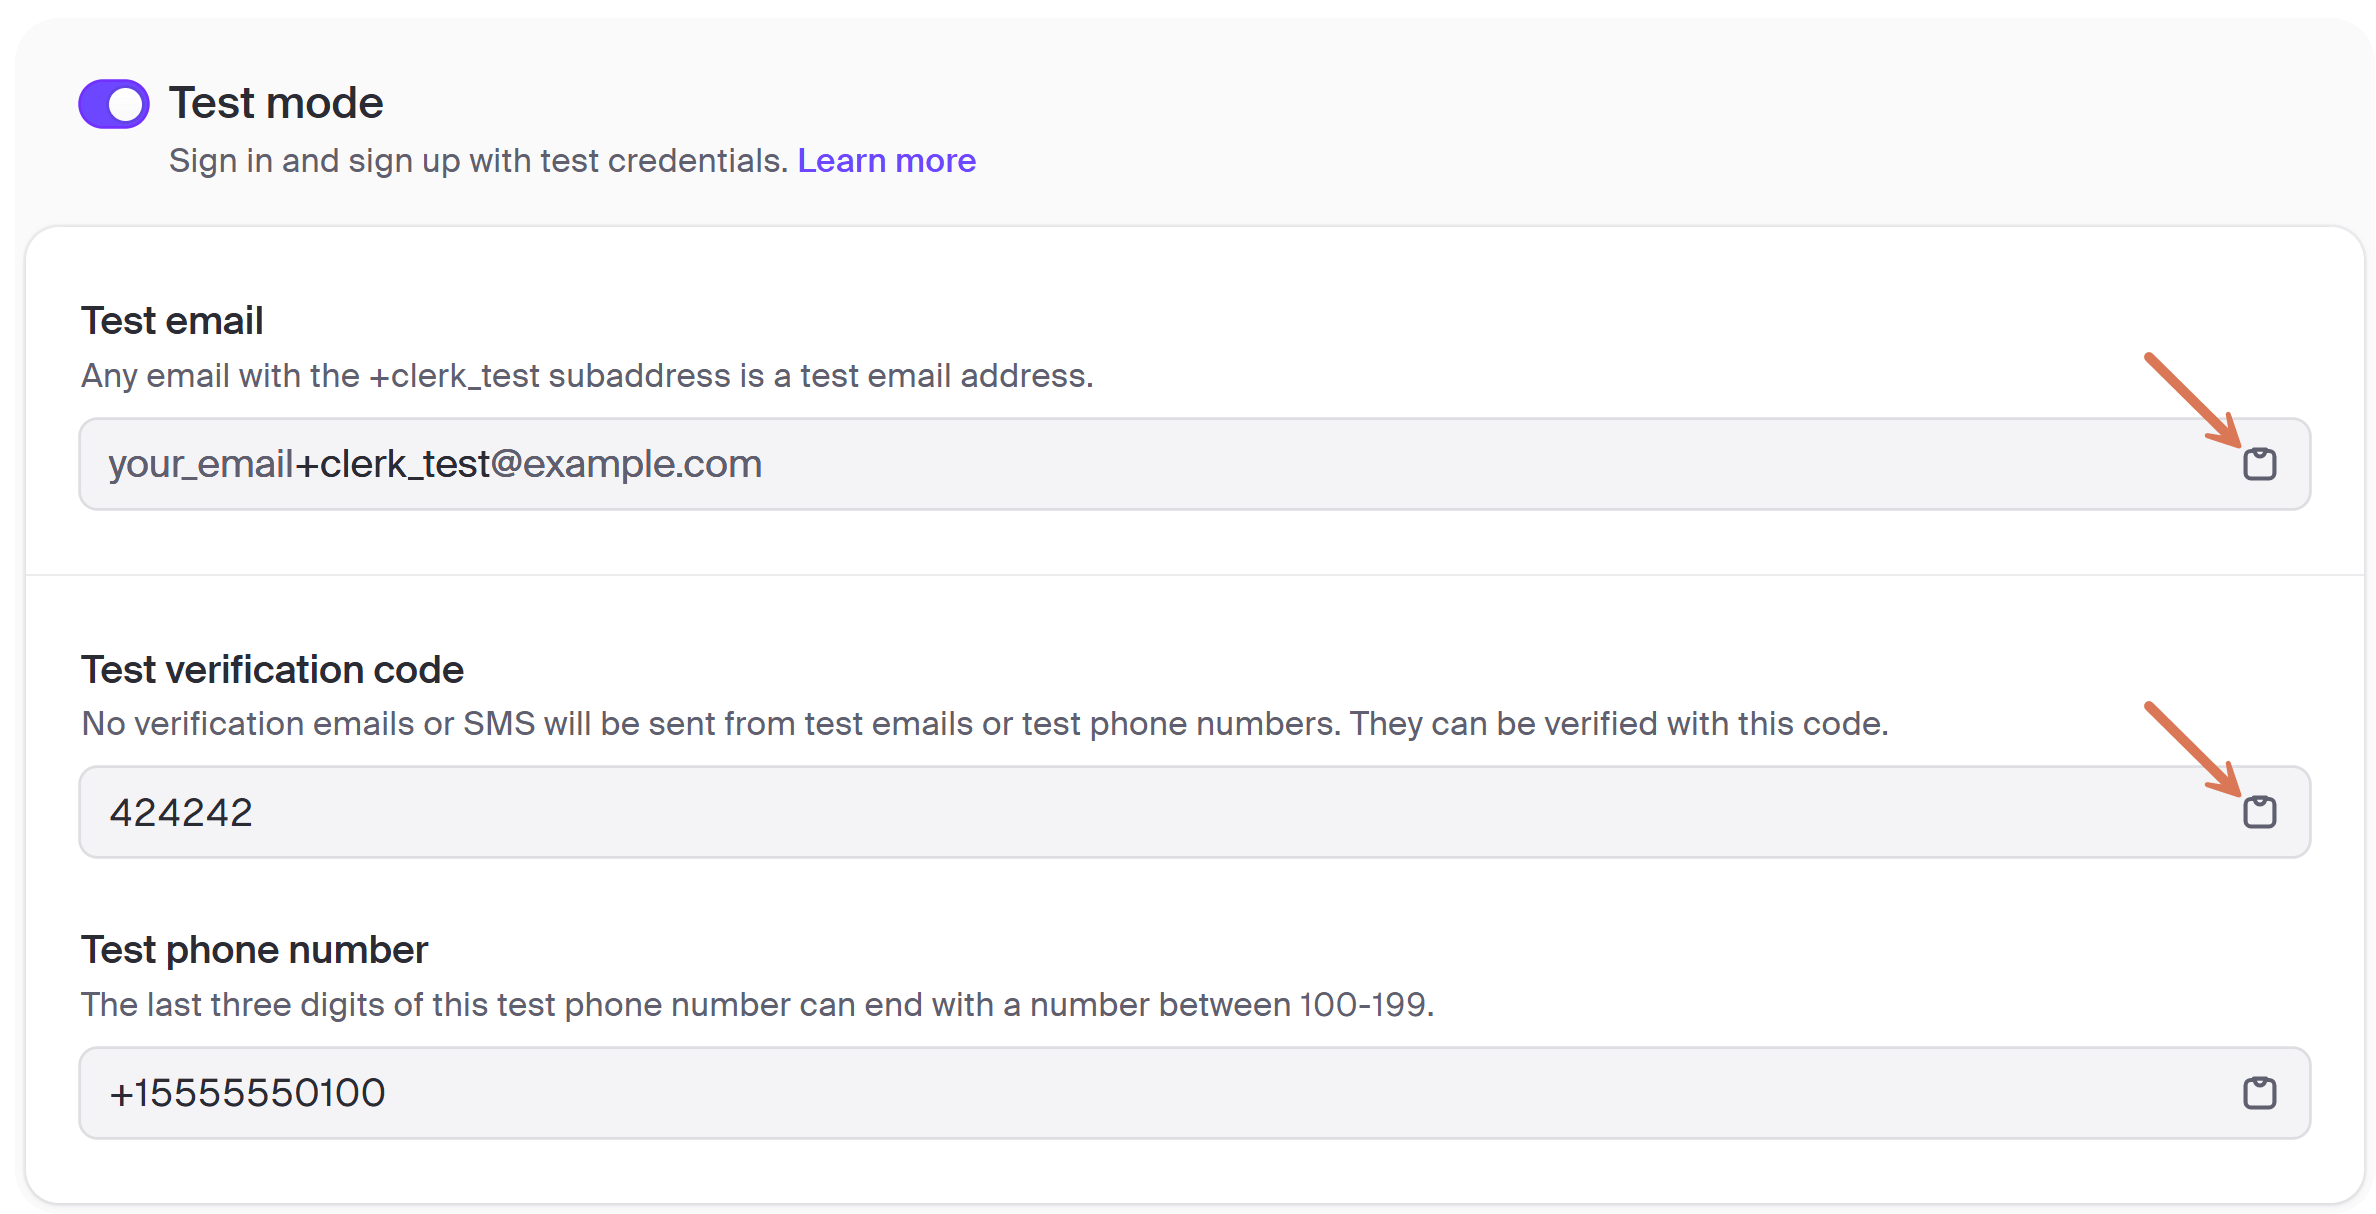
Go to Clerk Dashboard > Configure > Instance. Enable the “Test mode.” This will allow the agent to sign in to your development environment. I recommend you change the default verification code (here, “424242”):
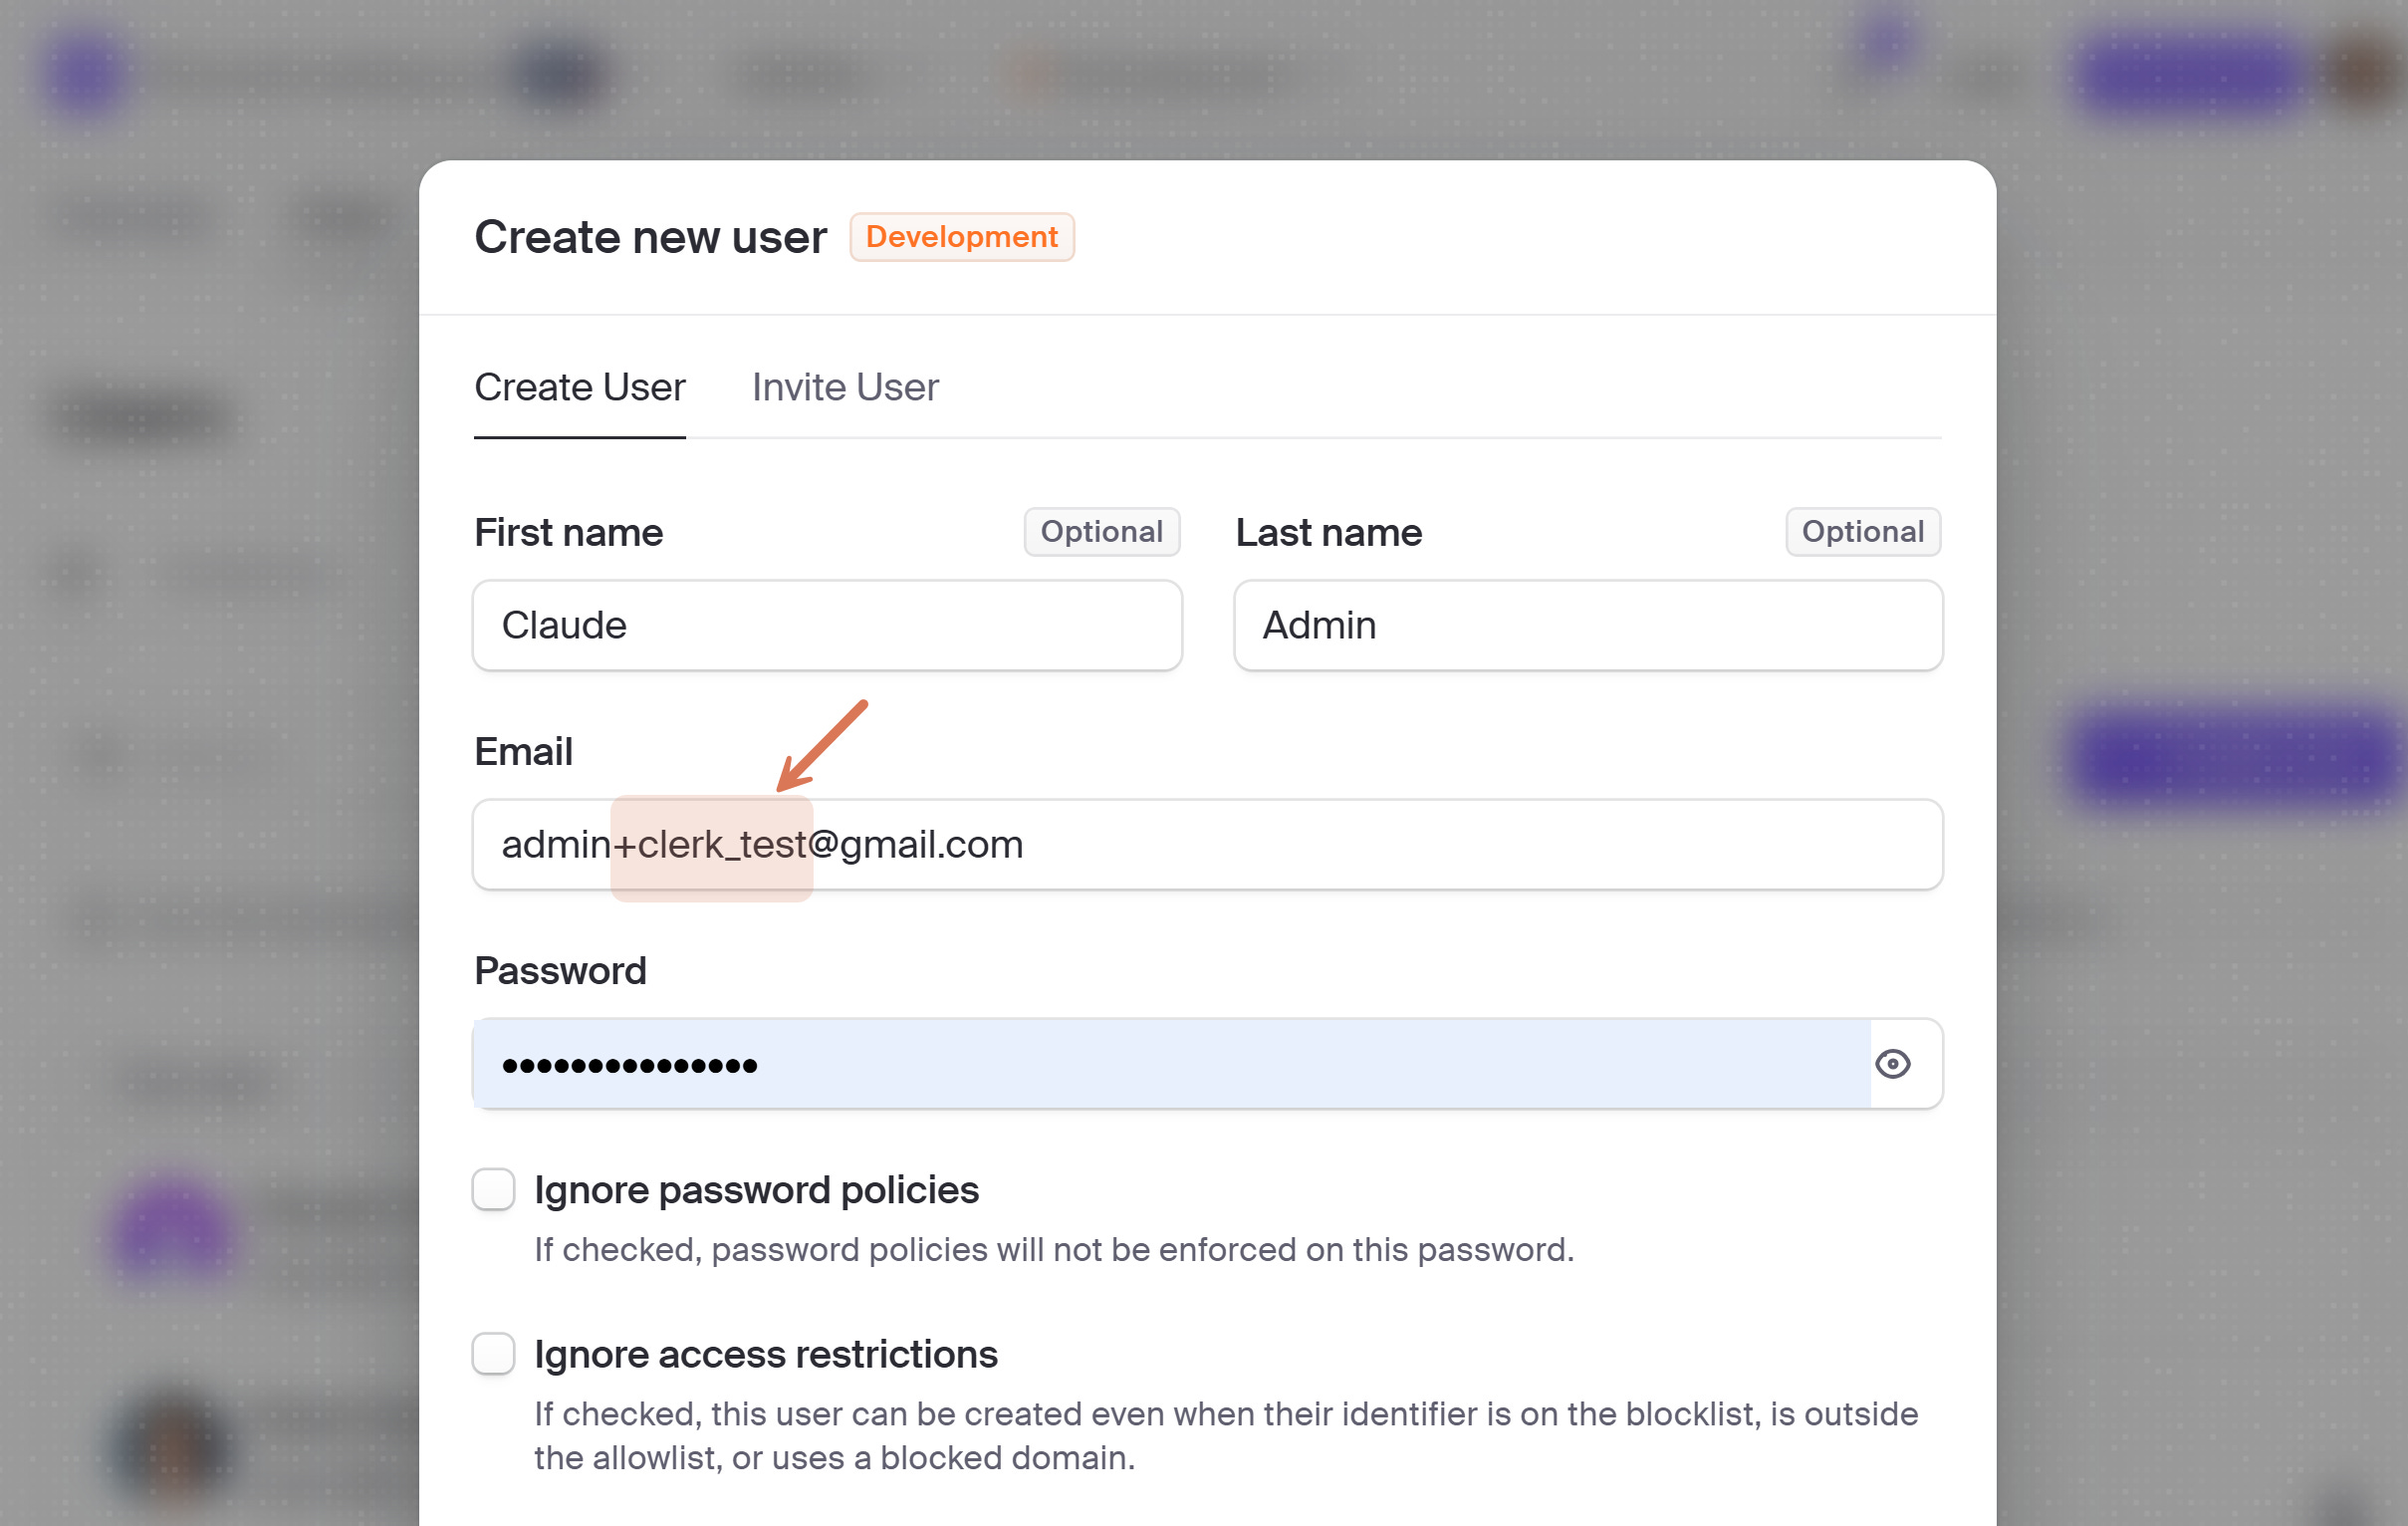
Next, go to Clerk Dashboard > Users and create an account with a special +clerk_test@ part, for example:
Save the user data to your .env file (we discussed that file earlier):
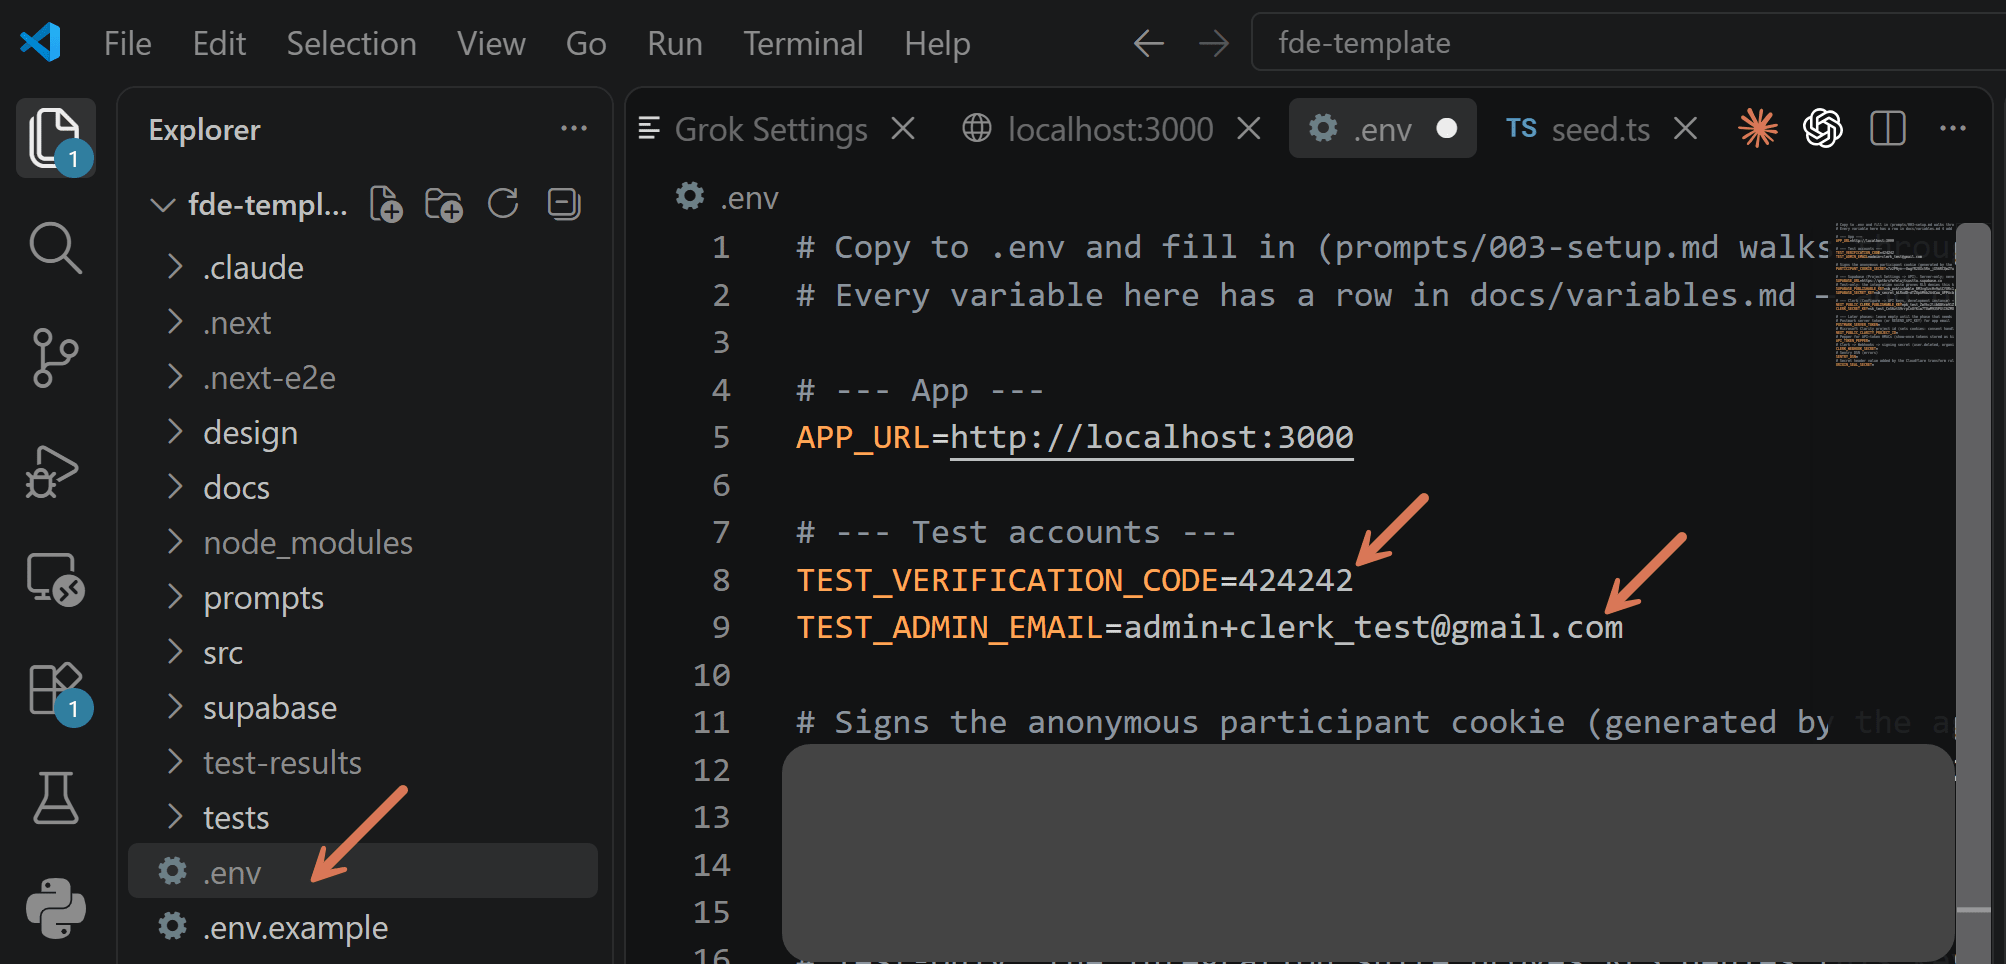
For your convenience:
# --- Test accounts ---
TEST_VERIFICATION_CODE=424242
TEST_ADMIN_EMAIL=admin+clerk_test@gmail.com
Next, ask the agent (Opus 5 worked for ~25 min):
Implement e2e test scenarios using browser automation (headless). In .env, I defined Clerk's:
TEST_VERIFICATION_CODE
TEST_ADMIN_EMAIL

Suggest complete scenarios (such as Sign in > Open a new room > Users ask questions > Users upvote questions > Admin can see these questions on a Projector > Admin closes the Room) and tell me what's covered. Run those tests.

Make sure test documentation is updated and create or show me a document with roles and permission matrix + what's not implemented yet.
You will get a detailed test report:

And detailed documentation with a permission matrix:

Review it against your intent. This is the base for future tests and automated code inspections. Without it, your agent may not know whether the observed behavior is a bug or a feature:
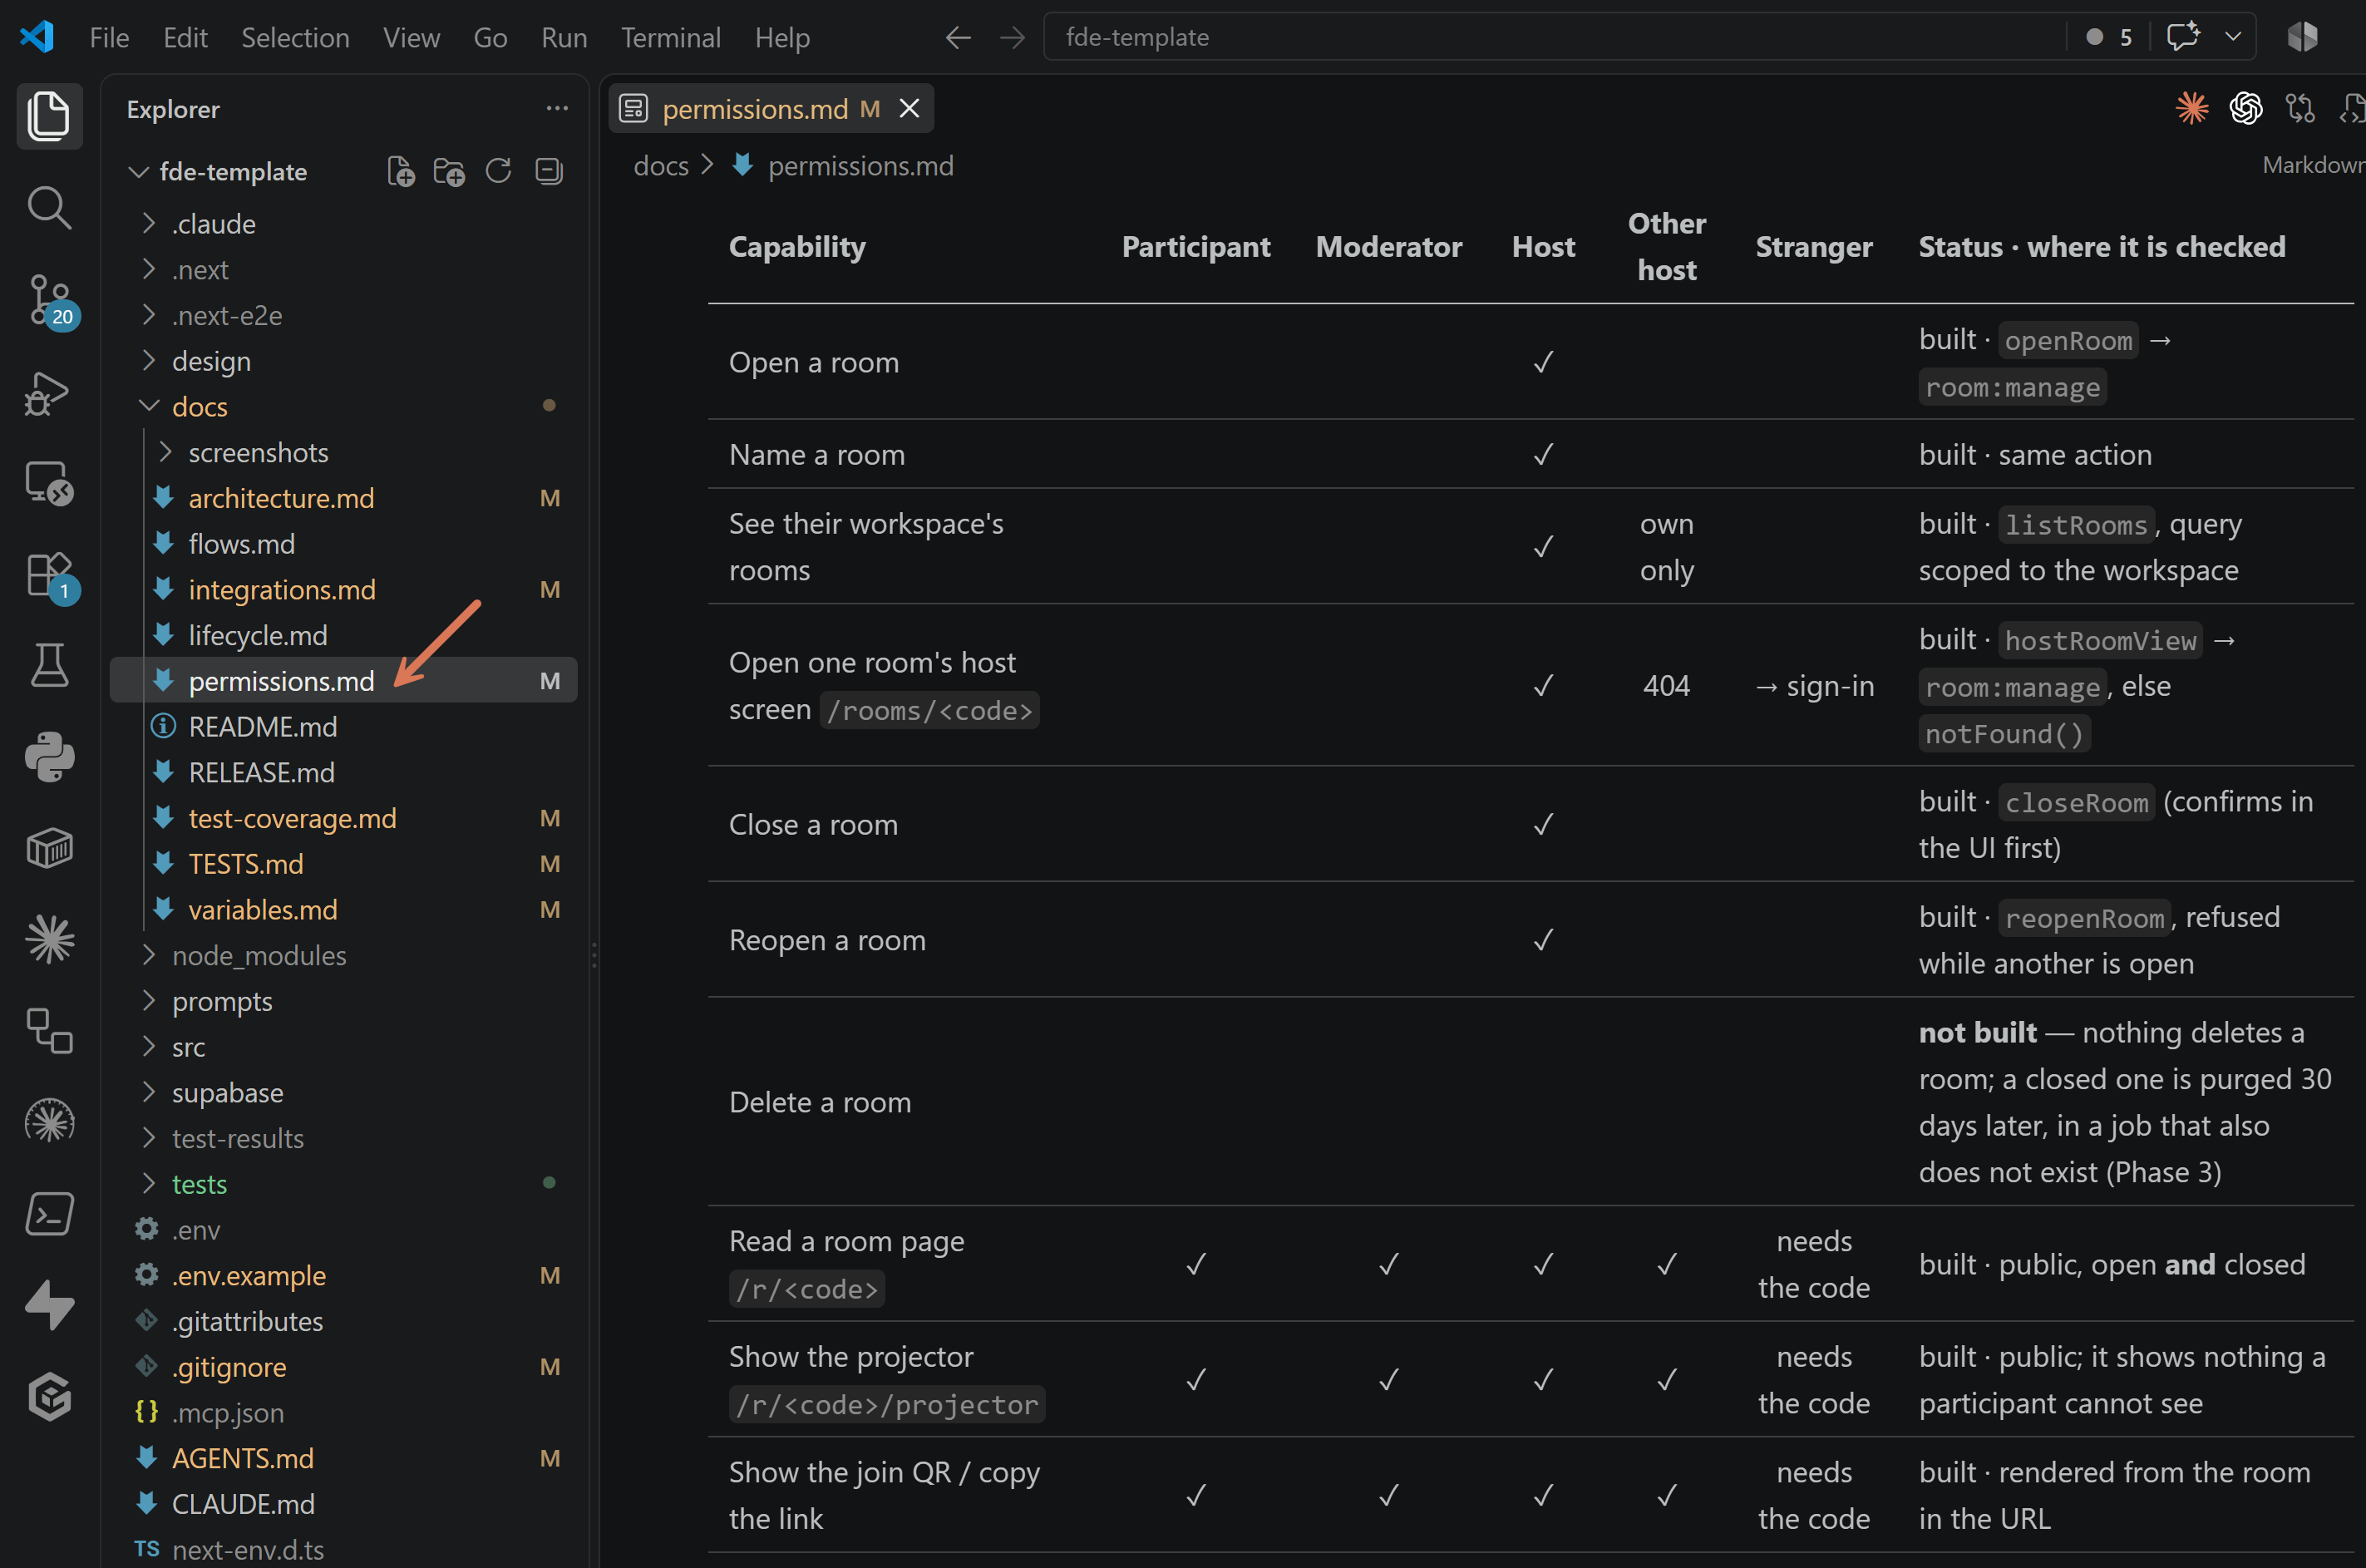
If you don’t see nice markdown formatting: Right click the tab name above the file content > “Open with” > “Markdown preview.”
9. Step 7: Publish it, Simplified
Let’s publish our dev environment. No advanced branches yet. For that, we need:
A free GitHub account
The GitHub CLI
A free Netlify account
Step 7.1: Install GitHub CLI
I’m not presenting creating a GitHub account. It’s straightforward.
Once you have one, go to https://cli.github.com/ and copy the installation prompt for your operating system:
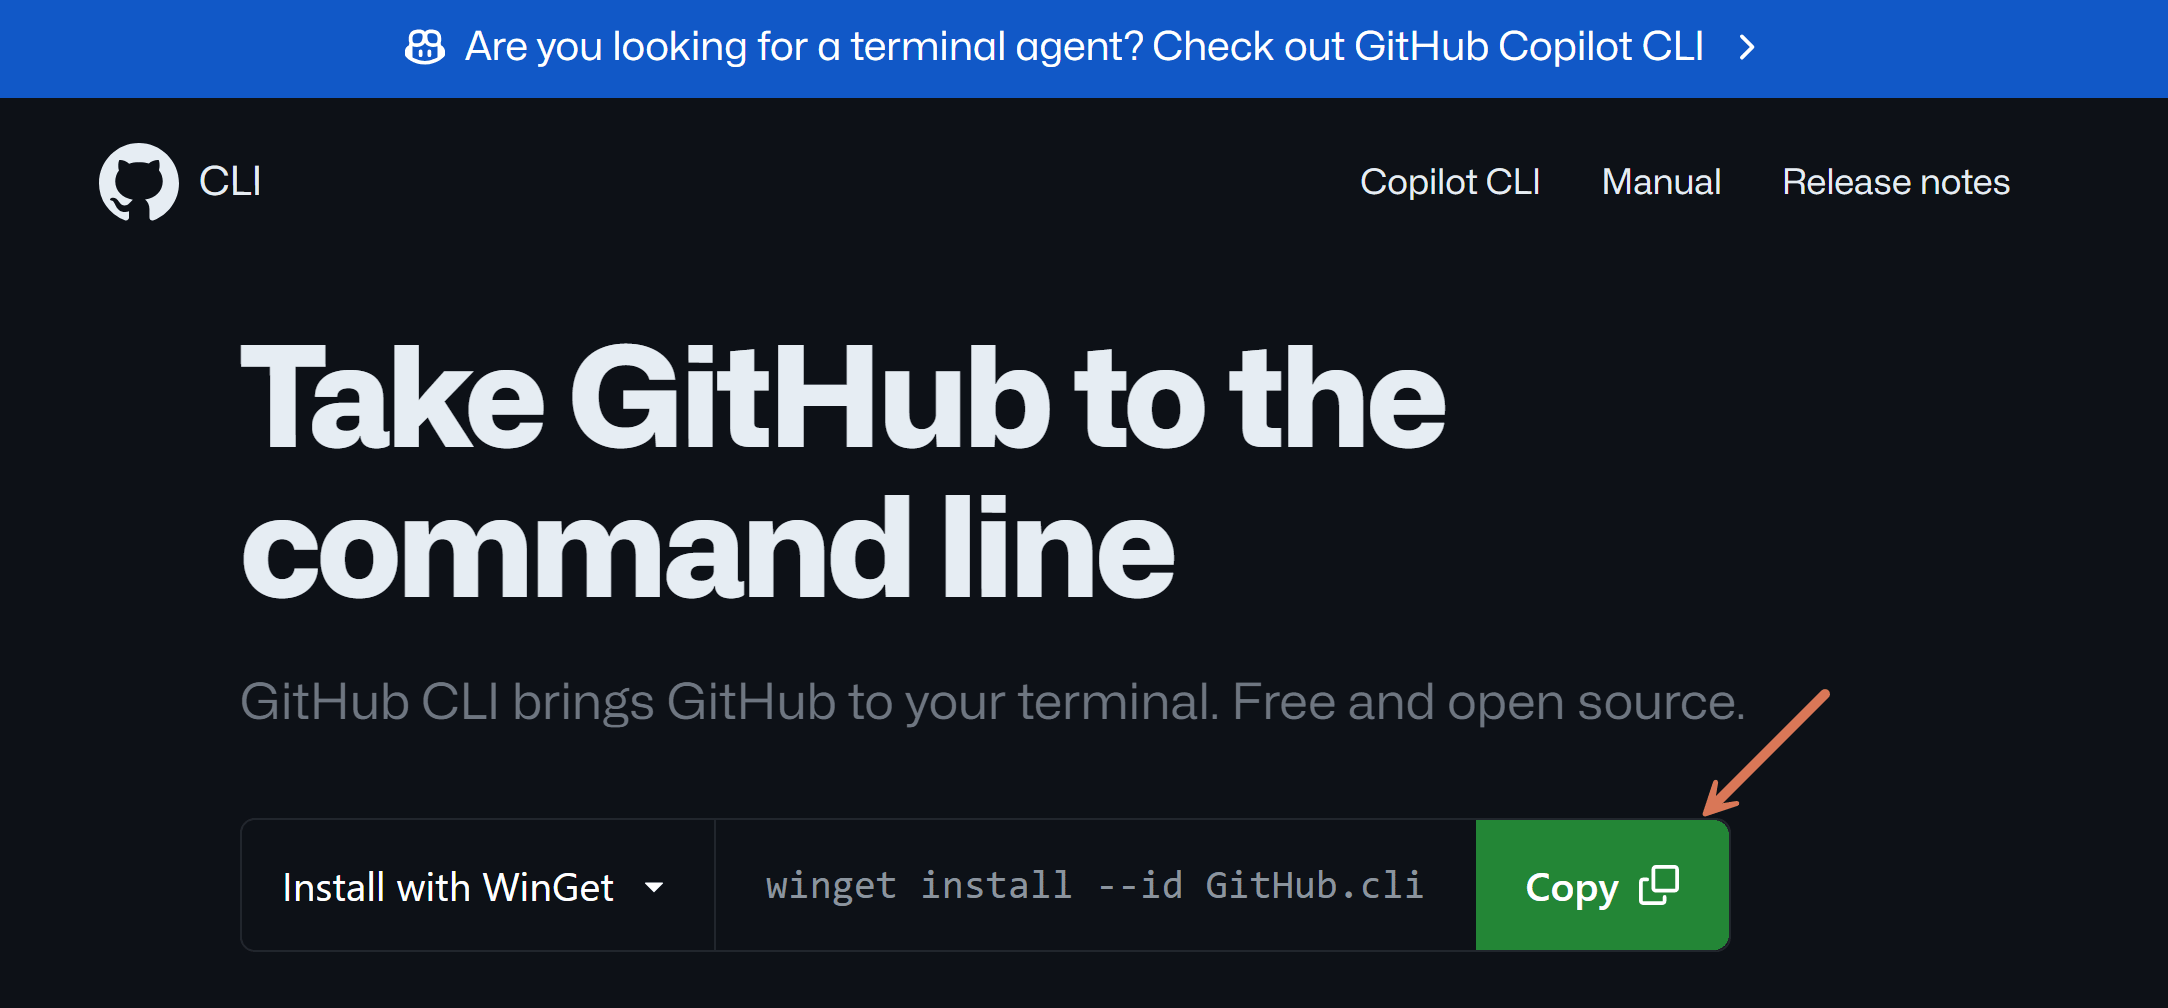
Execute it in your terminal (mine was already installed):
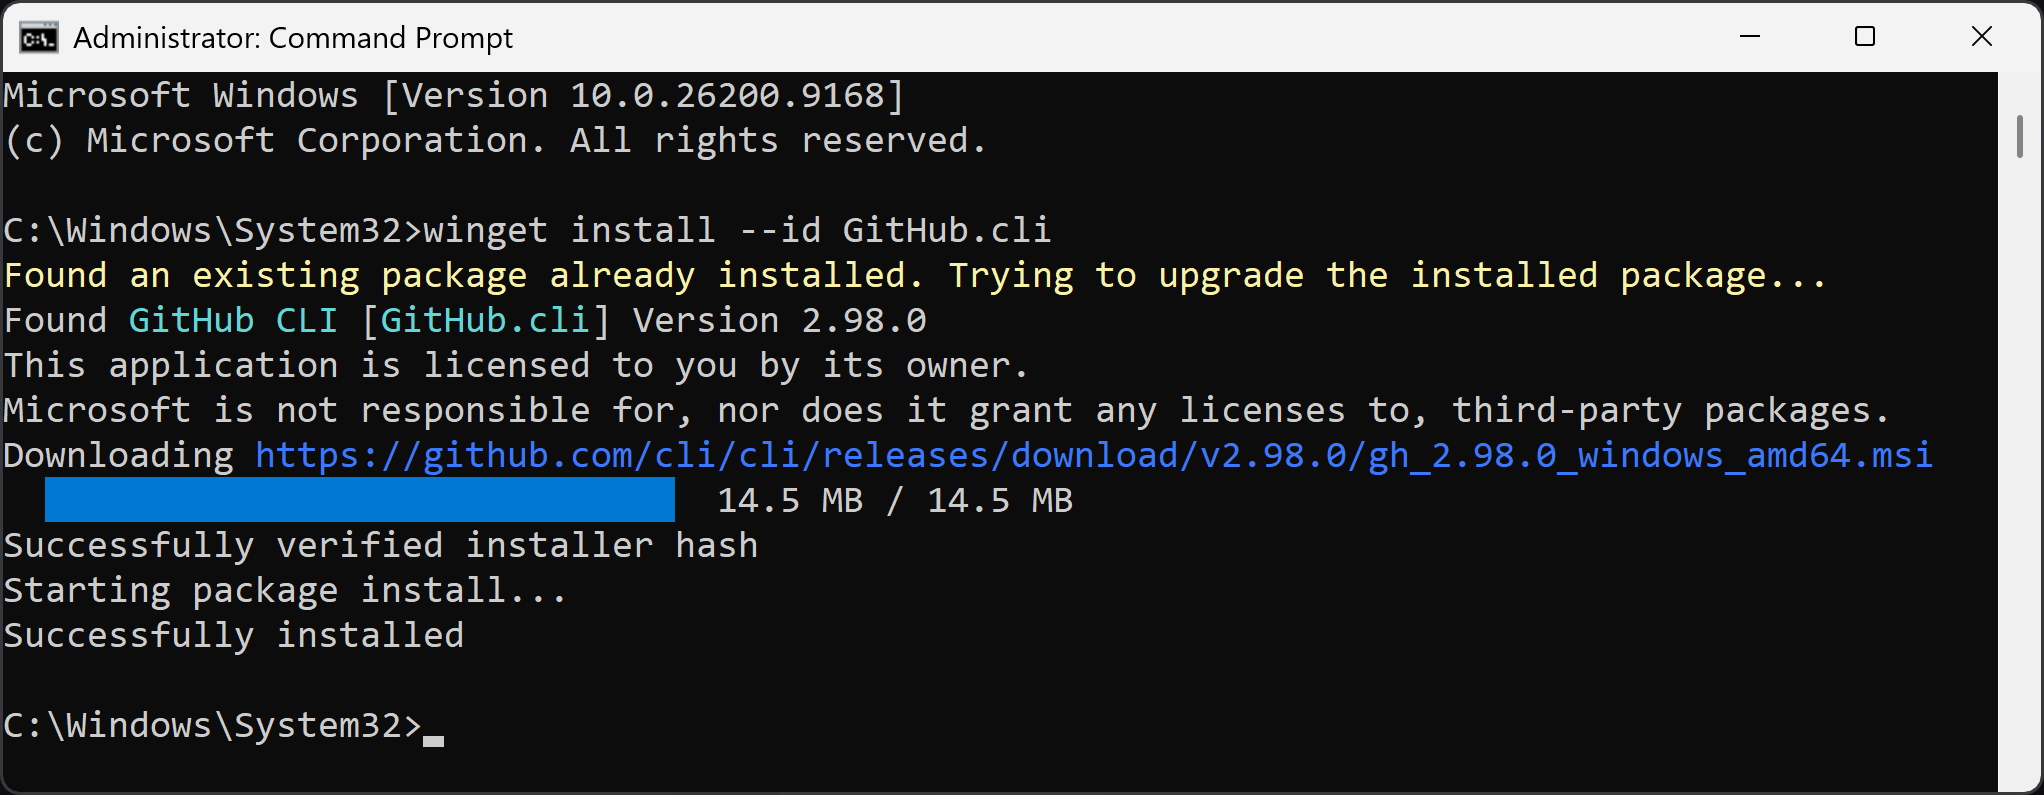
Then type “gh auth login” and answer four questions:
“GitHub.com”
“HTTPS”
“Y”
“Login with a web browser”
Hit “Enter.” Use the code displayed on the screen to authorize your device. I anonymized my code:
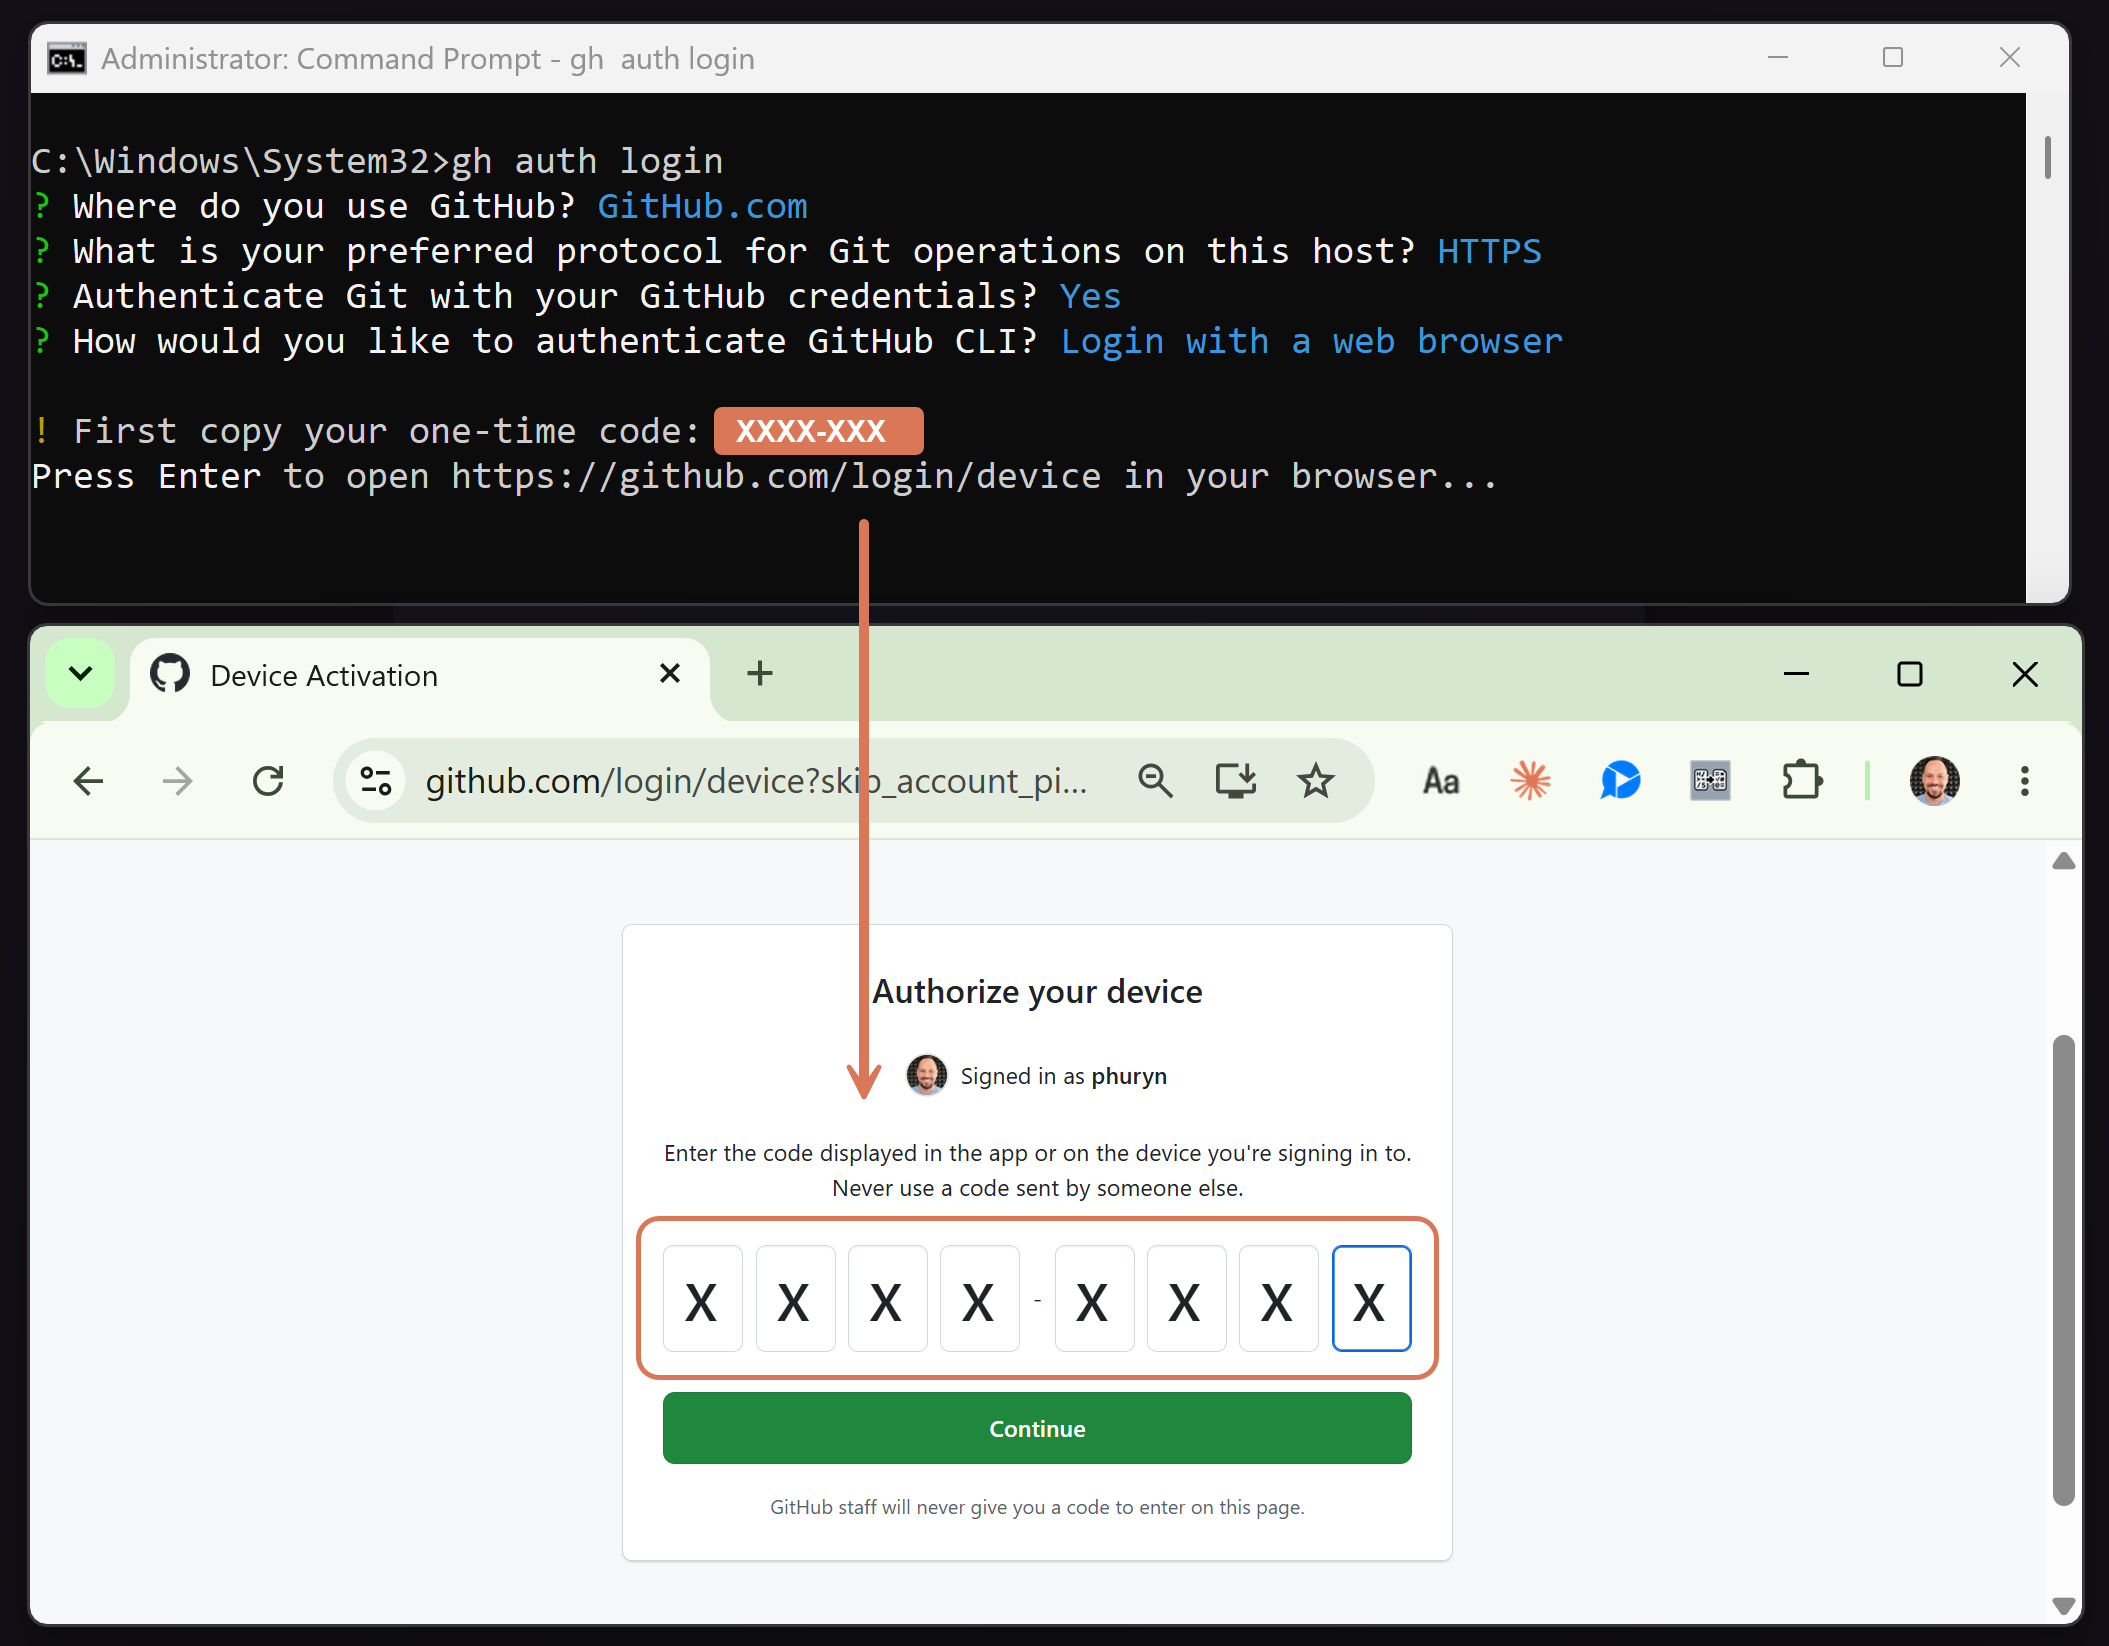
Now, ask the agent:
Just installed GitHub CLI. Create a new private repository for my project, "askone," and push the current to origin. Give me its URL.

Before the push, add netlify.toml as I will host this on Netlify.
“Push to origin” means “push to GitHub branch.” Here, it may not be needed. In the future, this is how you transfer your local changes to GitHub.
You will get a URL such as https://github.com/phuryn/askone. That's your online code repository!
Step 7.2: Publish it on Netlify
I’m not presenting creating a free Netlify account. It’s straightforward. Just remember to Sign up with GitHub.
Once inside, go to https://app.netlify.com/start > Import a Git repository > click “GitHub:”

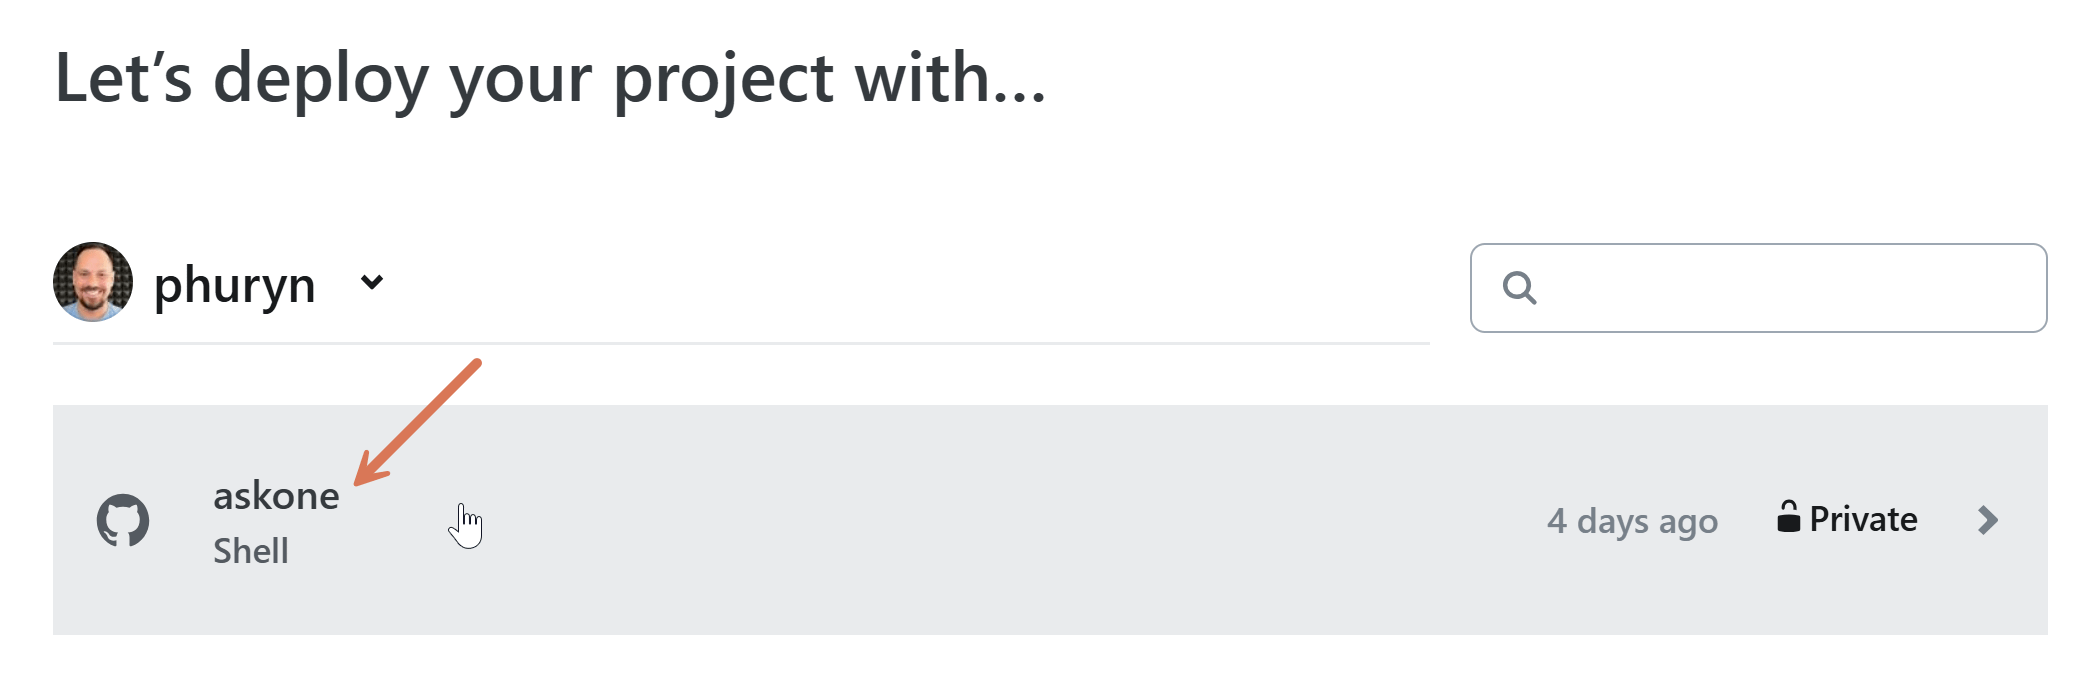
Select your repository:
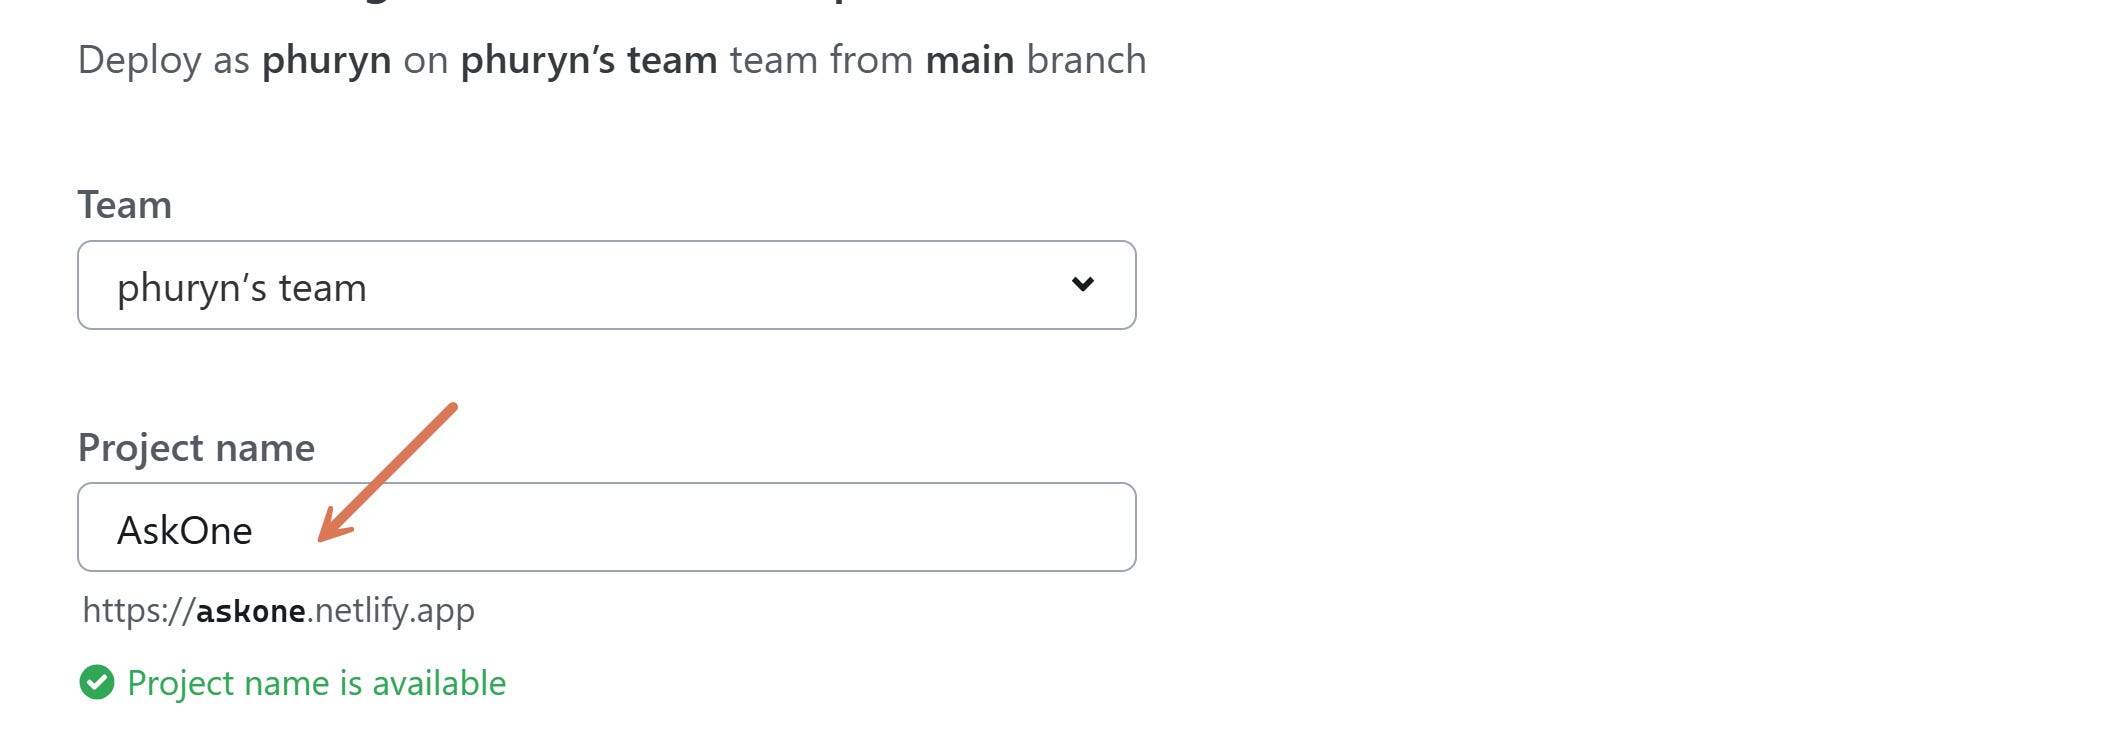
Give it a name and click “Deploy” at the very bottom of the page:
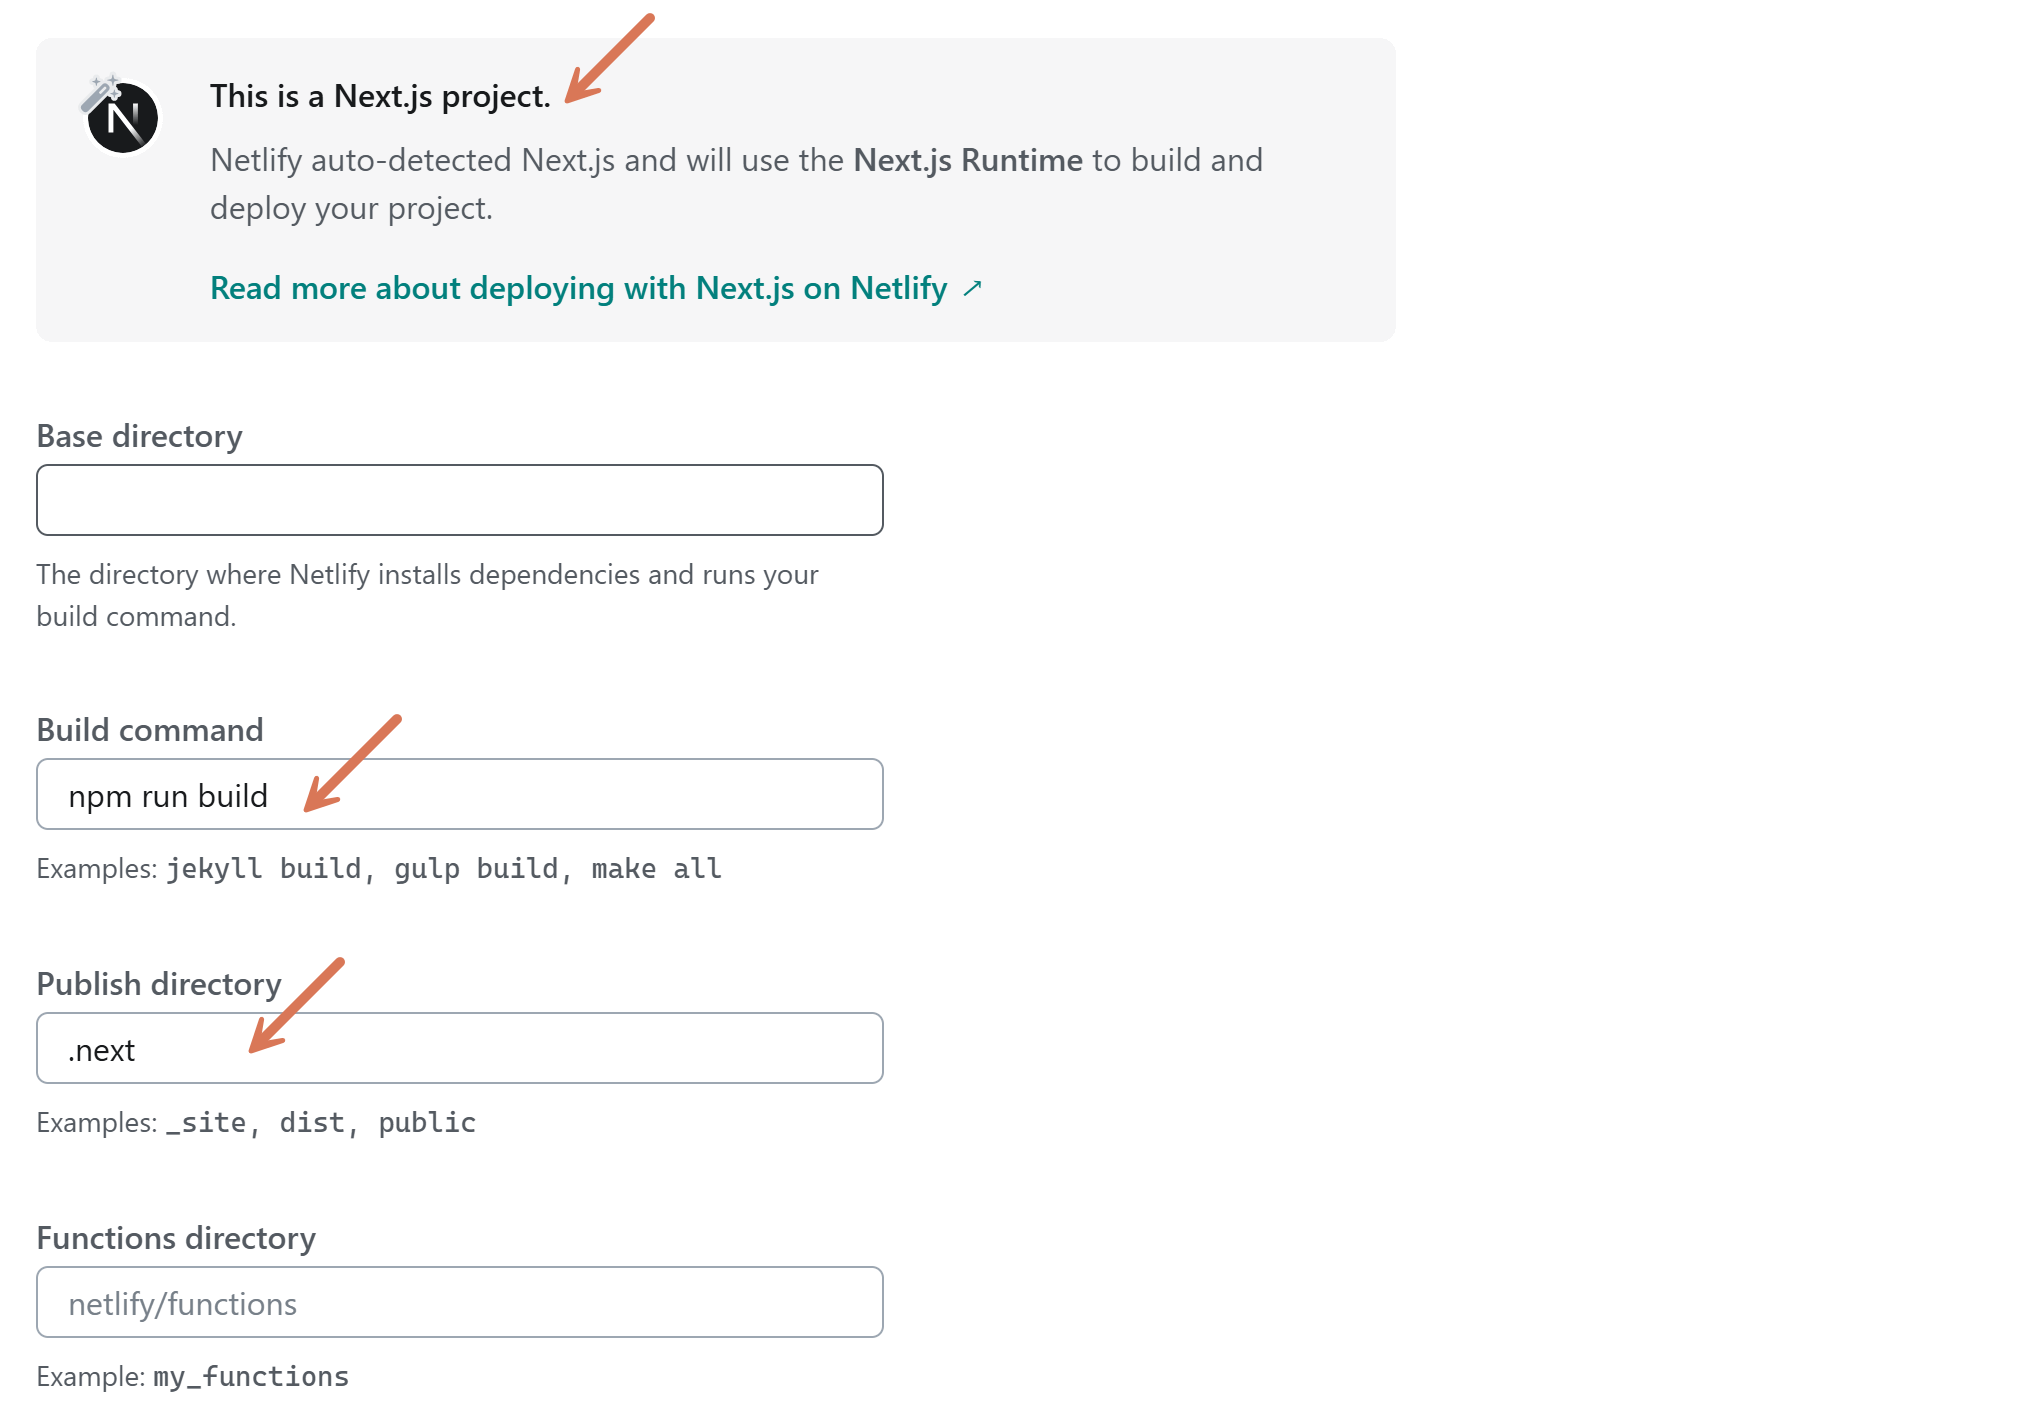
On the same page, it should automatically detect the right build settings (previously, we asked in the prompt to define netlify.toml). I didn’t have to type it manually:
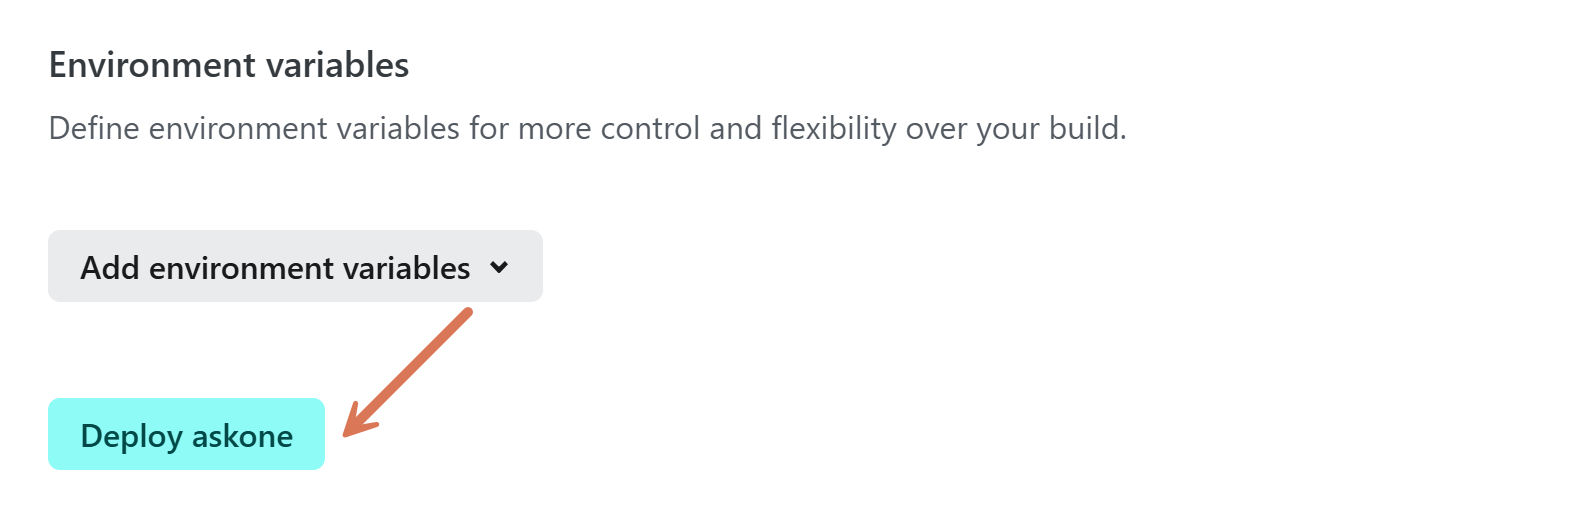
At the bottom of the page you will find a deploy button. Hit it:
Step 7.3: Configure Netlify Environment Variables
The .env file is untracked. Netlify doesn’t know your secrets.
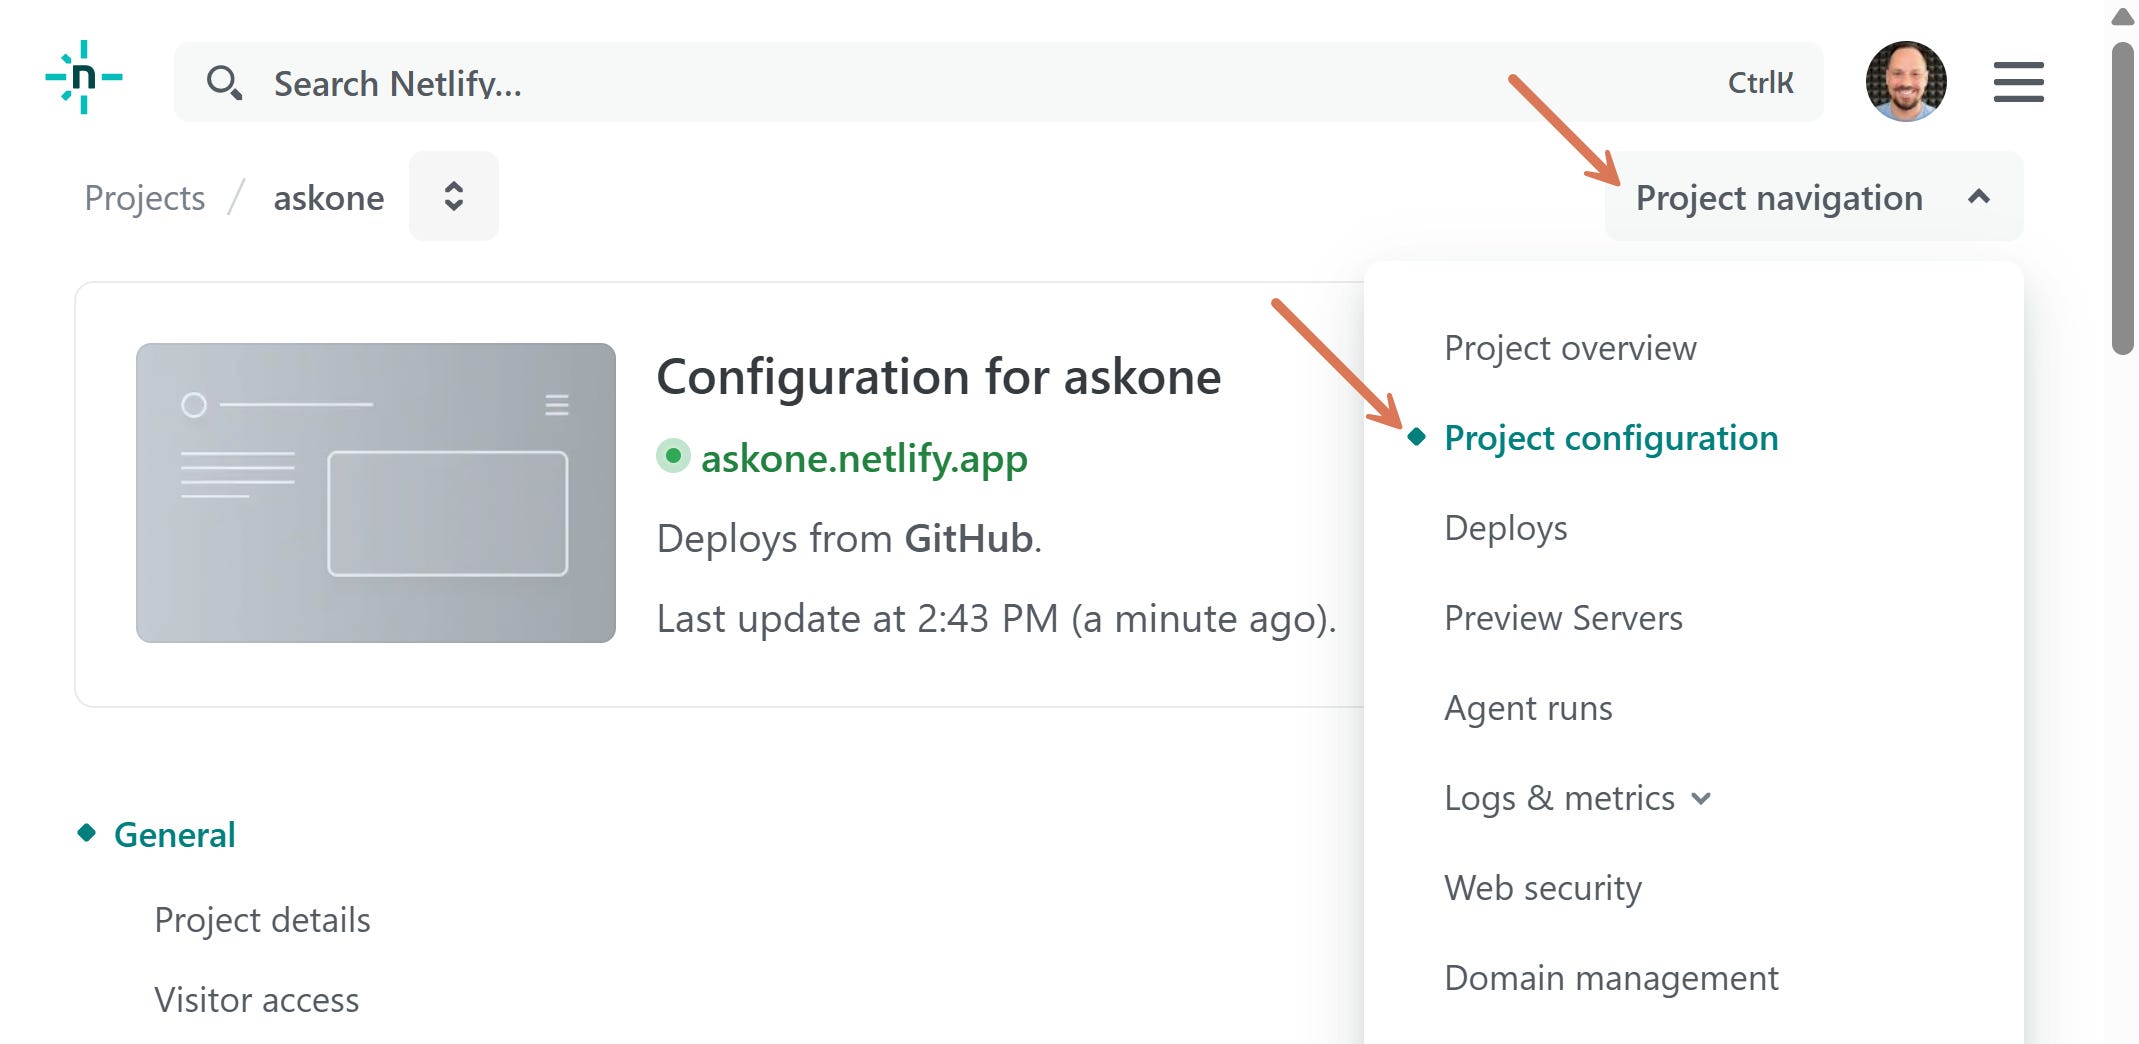
Go to “Project navigation” > “Project configuration” > “Environment variables:”
You could import the entire content of your .env file, but I prefer adding them manually:
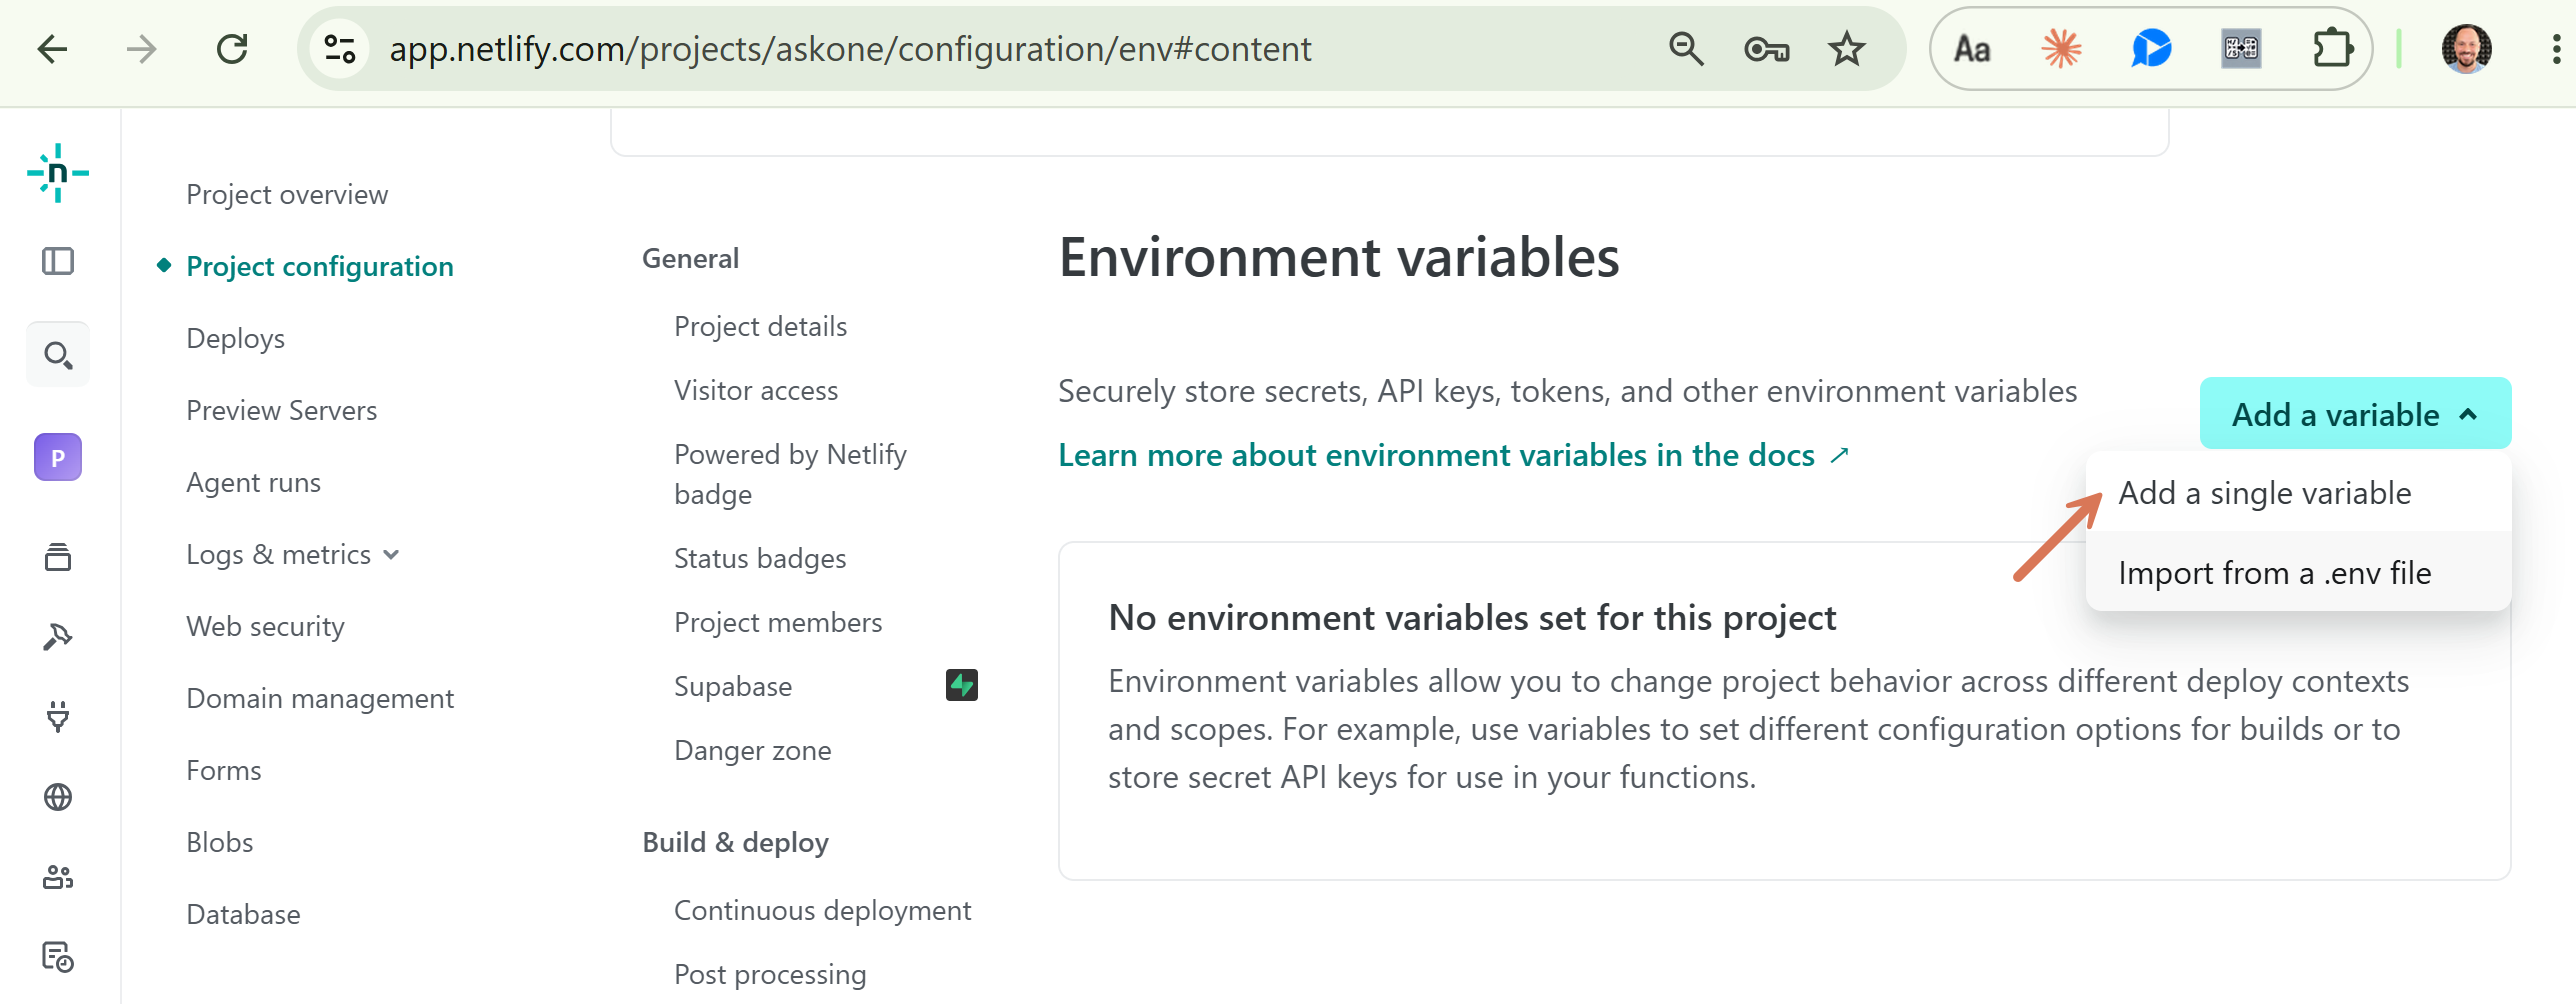
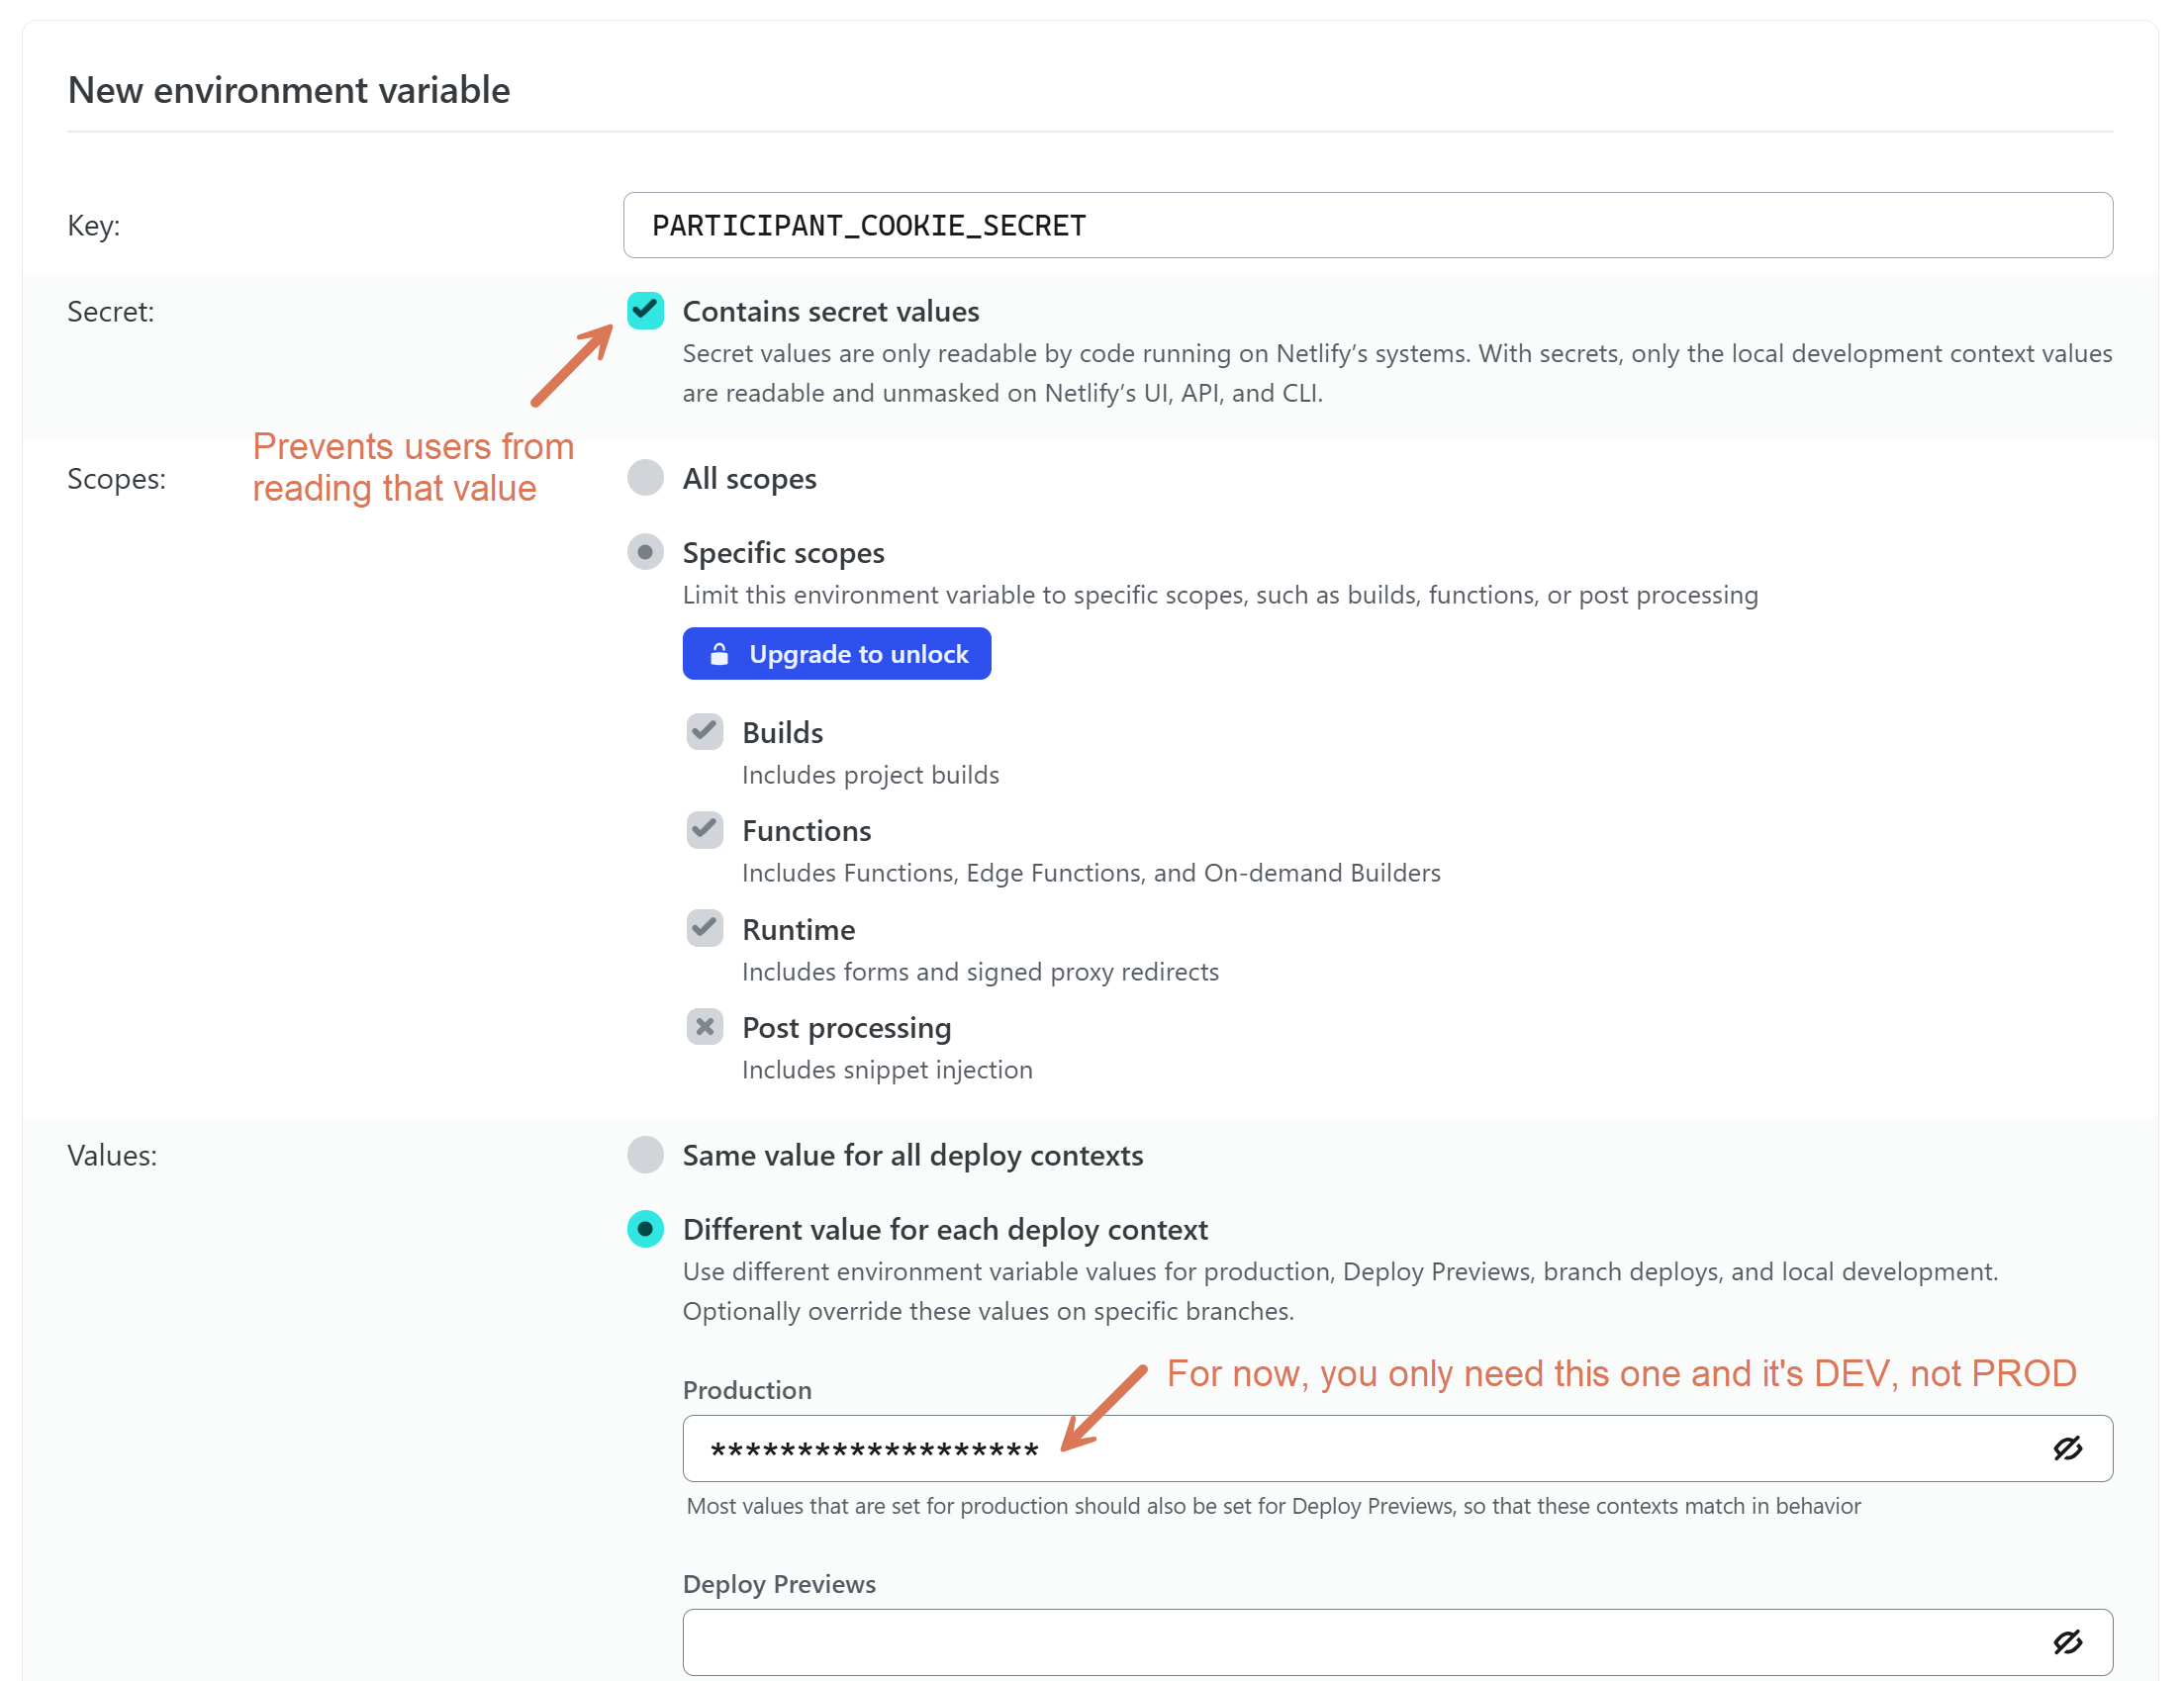
The full set the app refuses to boot without. All six, or nothing serves:
APP_URL - use your URL, e.g., https://askone.netlify.app
PARTICIPANT_COOKIE_SECRET -> copy from .env, mark as secret
SUPABASE_URL -> copy from .env
SUPABASE_SECRET_KEY -> copy from .env, mark as secret
NEXT_PUBLIC_CLERK_PUBLISHABLE_KEY -> copy from .env
CLERK_SECRET_KEY -> copy from .env, mark as secret
Step 7.4: Test it
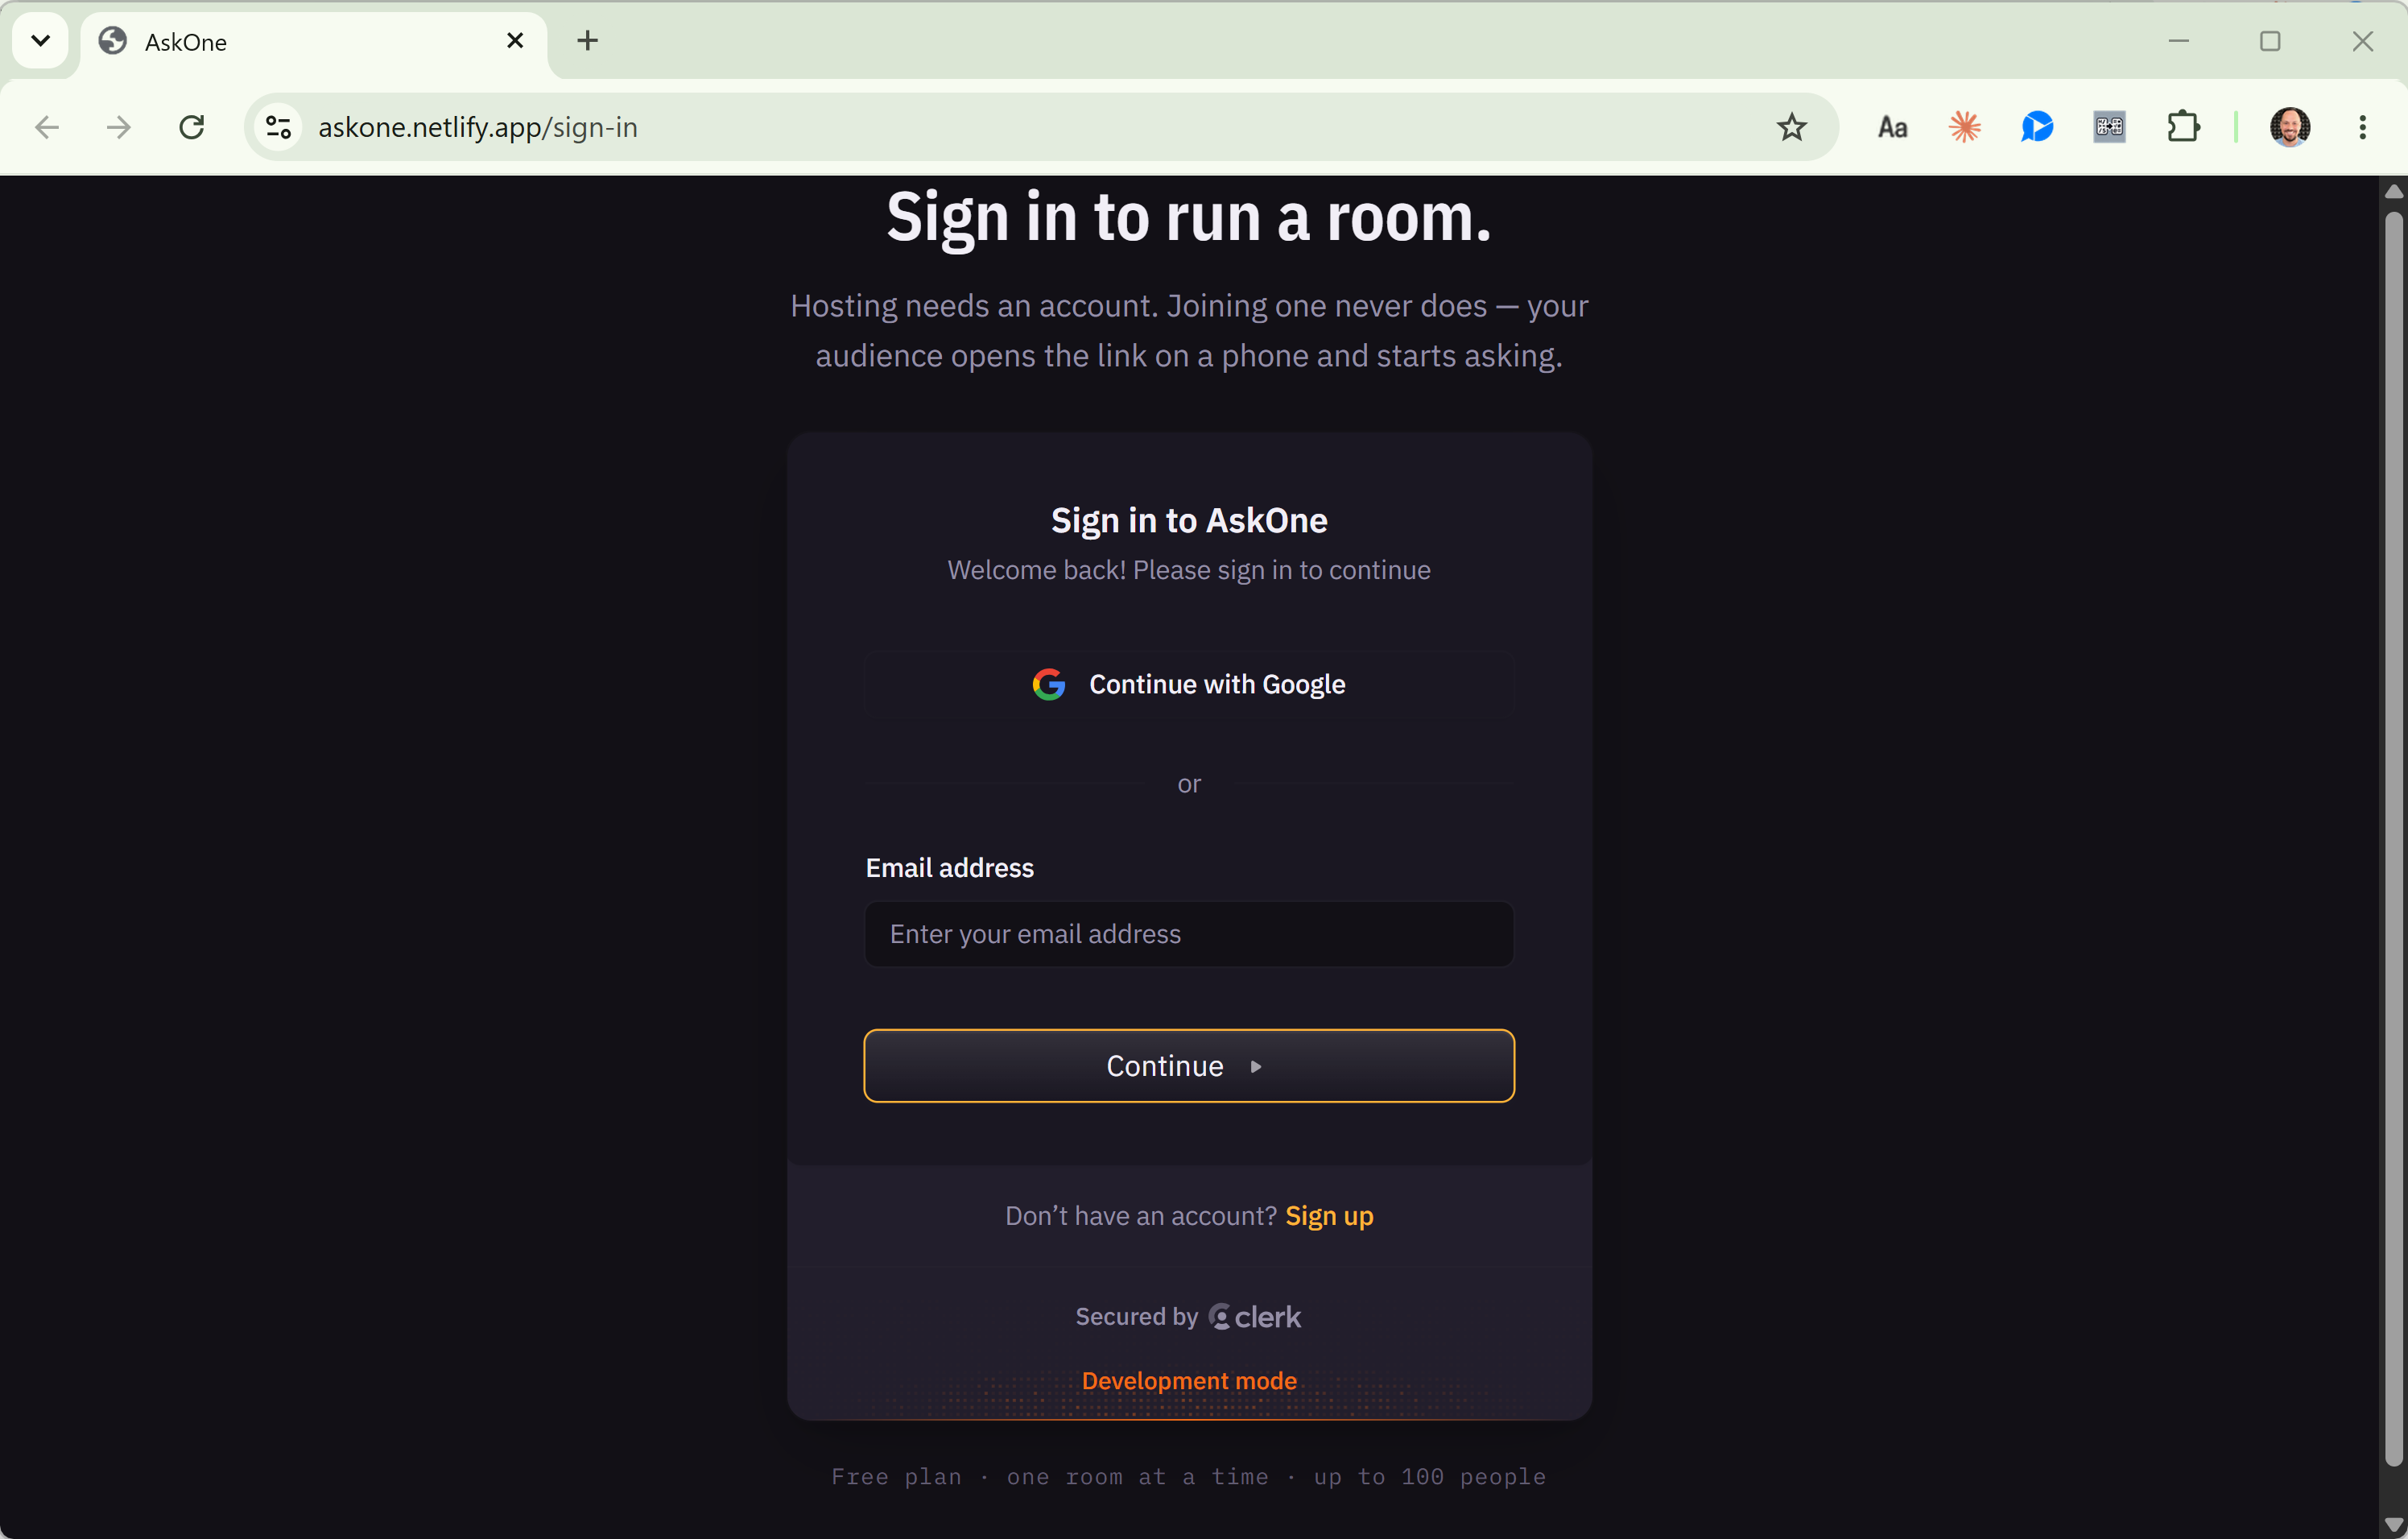
You, too, can access my dev environment: https://askone.netlify.app/ It’s far from perfect, but it works, and won’t reveal your room’s data to others.
10. The Template to Download
🔒 The template is available only to premium members. Upgrade, and it will appear right below.
After clicking the link you will see:
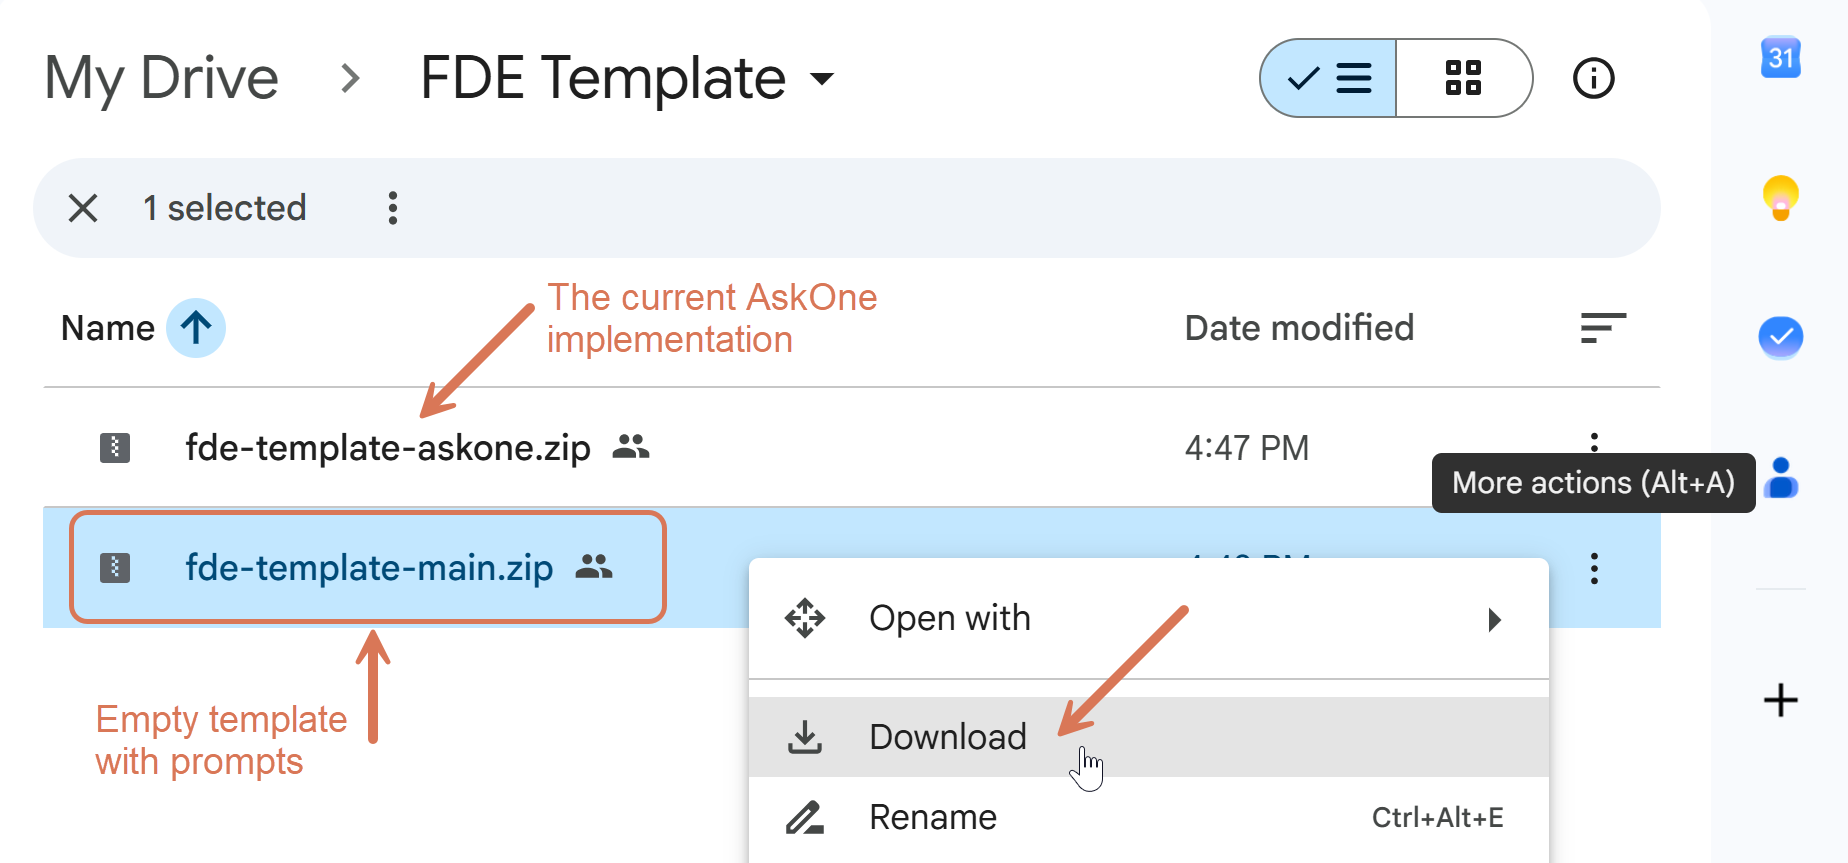
Unzip fde-template-main.zip and open it with VS Code:
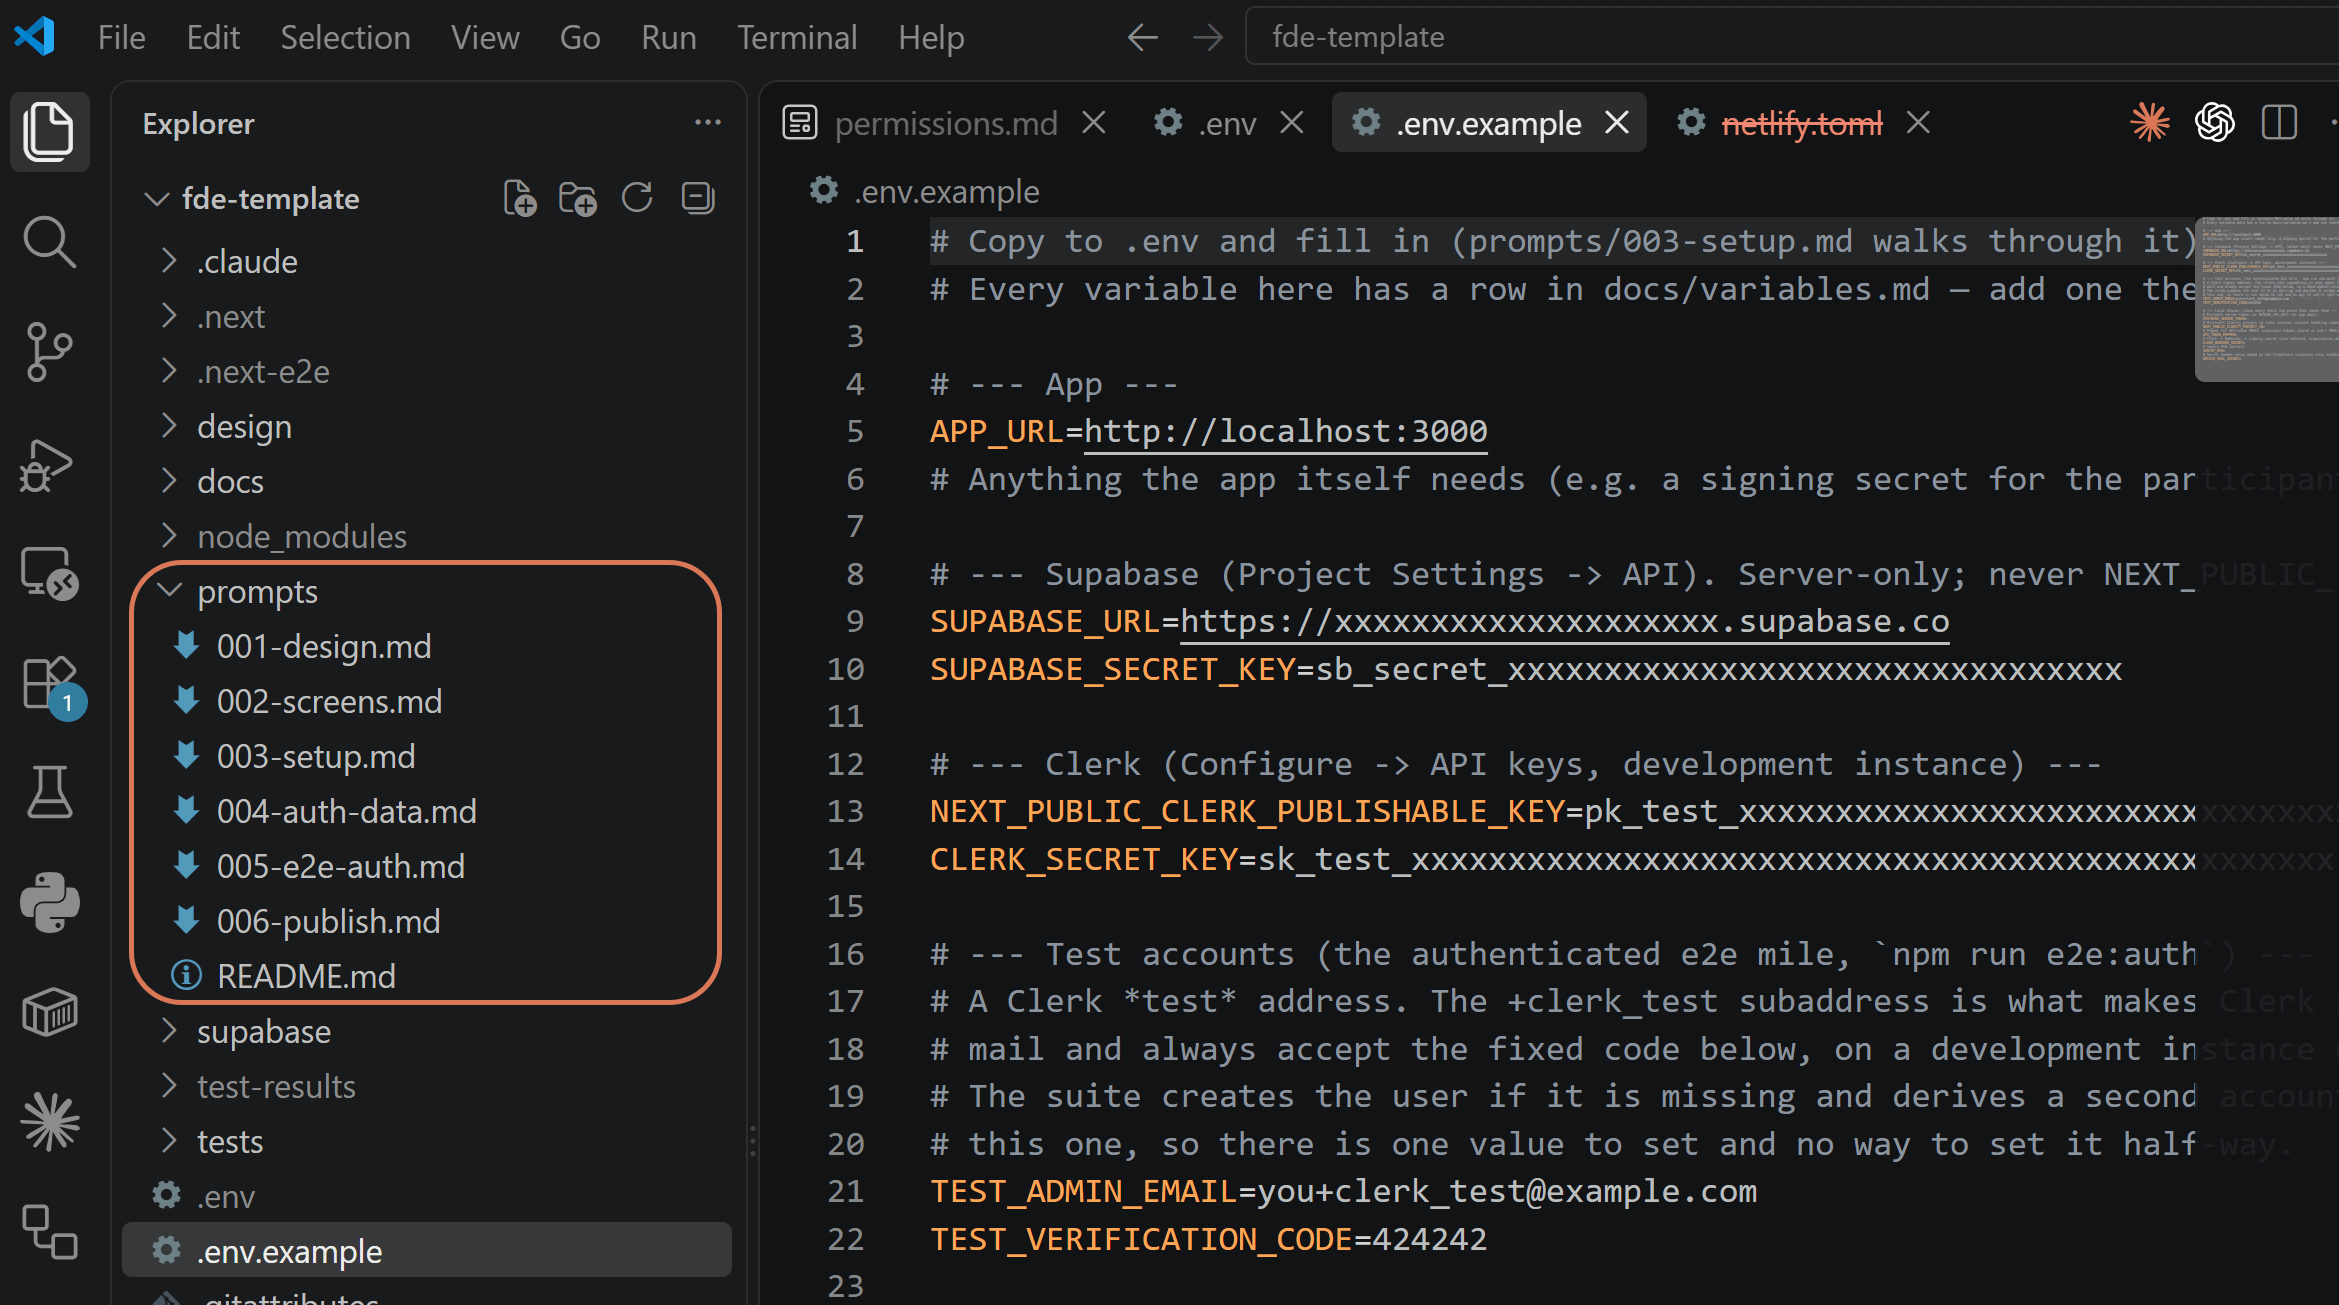
I’ll be adding more prompts, but I’m not going to change the template, so you can already start building on top of it.
11. Conclusion
I wrote this because the roles are merging whether or not you can already feel that in your organization. While product discovery remains the core of our job, as a PM you should understand how to engineer with AI.
You don’t have to code. At the same time, understanding the basic engineering concepts helps a lot.
So, here are some extra materials you can review in your free time:
[Day 1] Review these helicopter view resources:
[Days 2-3] Start working with Claude Code and Codex (our recordings with templates):
[Day 4] Proven ways to manage AI agents (not what people say):
Next in the series, we will cover:
Plugging a custom domain (askone.org)
Multi-tenant setup & more user roles
Mapping features to entitlements
Enabling real Stripe payments
App monitoring & support
CI/CD best practices & automation
PII, Terms of Use, Privacy Policy
Securing the app (WEF with Cloudflare, app-specific limits)
Security and performance tests
This Thursday, we continue building AskOne: https://go.productcompass.pm/events
The recording of the recent Thursday’s session will be available later today.
12. Live Session Recording
You can watch it here, Steps 1-5: https://go.productcompass.pm/events
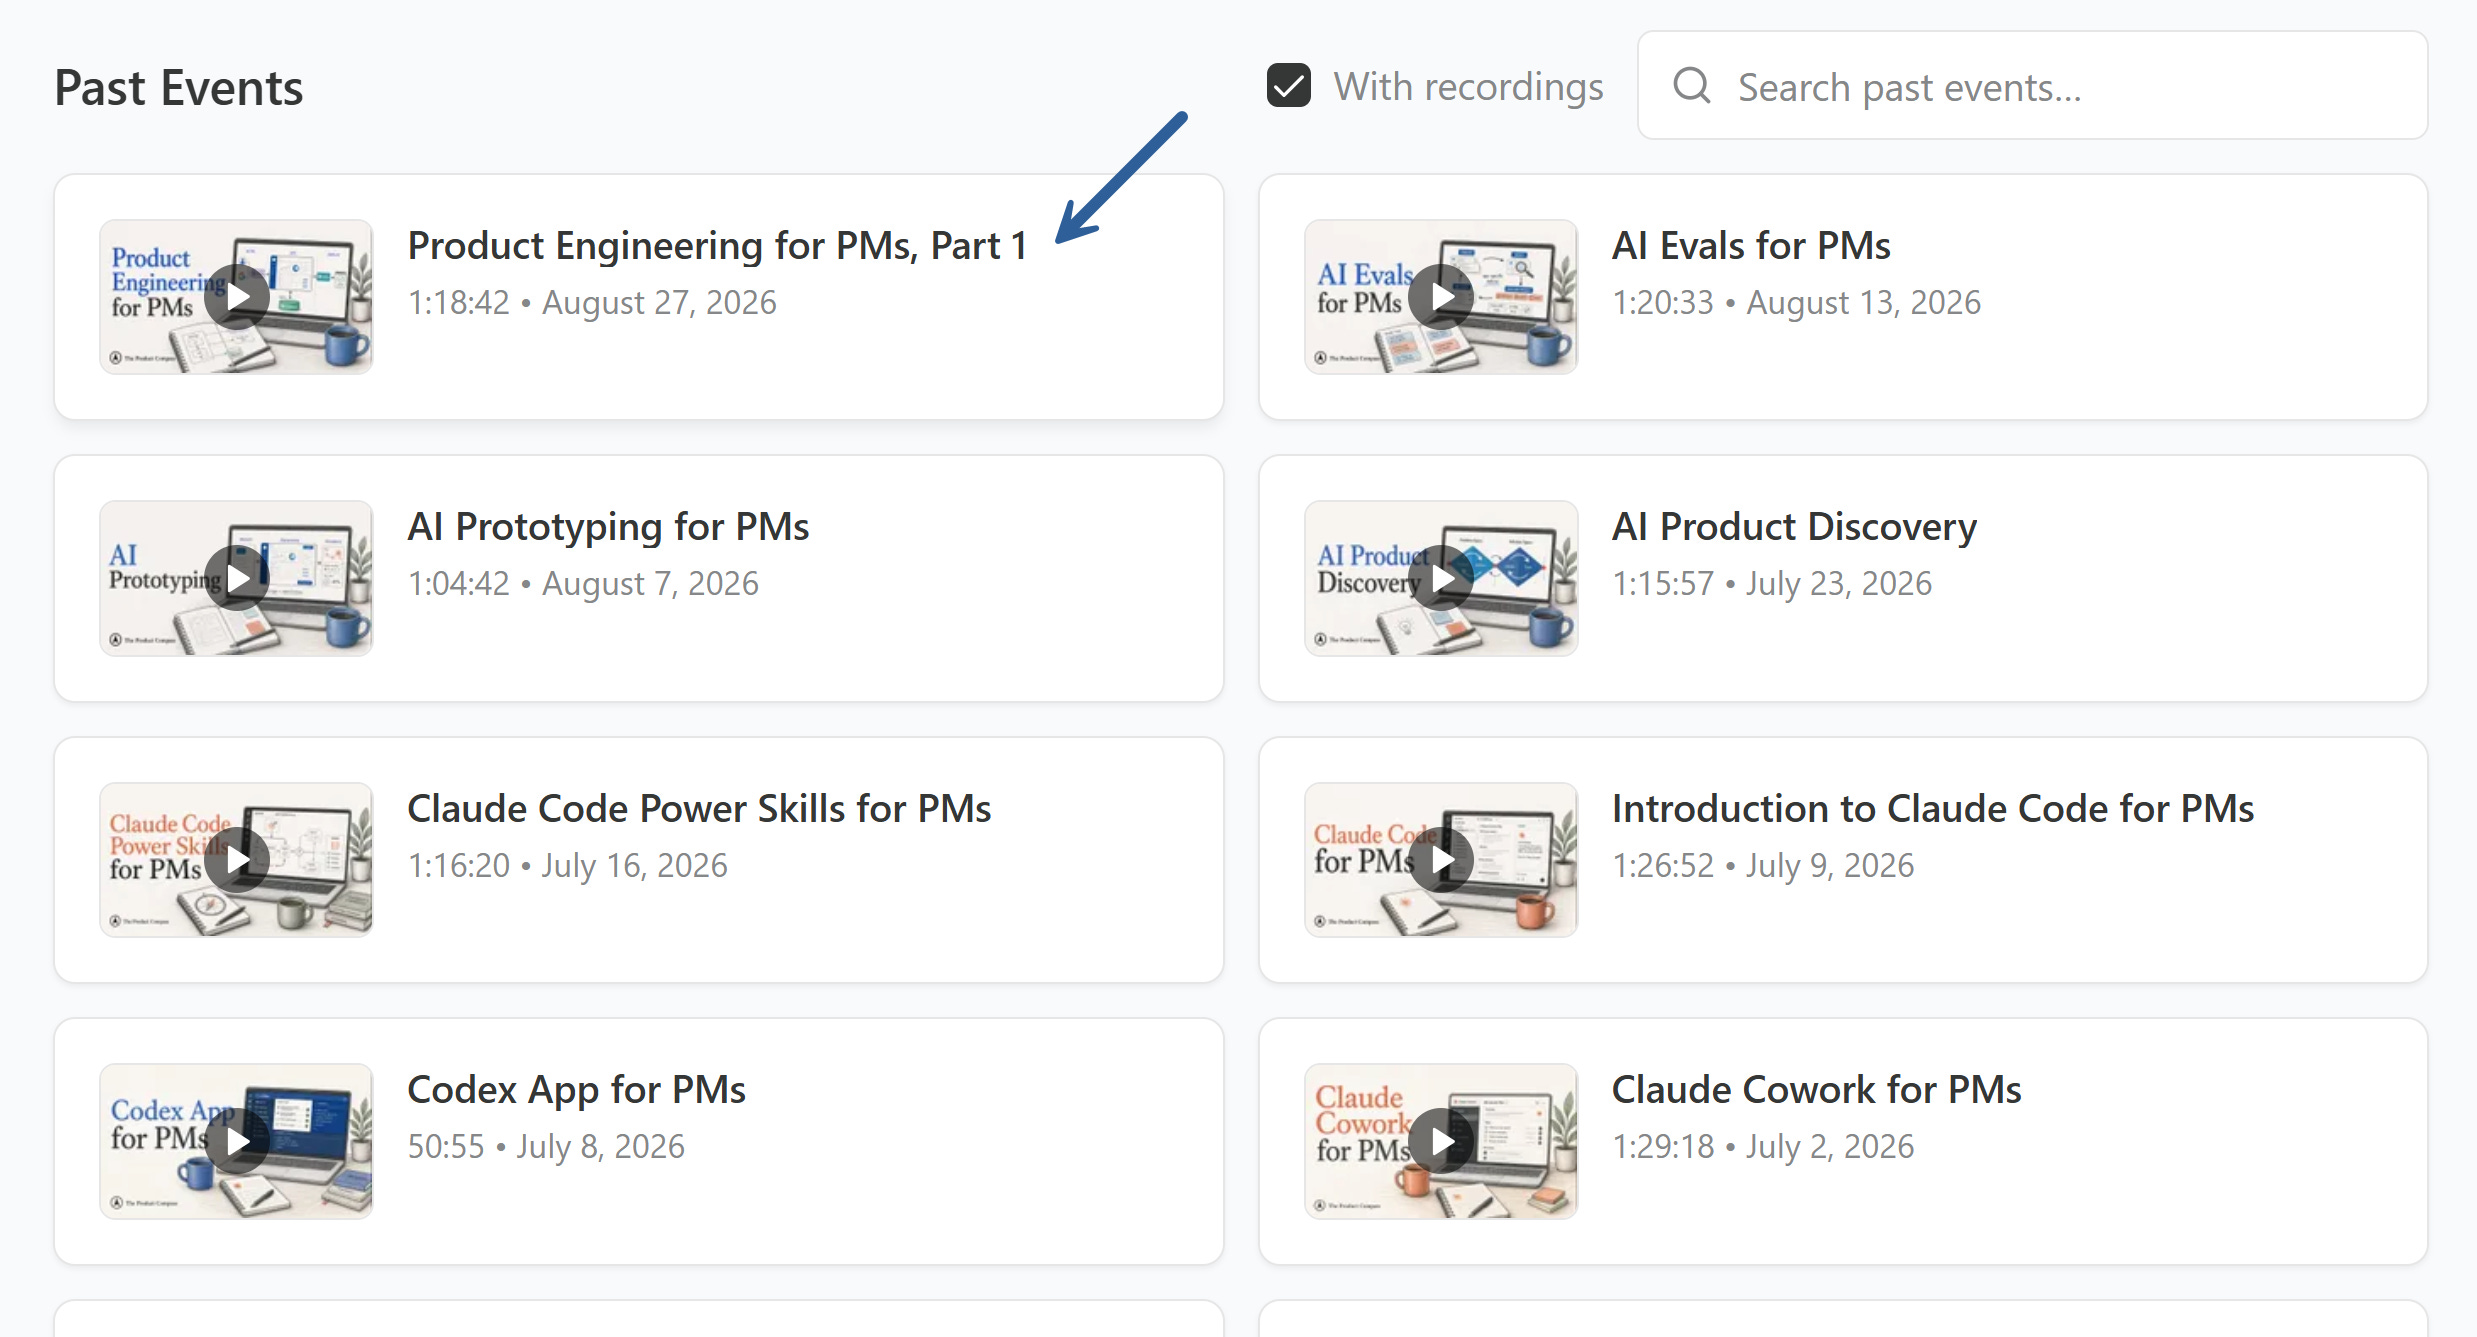
If you do not have an account, sign up with your newsletter email. The benefits will sync in 5 min (existing subscribers) - 2 hours (just subscribed).
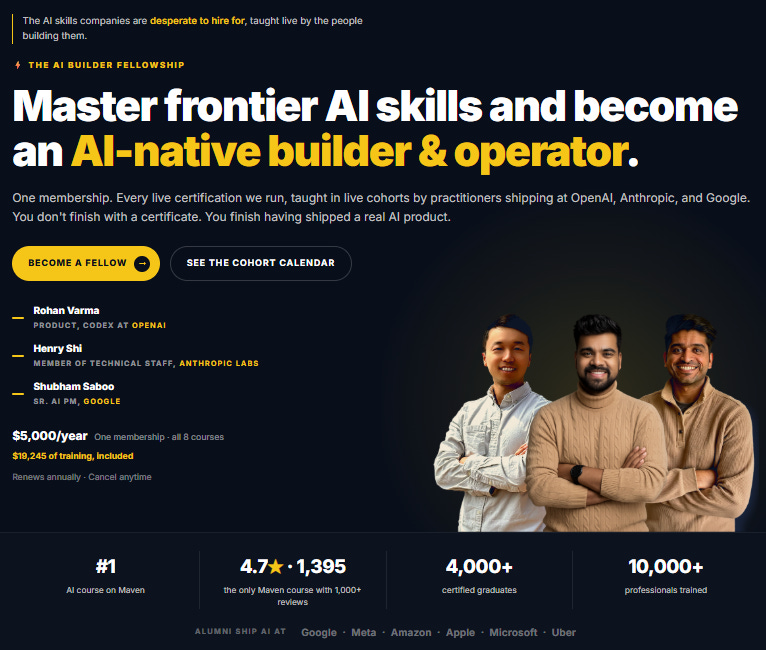
P.S. If you’re looking for a cohort, I just joined Product Faculty as a trainer.
Currently, we offer 8 AI PM cohorts (Anthropic, Google, OpenAI) for the price of one + $1,500 off for my readers: 👉 https://productfaculty.com?code=PAWEL
You get them all for $3,500. On Maven, this program would cost ~$22,000. That’s, by far, the best training offer in the market.
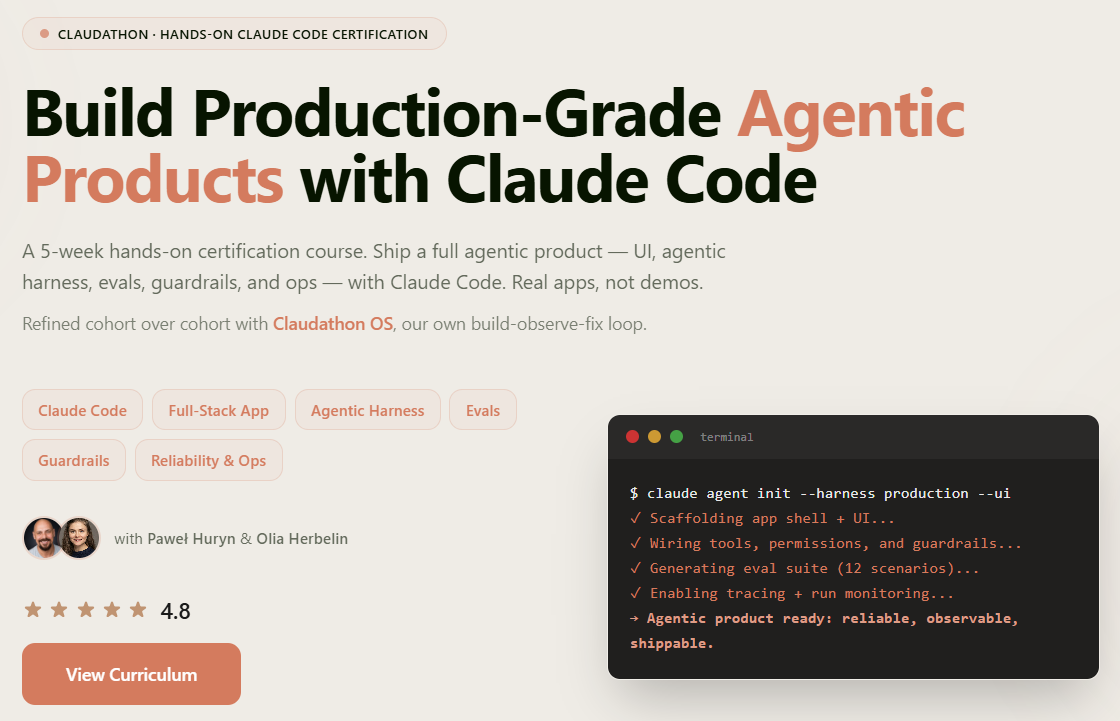
And that’s not everything. Everyone who enrolls with the above code can attend our Claudathon for PMs for free: https://go.productcompass.pm/claudathon (send me an email with a purchase confirmation: pawel@productcompass.pm) - we start on Sep 19.
Thanks for Reading The Product Compass
It’s amazing to learn and grow together.
Have an amazing rest of the week,
Paweł